
Managing a User Group
Managing a user group in manage.ID.
Before you begin
- You are assigned to a user group that at least has the permission User management.
- You have created one or more user groups.
About this task
To easily manage user groups, manage.ID has a set of editing functions.
Procedure
-
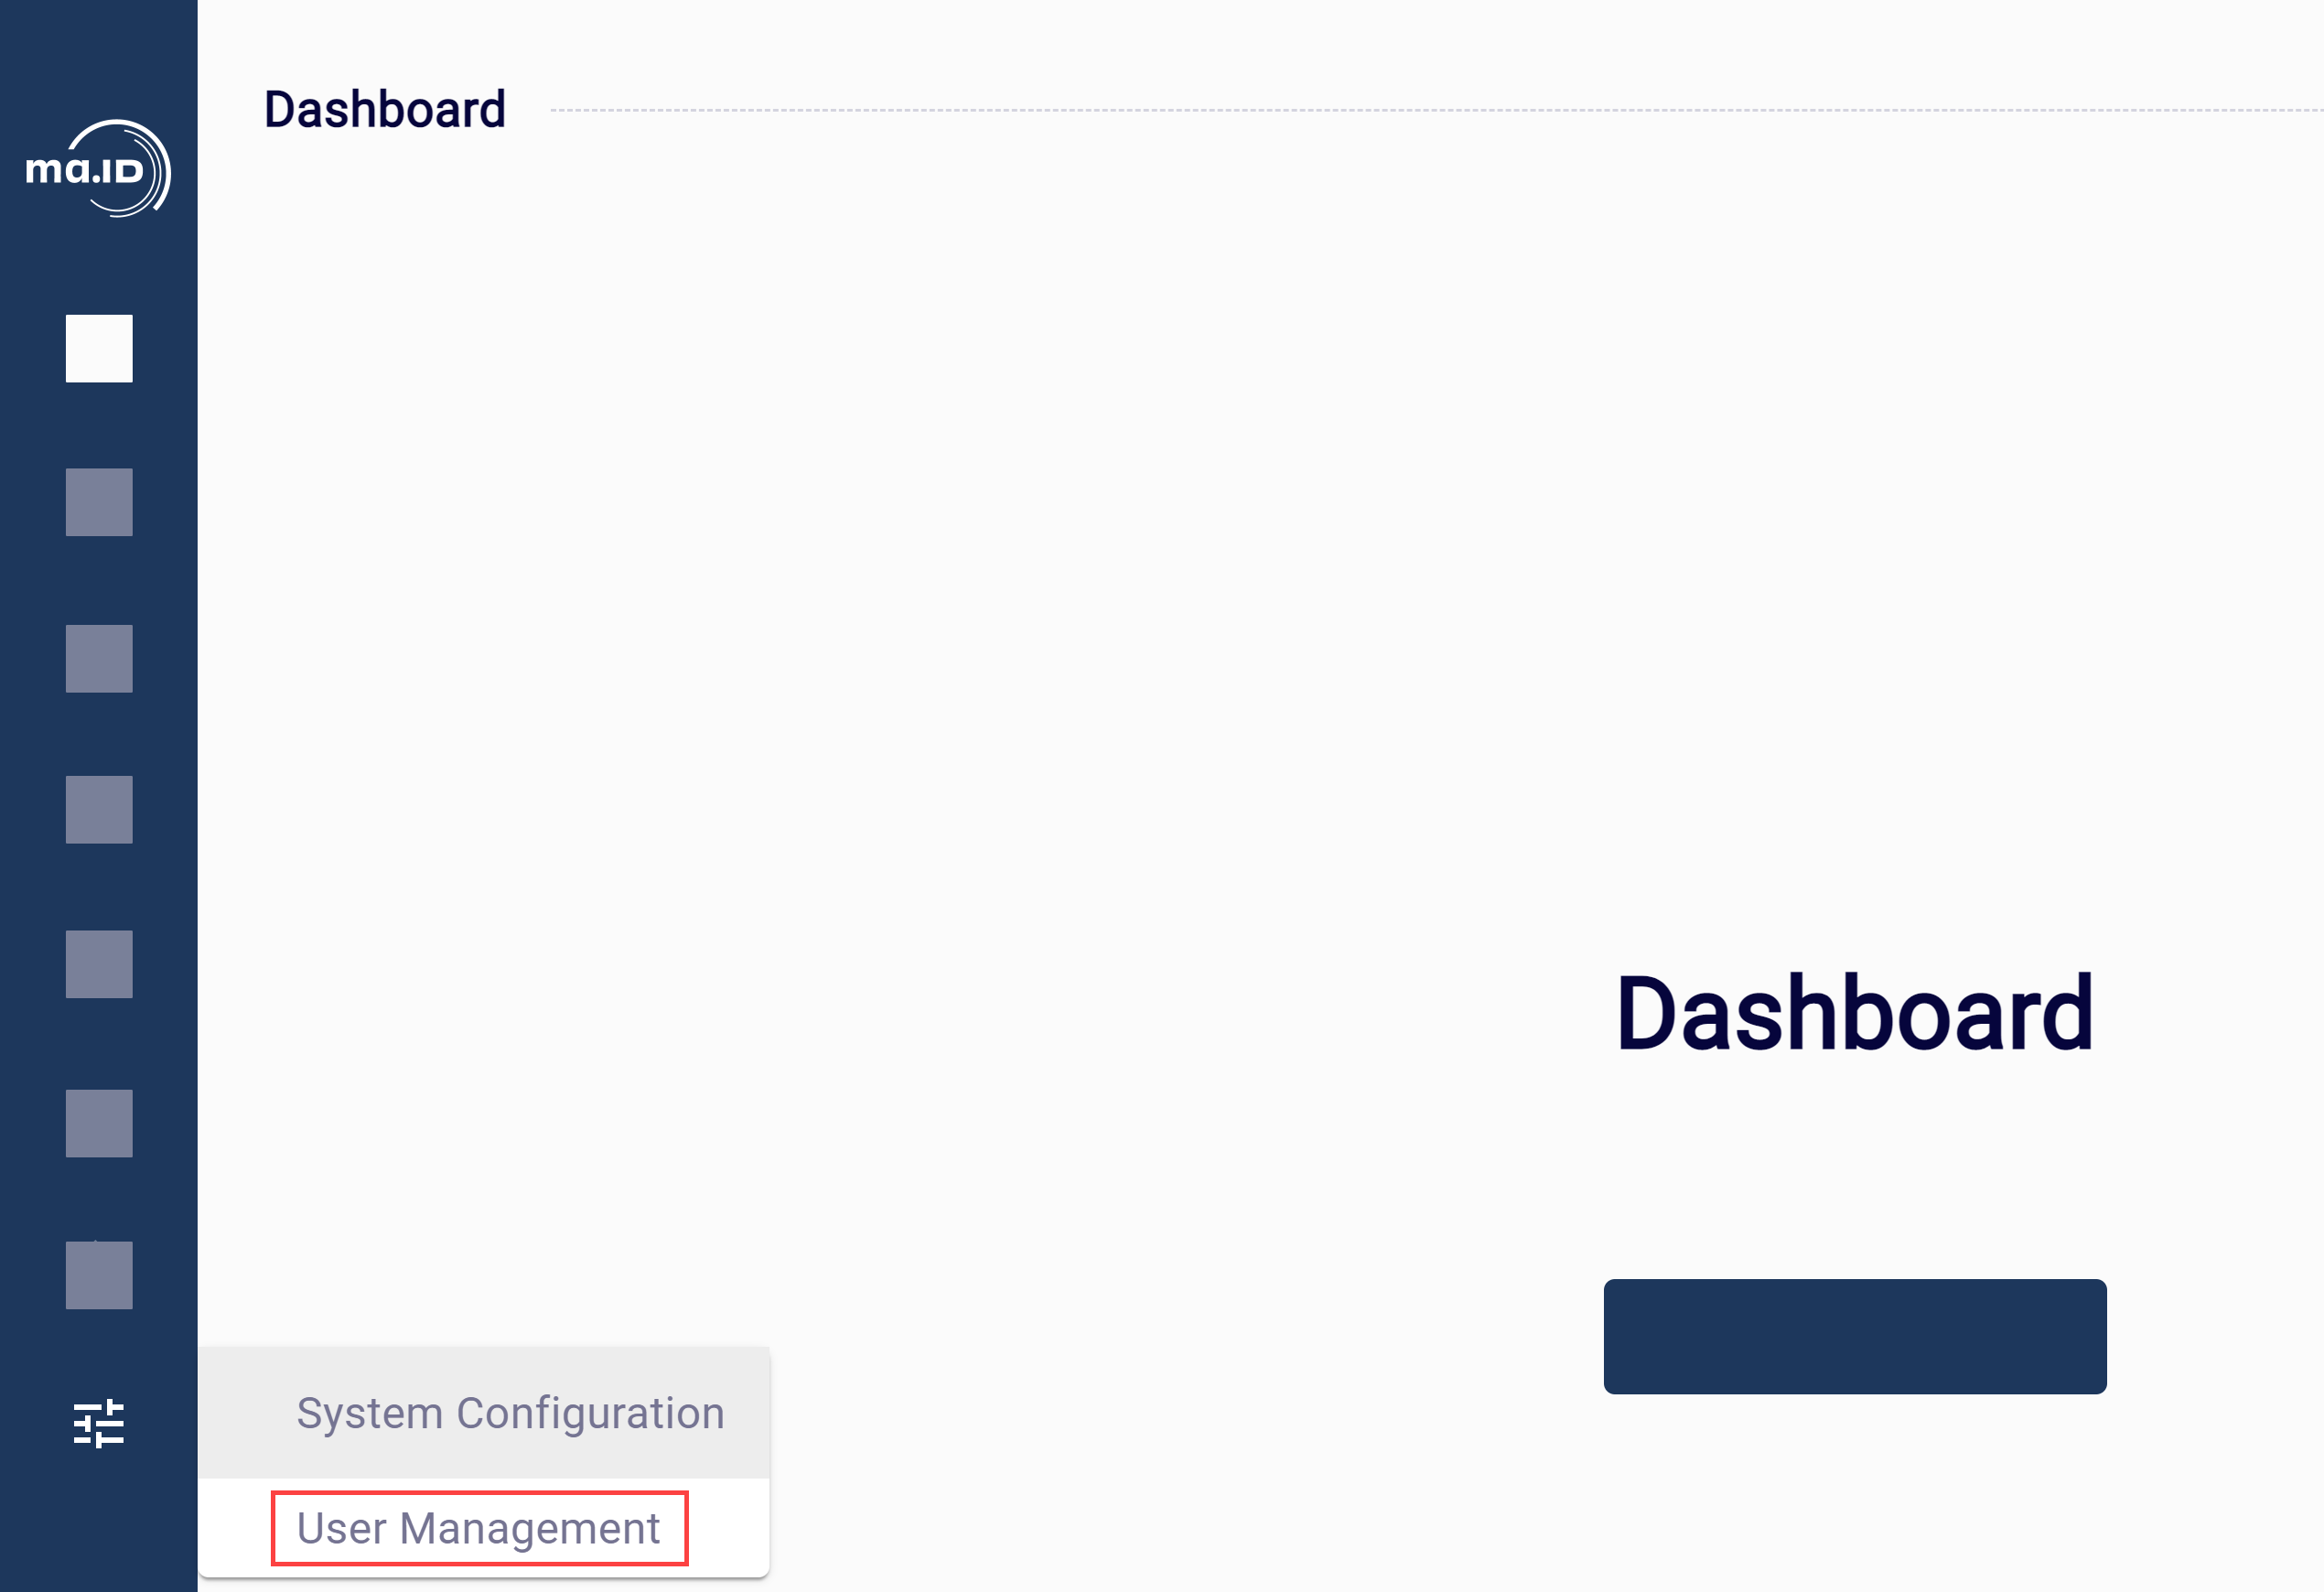
In the side bar, select System
Configuration and click User
Management.
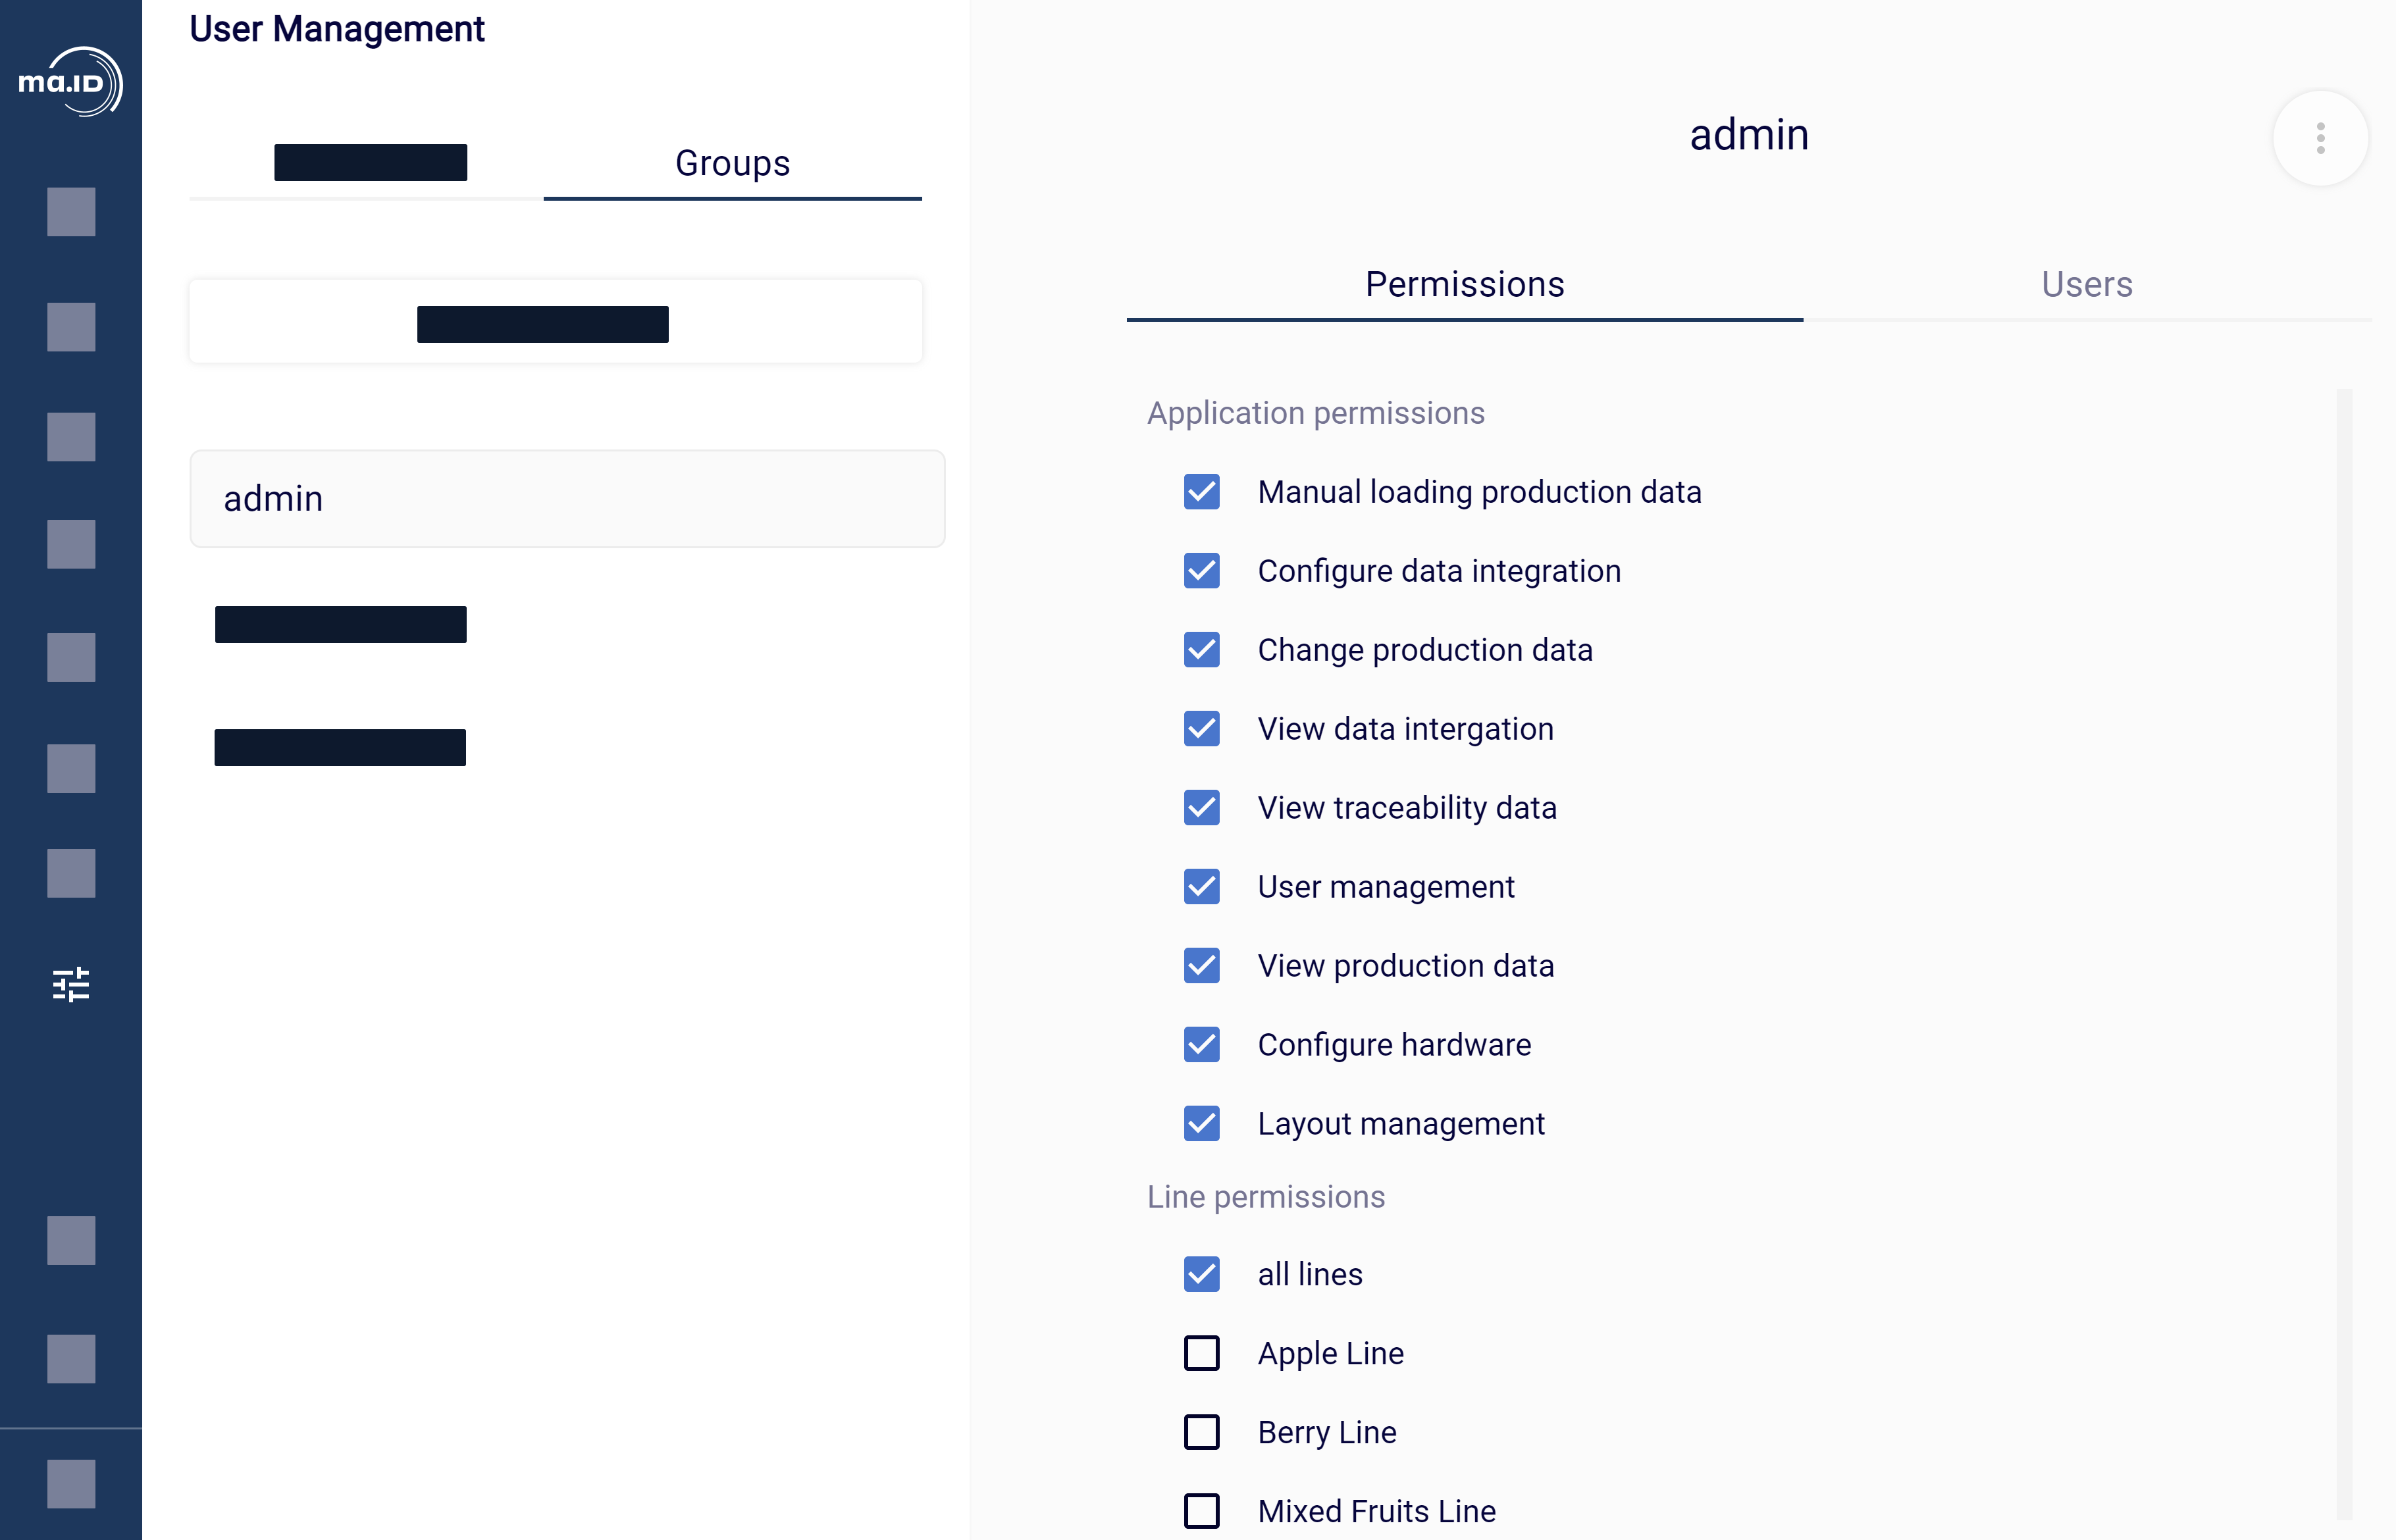
 You see the overview of current users in the default view. To show an overview of current user groups, switch to the tab Groups.
 - Click on the user group that you want to manage.
-
Use the editing functions to make changes in the user group:
-
Set permissions for the user group in the tab
Permissions.
You can set the following permissions:
- Viewing or configuring data integration.
- Viewing or changing production data.
- Manually loading production data.
- Viewing traceability data.
- Configuring hardware devices.
- Managing label layouts.
- Managing user accounts and user groups.
- Viewing and managing one, some or all production lines.
-
Add or remove user accounts in the tab
Users.
- To add user accounts, click Add user,
search for the user accounts that you want to add to the user
group and click Confirm.
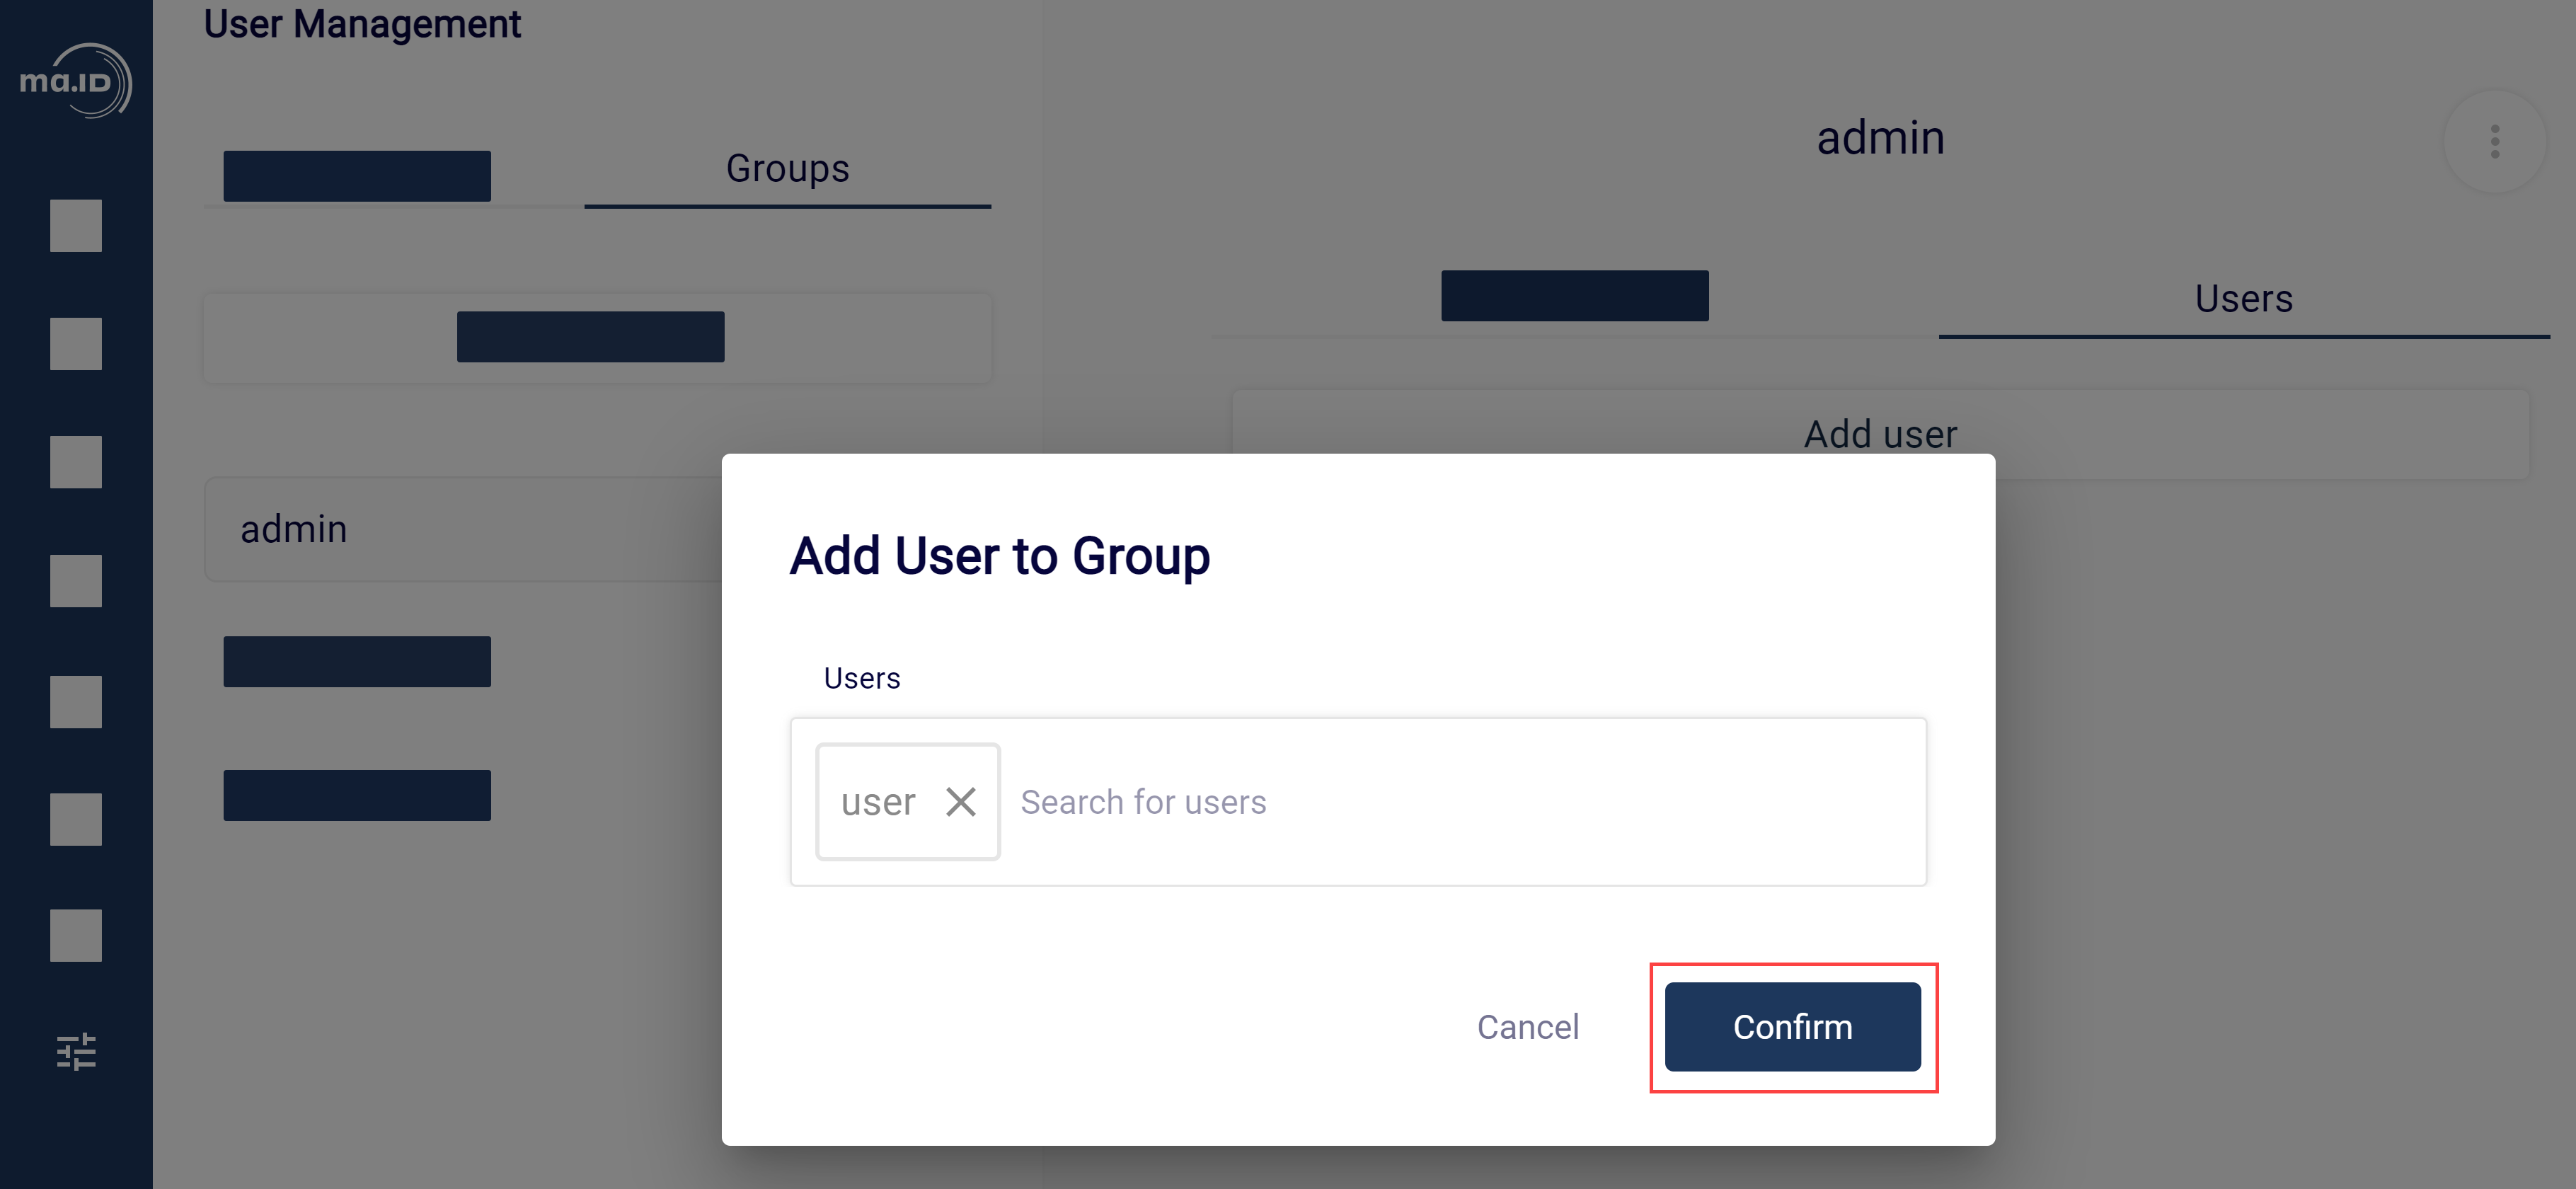
- To remove user accounts, click the delete icon X next to each user account that you want to remove from the user group.
- To add user accounts, click Add user,
search for the user accounts that you want to add to the user
group and click Confirm.
-
Set permissions for the user group in the tab
Permissions.