This is the multi-page printable view of this section.
Click here to print.
Return to the regular view of this page.
Audit Trail
An audit trail (also called audit log) is a security-relevant chronological set of records that provide documentary evidence of the sequence of activities that have affected at any time a specific operation, procedure, event, or device.
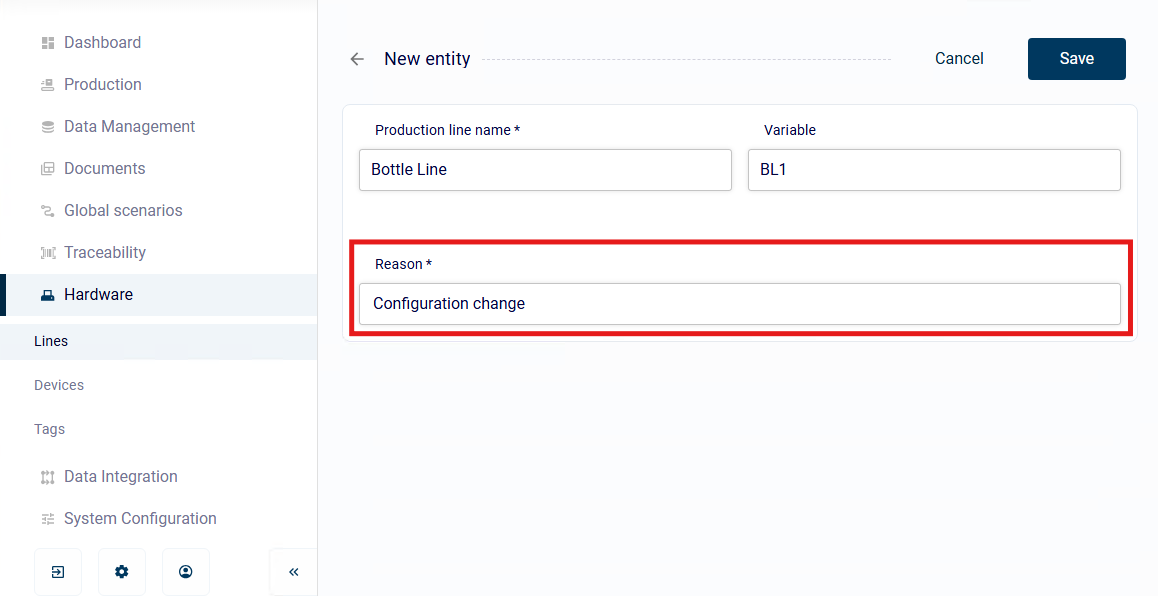
If the feature is activated, every action that changes data in the system is saved in order to know who did what, when and why.
The following example shows this when a data record in the master data is changed by a user. The user is prompted to enter a reason. This reason can be predefined and selected. Or the user can write their own individual reason.
1 - Activate Audit Trail
Activate Audit Trail to log data changes in manage.ID
Before you start
- You are assigned to a user group that at least has the permission Customer feature control.
About this Task
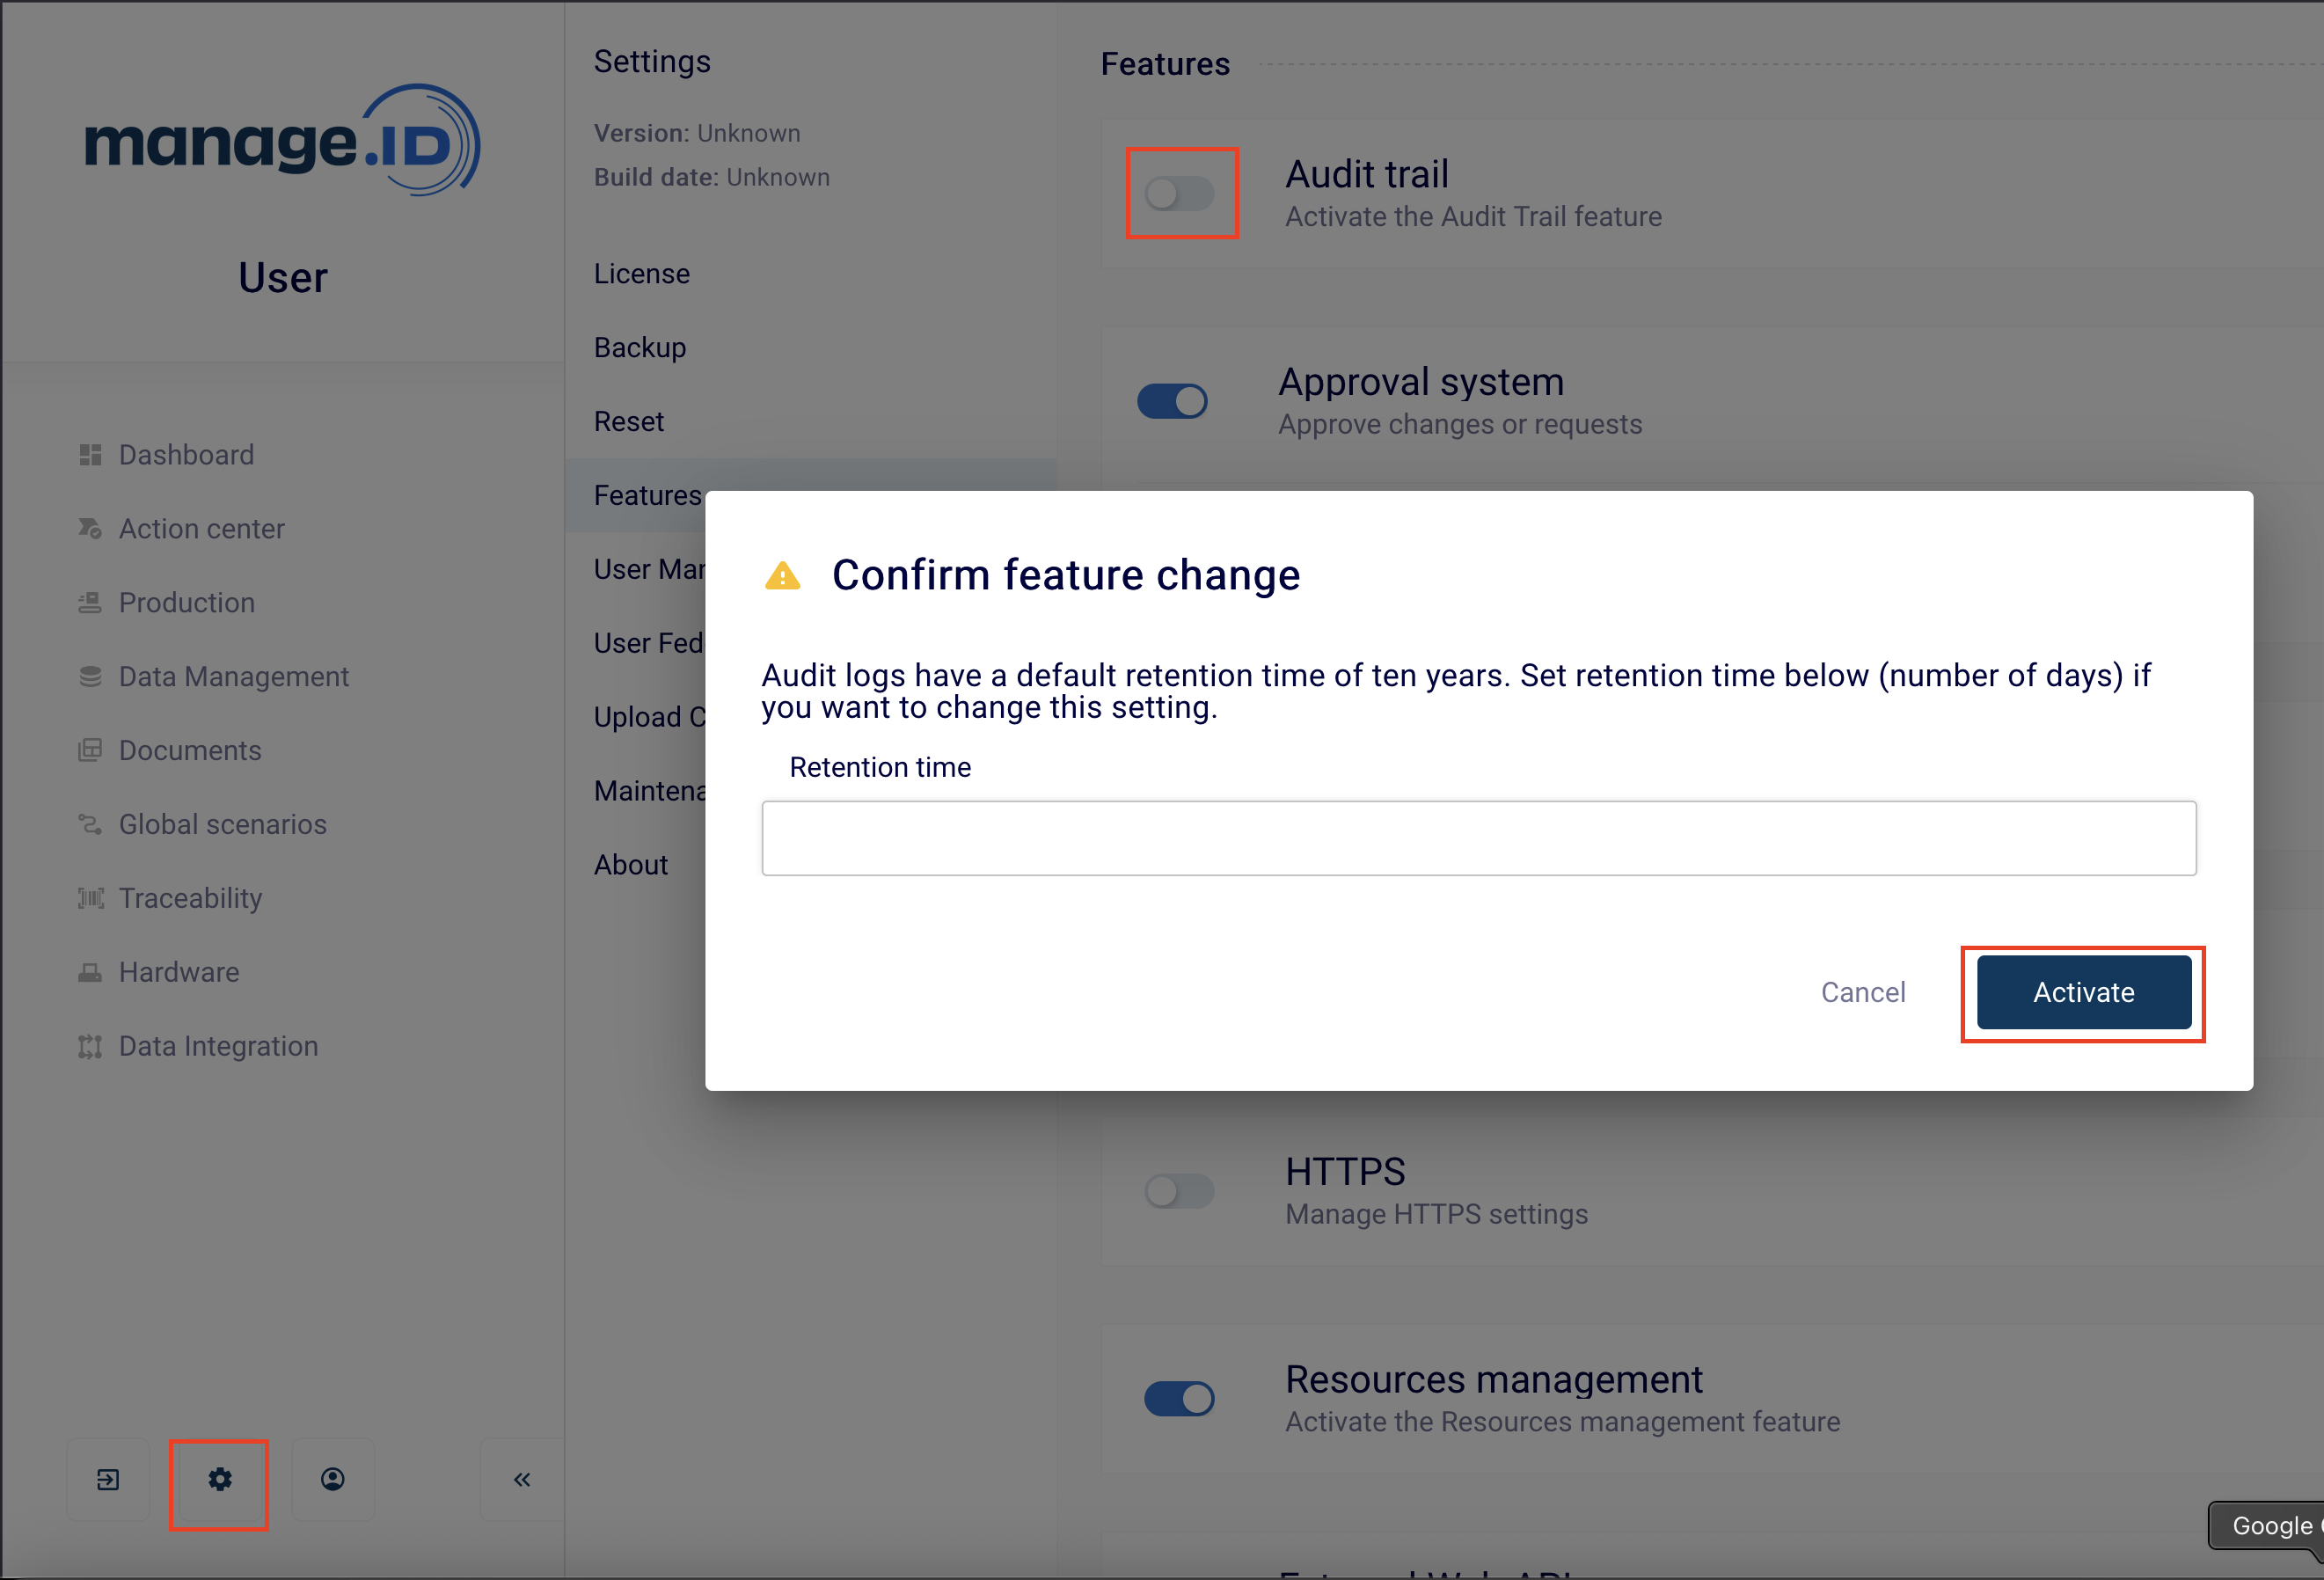
In order to use the audit trail functionality in manage.ID you need to activate the feature Audit Trail
Procedure
- Click on the gear wheel at the bottom right
- Active with the toogle switch the Audit Trail function
- Define a retention time for the audit log. Default is 10 years
Results
You have activated the audit trail functionality in manage.ID. You have now new menu items under Traceability.
What next
- predefine audit train reasons
- Review the audit log
2 - Predefine Reasons
Predefine audit log reasons for recurring tasks. If a user wants to change data in the system, they can choose from the template reasons.
Before you start
- You have activated the audit trail functionality.
- You are assigned to a user group that has the permission Edit log reasons.
About this Task
When changing data in the system, the user is asked to specify the reason for the change. in order to be able to select predefined reasons, these must be created in advance. The following steps show this.
Procedure
- Click on Traceability
- Click on Audit Trail Reason.
- Click on Action and then Add row
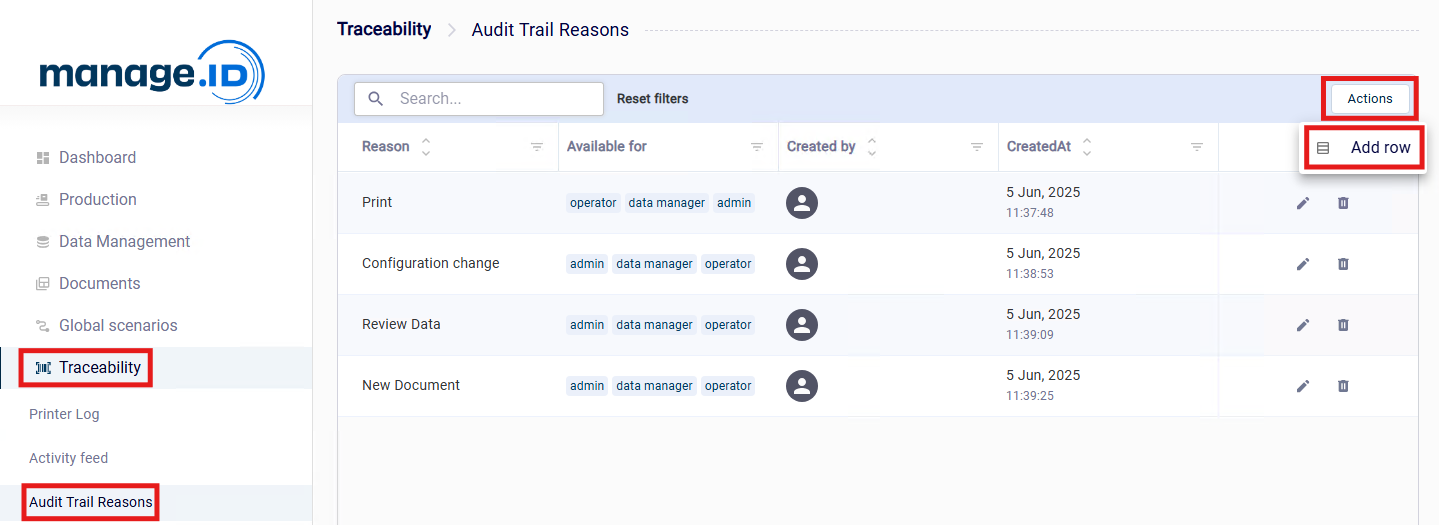
- Type in the reason and the select the user groups which are allowed to use the reason
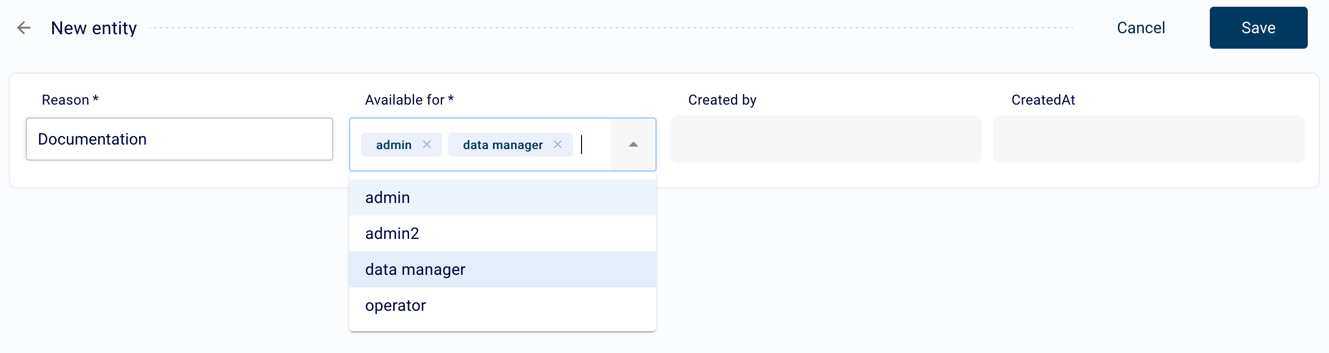
- Click on Save
Results
You have created a predefined reason that a user can select when making changes.
What next
- make a change and log the reason
- Review the audit log
3 - Overview - Audit logs
Overview of the audit logs browser functions
General
The Audit Logs browser makes it possible to track the activities in the system. Every change to a data record in the database is displayed here.
Before you start
- You are assigned to a user group that has the permission View audit logs.
Functions
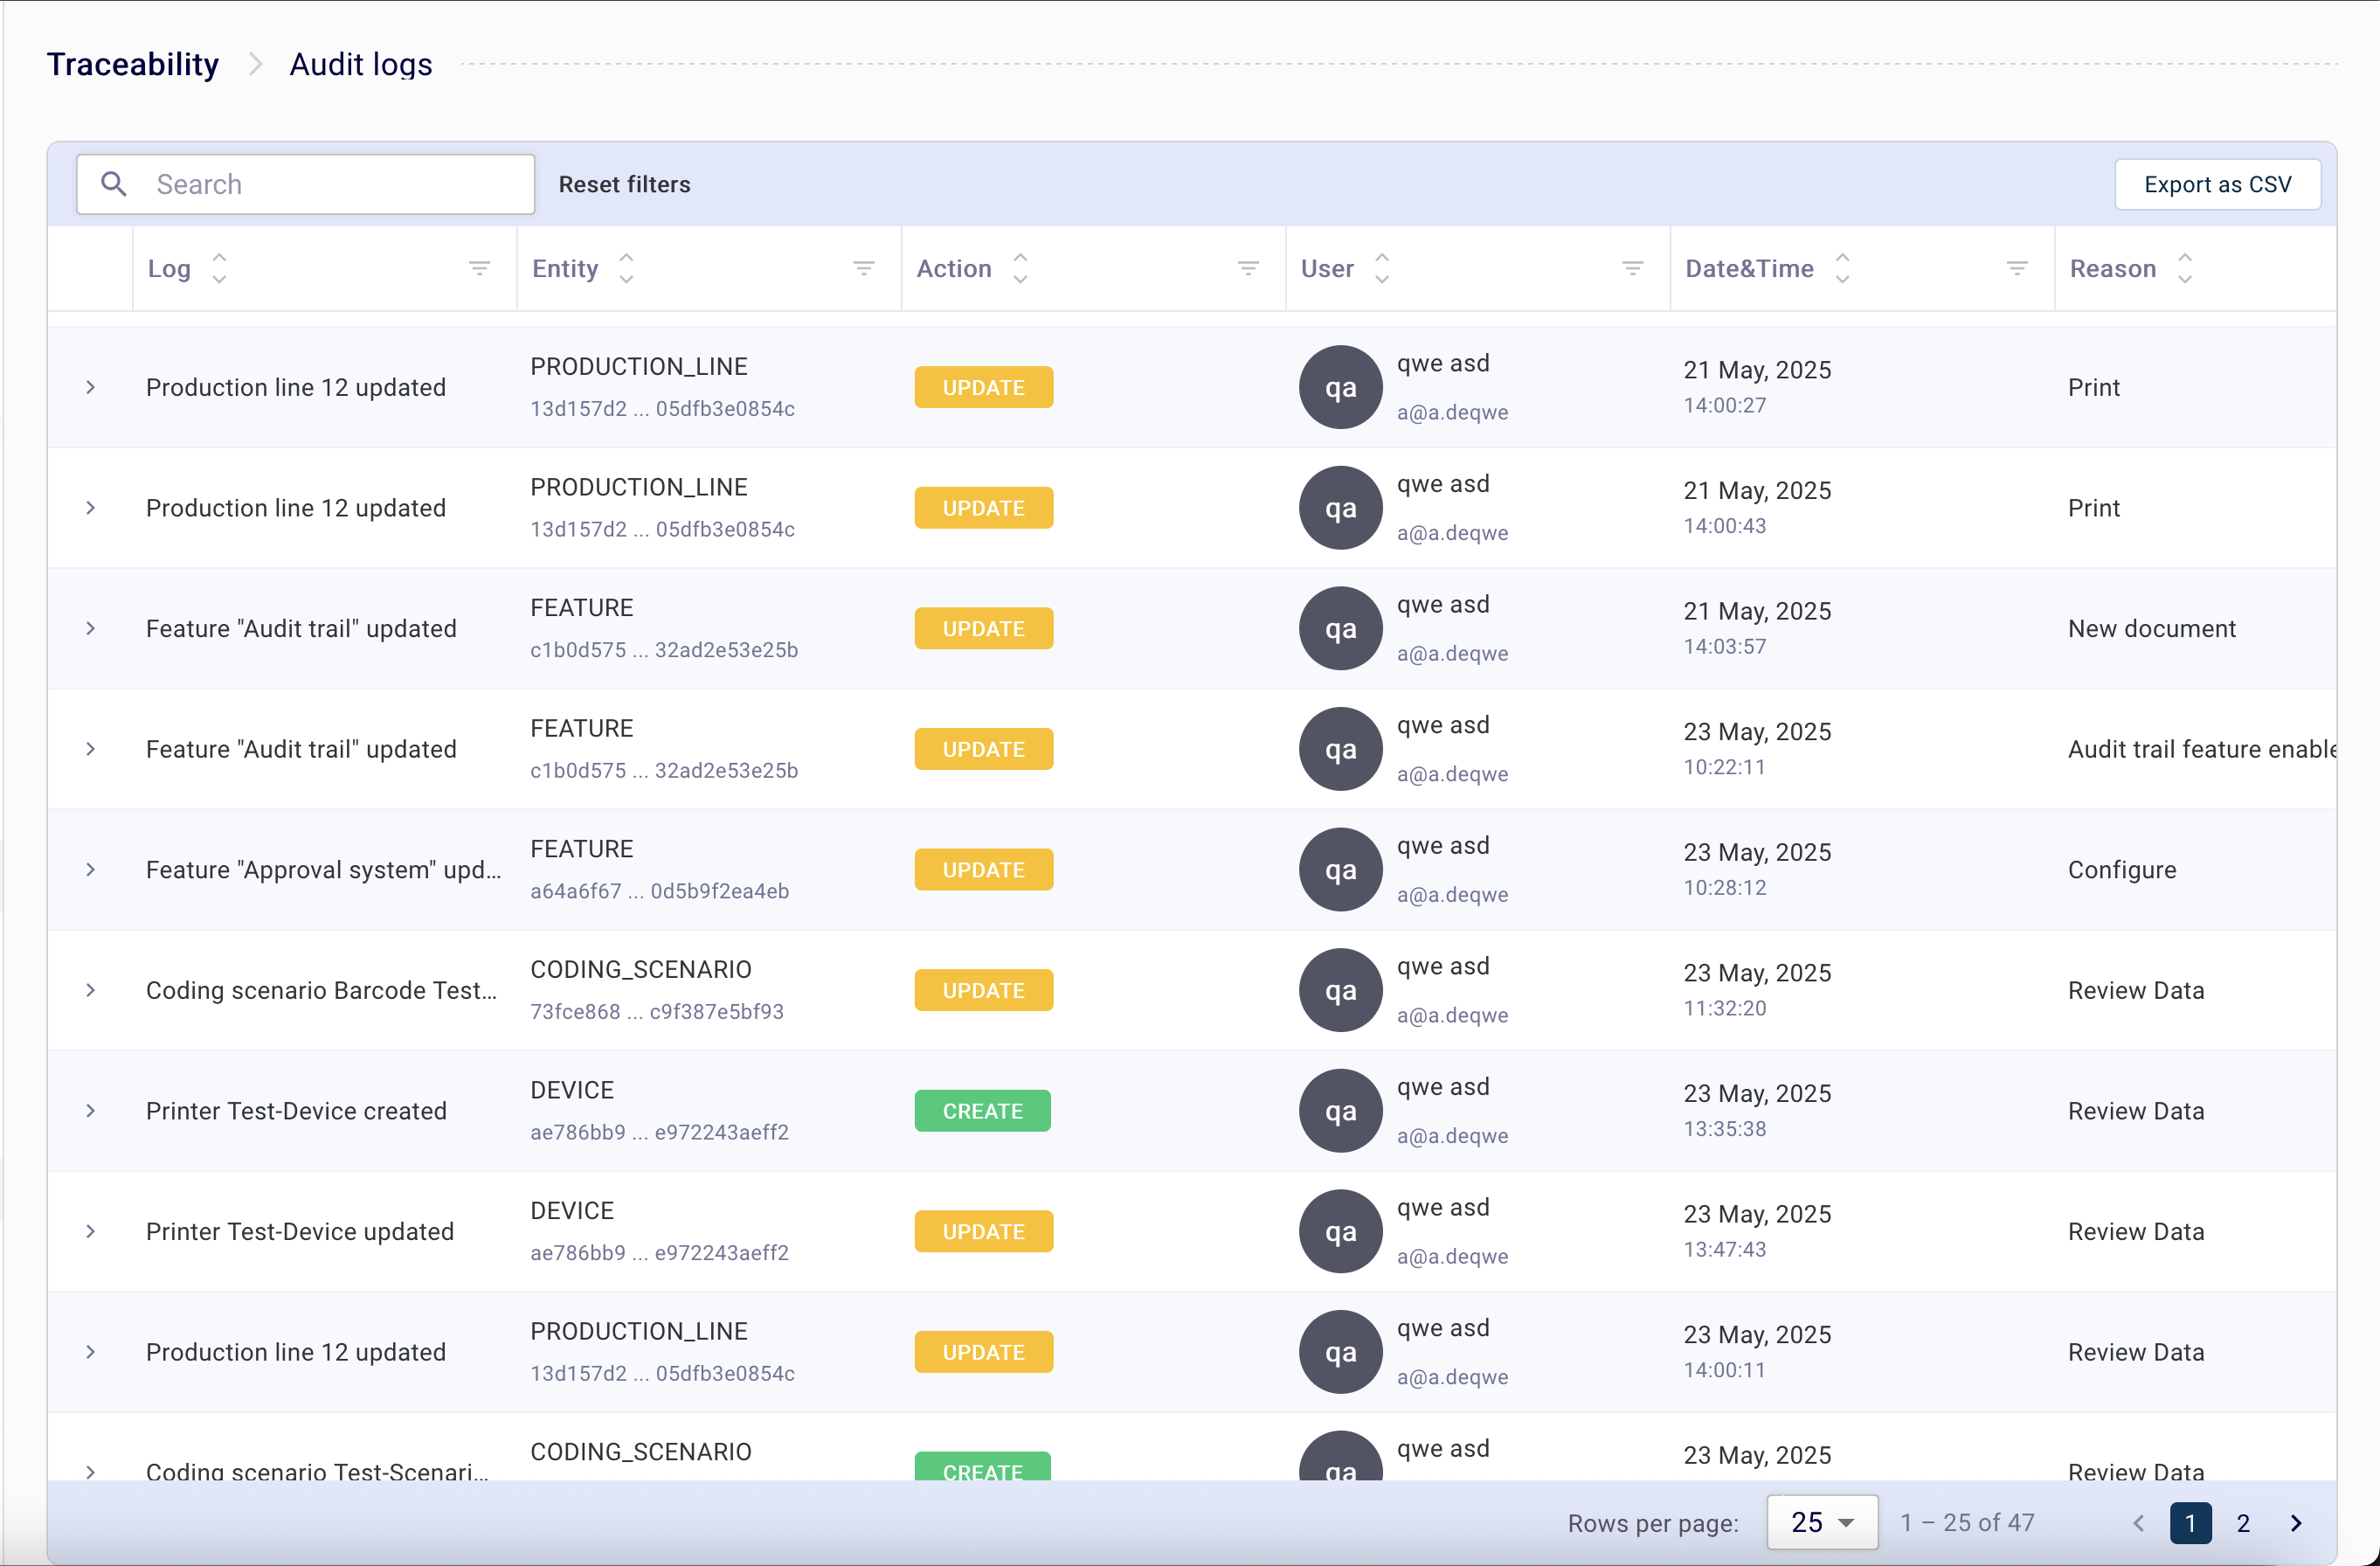
Searching records
The search field on top of the browser can be used to search in all fields of the table
Filtering records
Each column of the table allows the user to filter in it. The filters of the individual columns add up. This makes it possible, for example, to filter for a specific data record in a specific time period.
Export to CSV
The current filtered or search results can be exported as an CSV file with the Export to CSV button.