System Data
System data is configuration that supports the production process, rather than the product, order, and print records that make up master data. It’s grouped under its own System Data section in the side bar, alongside Master Data, and covers four elements:
- FIFO — named queues that buffer products, production orders, or logistic units between two points in a coding scenario.
- Statuses — user-defined labels tracking the state of a product, production order, or logistic unit.
- Counter — automatic numeric counters (for example serial or batch numbers) that a coding scenario can read and increment.
- Tags — labels used to match a layout, printer, resource file, or import task to each other.
Each of these is configured on its own page under System Data, and each is also read or written by dedicated coding-scenario steps — see Coding Scenarios for those.
1 - FIFO
Defining a FIFO queue to buffer products, production orders, or logistic units in a coding scenario.
About this task
A FIFO queue is a named, ordered buffer that a coding scenario can push records into and later get back out in arrival order. Use it to decouple two parts of a process — for example, buffer items scanned at one station and process them, in order, at a downstream station whenever it has capacity. The queue itself only holds a reference to each item; a coding scenario reads or writes it using the FIFO push item, FIFO get item, and FIFO delete item steps (see Coding Scenarios).
Procedure
- In the side bar, select System Data and click FIFO.
- Click the add icon to create a new queue.
- Enter a name for the queue. The name must be unique across all FIFO queues.
- Select the queue’s type: Product, Production Order, or Logistic Unit. This fixes what kind of record the queue holds.
- Save the queue.
Results
The queue appears in the FIFO overview, showing its name, type, and current item count (updated live as scenarios push and get items). Opening a queue shows the items currently waiting in it, in position order.
Limitations
- A queue’s name must be unique.
- A queue’s type determines what can be pushed into it — a Logistic Unit queue can only be populated by other means; the FIFO push item scenario step only supports Product and Production Order.
- FIFO queues are global: any coding scenario, on any production line, can push to or get from the same named queue.
What to do next
- Use the queue in a coding scenario — see FIFO Queue for the push/get/delete steps.
2 - Statuses
Defining the statuses used to track the state of products, production orders, and logistic units.
Available only when the Statuses feature is enabled.
About this task
A status is a user-defined label — for example Draft, Active, Suspended, or Archived — that tracks the state of a product, production order, or logistic unit as it moves through the production process. A coding scenario’s “Set status to…” steps assign it, and other steps can gate on it (for example Check logistic unit status) — see Coding Scenarios.
Procedure
- In the side bar, select System Data and click Statuses.
- Open the drop-down menu and click Edit Mode.
- Click + Add row to insert a new status, and enter its name. The name must be unique.
- Click Save.
- Open the drop-down menu and click Preview Mode to deactivate the edit mode.
Results
The status is available to assign to products, production orders, and logistic units, both manually and through coding-scenario steps.
Limitations
- A status name must be unique.
- A status that’s currently assigned to any product, order, or logistic unit can’t be deleted — remove it from those records first.
- No status is a fixed, built-in status that can’t be renamed or deleted; it’s the default state for a record with nothing else assigned.
- Statuses are global — the same list is used for products, production orders, and logistic units everywhere in the system.
What to do next
- Assign statuses from a coding scenario — see the status steps on the Other page.
3 - Counter
Defining a counter for automatic numbering, such as serial or batch numbers, printed onto labels.
About this task
A counter is a named, persistent numeric value — for example a serial or batch number — that a coding scenario can read, and that can increment automatically on every print. Coding-scenario steps can also increment, decrement, reset, or evaluate a counter explicitly (see Coding Scenarios).
Procedure
- In the side bar, select System Data and click Counter.
- Click the add icon to create a new counter.
- Enter a name for the counter.
- Select the counter’s type:
- Global — one shared value used everywhere.
- Per Line — a separate value for each production line. Only available when Increment on every print is off.
- Per Printer — a separate value for each printer. Only available when Increment on every print is on.
- Enter the start, current, and end value (current must fall between start and end), and the counter’s length.
- Optionally enable Daily reset (resets the value once a day), Increment on every print, and Calculate check digit at the end.
- For a Per Line or Per Printer counter, set the start/current/end values for each line or printer individually.
- Save the counter.
Results
The counter is available for use in a coding scenario and, if configured, increments automatically on every print.
Limitations
- A counter’s type — Global, Per Line, or Per Printer — is exclusive; values are tracked separately per line or per printer, not combined.
- Start value must not exceed end value, and the current value must fall within that range.
- Per Printer requires Increment on every print to be enabled; Per Line requires it to be disabled.
- If Daily reset is enabled but no start value is defined, a reset clears the current value instead.
What to do next
- Read or change the counter from a coding scenario — see the counter steps on the Other page.
4 - Defining Tags
Defining a tag to match a label layout, printer, resource file, or import task to each other.
Before you begin
- You are assigned to a user group that at least has the permission Change production data.
About this task
A tag is a simple, reusable label used to match things together — most commonly a label layout to a printer, so a coding scenario can pick the right layout for a given printer without hard-coding names. Beyond layouts and printers, a resource file or an import task can also carry a tag. A tag is only defined here; it’s assigned to a device, layout, resource, or import task on that item’s own configuration page.
Procedure
- In the side bar, select System Data and click Tags.
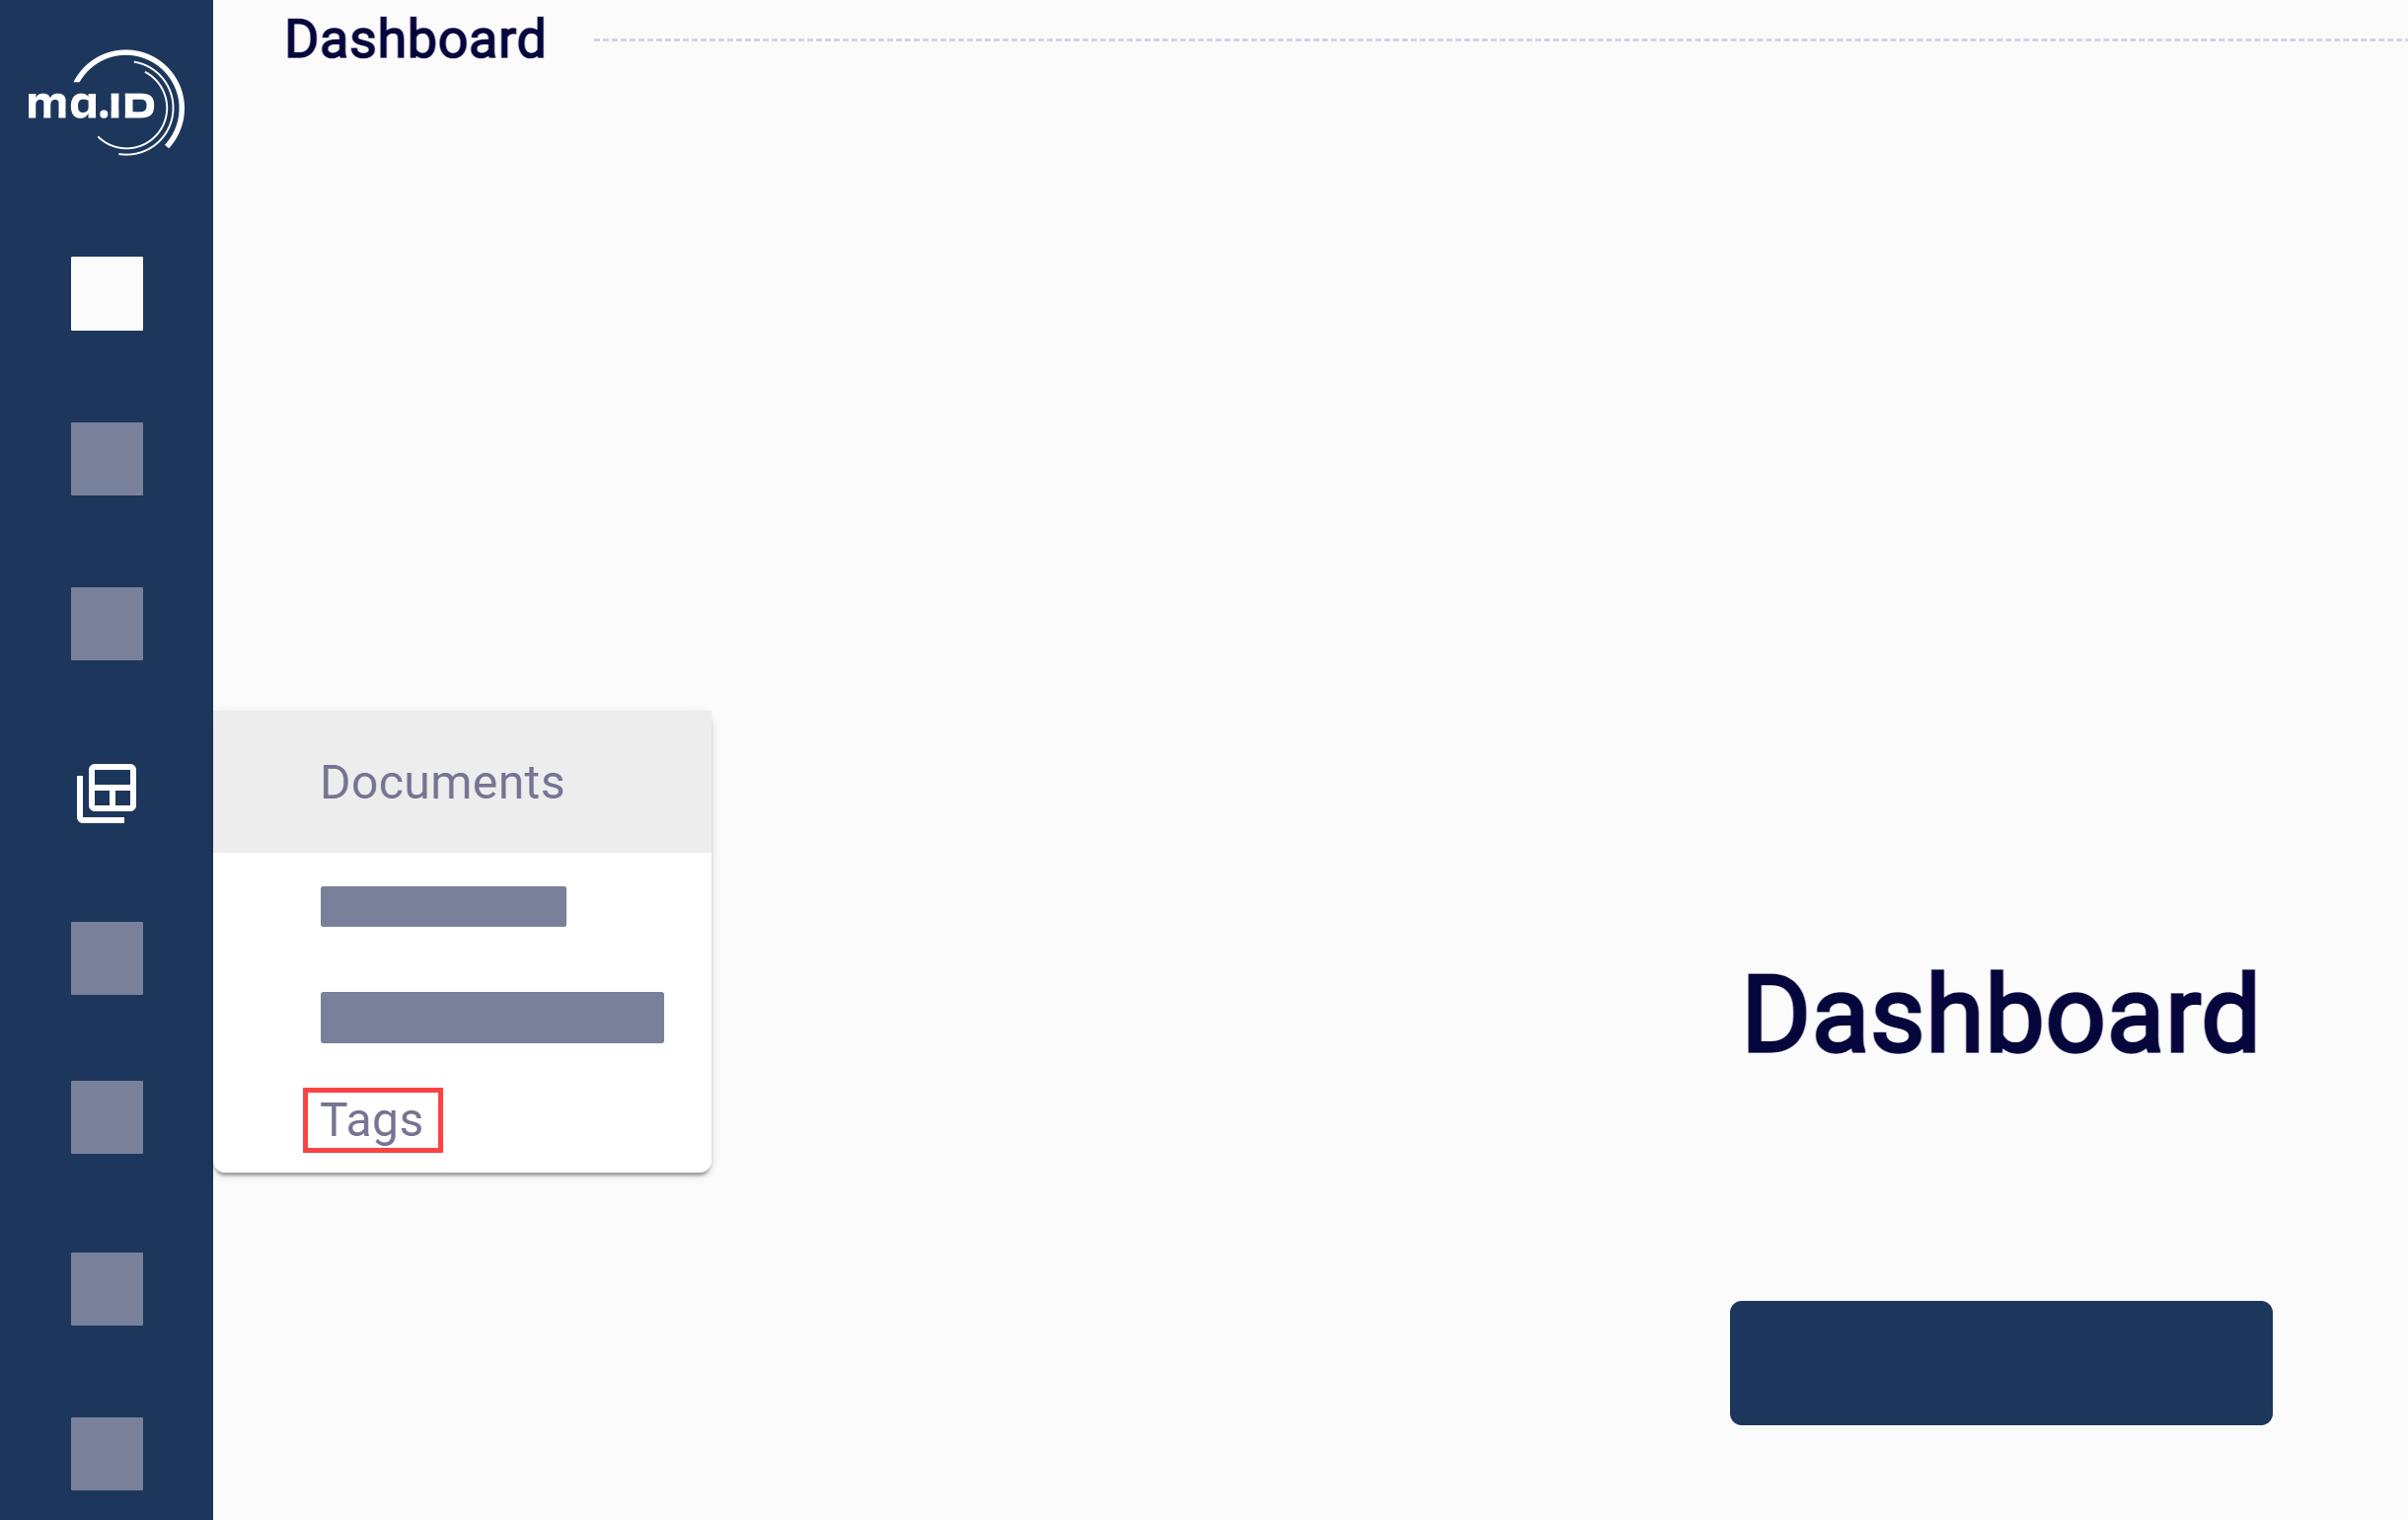 The view Tags opens.
2. Open the drop-down menu and click Edit Mode.
The view Tags opens.
2. Open the drop-down menu and click Edit Mode.
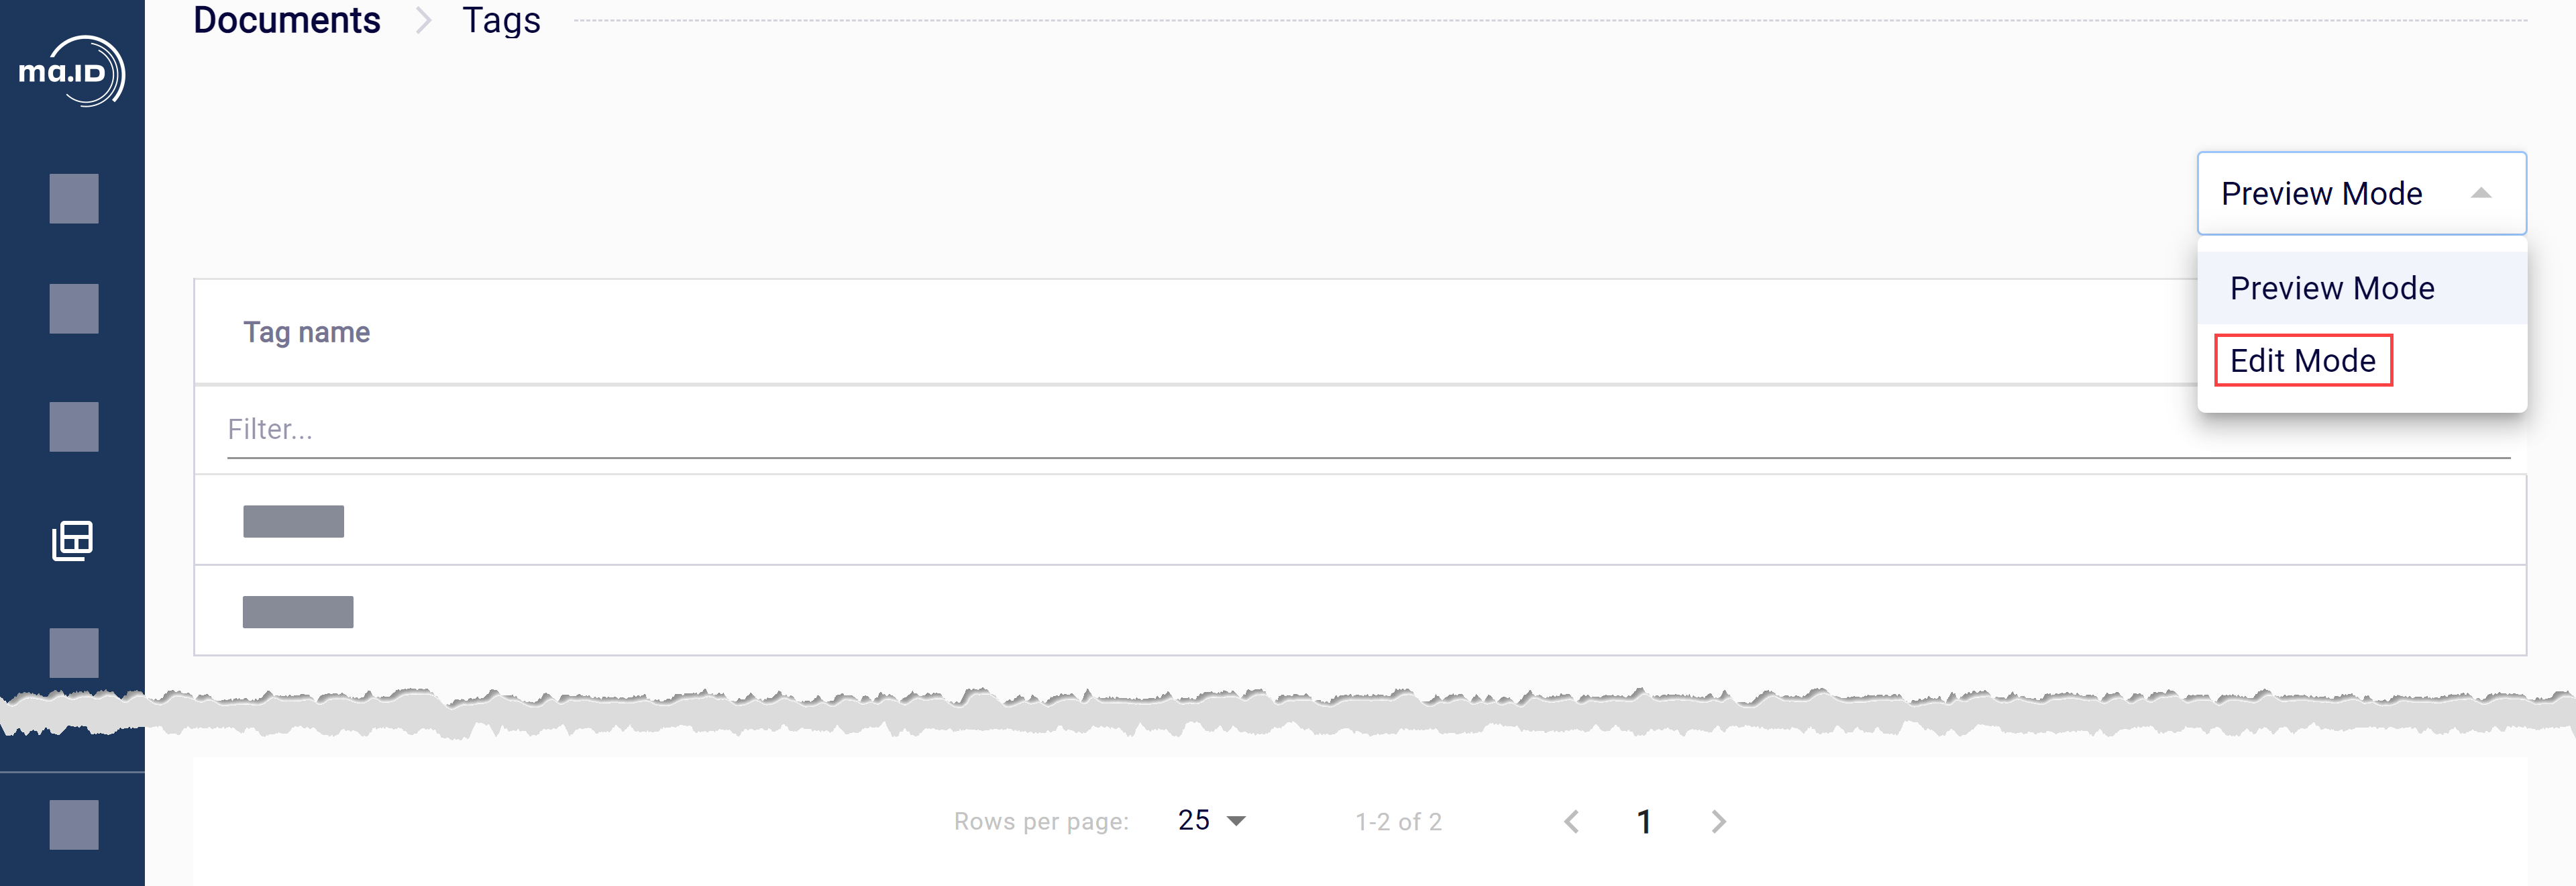 3. Click + Add row to insert an empty input field into the table.
4. Enter the tag name into the field. The name must be unique.
5. Click Save.
6. To add more tags, repeat steps 3 to 5.
7. Open the drop-down menu and click Preview Mode to deactivate the edit mode.
3. Click + Add row to insert an empty input field into the table.
4. Enter the tag name into the field. The name must be unique.
5. Click Save.
6. To add more tags, repeat steps 3 to 5.
7. Open the drop-down menu and click Preview Mode to deactivate the edit mode.
Results
You have defined a tag. It’s now available to assign on a device, layout, resource, or import task.
Limitations
- A tag name must be unique.
- A tag that’s currently assigned to any layout, device, resource file, or import task can’t be deleted — remove it from all of them first.
What to do next
- Import a label layout.
- Set up a hardware device.