Data Integration
Exchanging data with external systems through scheduled or manually triggered import and export tasks.
Data Integration is how manage.ID exchanges data with external systems on a schedule, without manual re-entry. An import task picks up a CSV, XML, or database source and writes it into manage.ID; an export task does the reverse, sending data out to a file, a database, or a REST API.
Import and export tasks aren’t limited to master data:
- Import can populate any of the five master data tables (see Master Data > Data Types), as well as label layouts and resource files.
- Export is more limited — only Logistic Units and Printer Logs can be exported.
Both task types are configured the same way, under Data Integration > Import & Export in the side bar. See Importing Data and Exporting Data for the setup procedure, and Overview - Fields for Import Tasks for what each form field does.
1 - Importing Data
Importing product, order, or other data into manage.ID from an external source.
Before you begin
- You are assigned to a user group that at least has the permission Configure data integration.
About this task
In order to use information from an external database in manage.ID, you must first define an import task.
Procedure
- In the side bar, select Data Integration and click Import & Export.
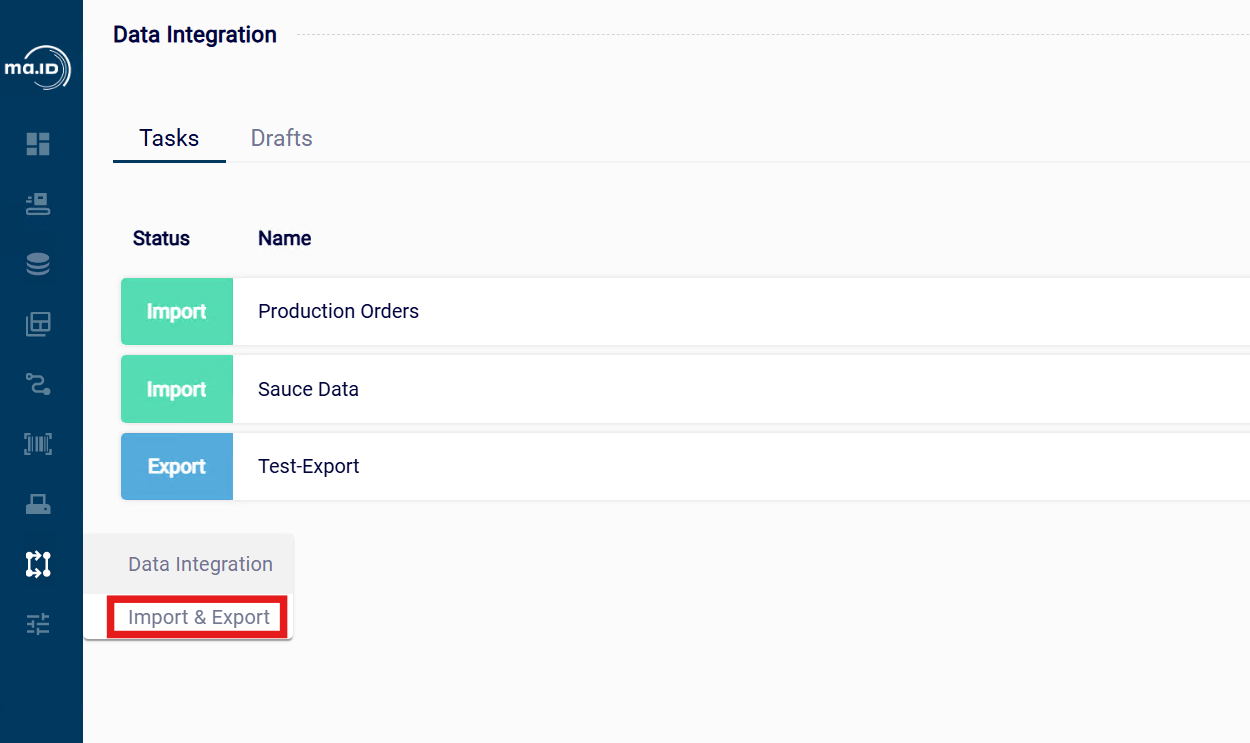 The view Data Integration opens.
2. To add a new task, click the add icon +.
The view New Task opens.
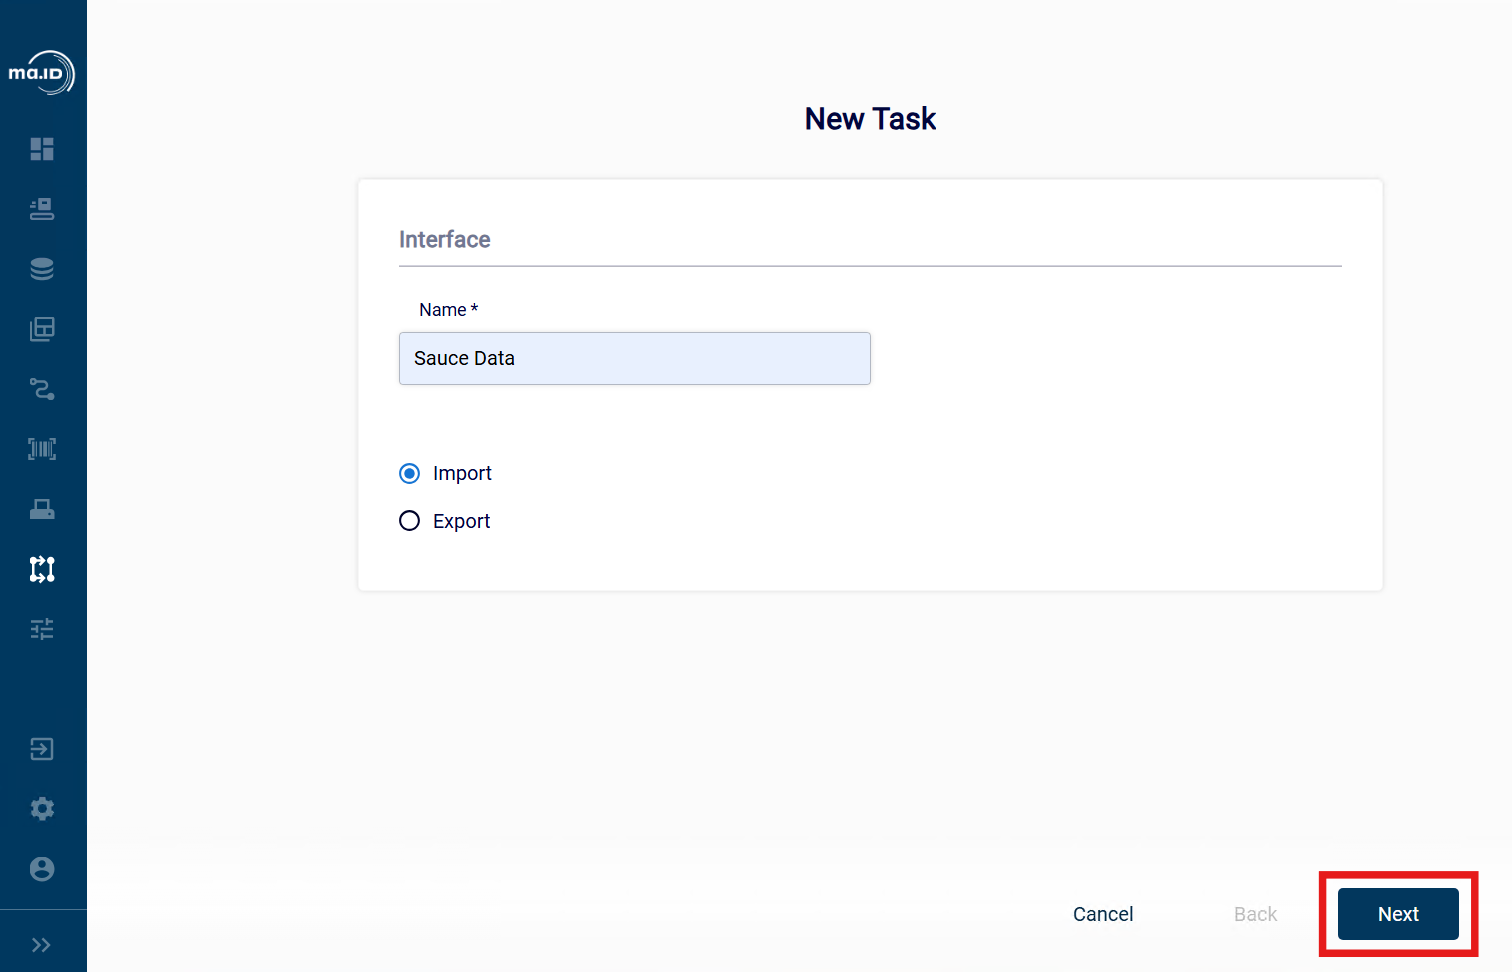
3. Enter a name for your task and select Import. A Type dropdown then appears: choose Task for a regular, field-mapped import into a master data table; Document to import label layouts; or Resource to import auxiliary printer files such as logos or fonts (only shown if the Resources Management feature is enabled). Document and Resource imports don’t use the field-mapping steps below (7–8) — they match files by name instead. The rest of this procedure describes a Task import into a master data table.
4. Click next.
The view Data Integration opens.
2. To add a new task, click the add icon +.
The view New Task opens.
3. Enter a name for your task and select Import. A Type dropdown then appears: choose Task for a regular, field-mapped import into a master data table; Document to import label layouts; or Resource to import auxiliary printer files such as logos or fonts (only shown if the Resources Management feature is enabled). Document and Resource imports don’t use the field-mapping steps below (7–8) — they match files by name instead. The rest of this procedure describes a Task import into a master data table.
4. Click next.
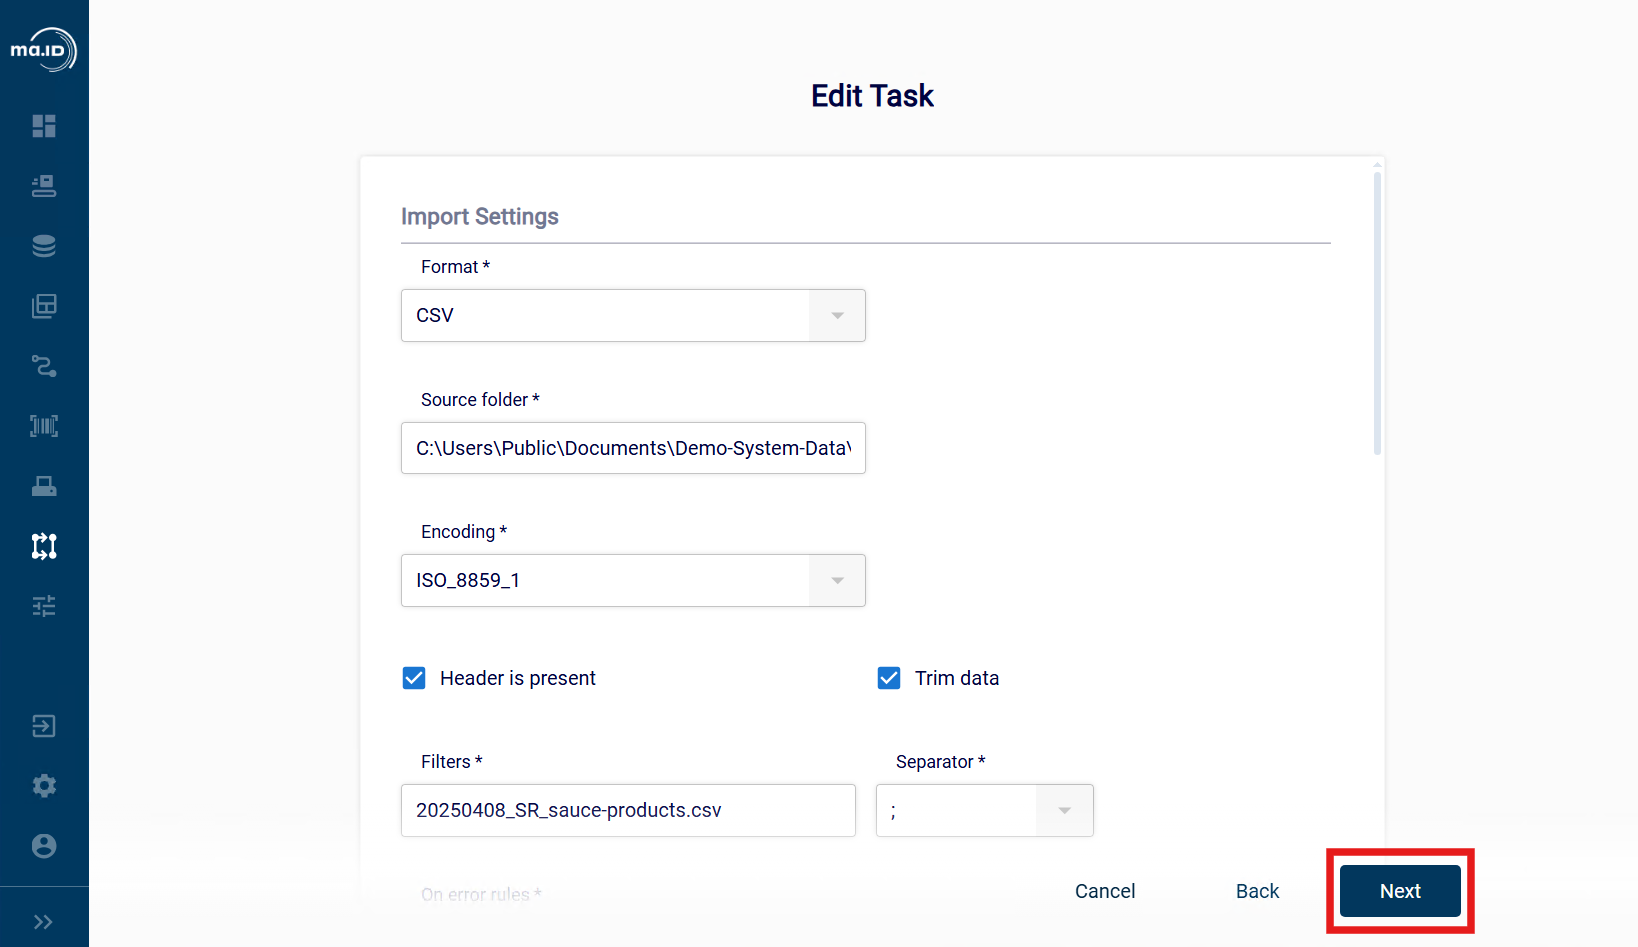
 5. Choose the source format (CSV, XML, or database connection) and enter the corresponding details: source folder, filter, and encoding; format-specific settings such as the CSV separator and header row; how to handle errors during import; how to handle the source file after a successful or an unsuccessful import; and whether to assign a status to new or updated records. Set the import task to run manually or periodically. Obligatory fields are marked with an asterisk. For more information on the form fields, see Overview - Fields for Import Tasks.
6. Click Next.
5. Choose the source format (CSV, XML, or database connection) and enter the corresponding details: source folder, filter, and encoding; format-specific settings such as the CSV separator and header row; how to handle errors during import; how to handle the source file after a successful or an unsuccessful import; and whether to assign a status to new or updated records. Set the import task to run manually or periodically. Obligatory fields are marked with an asterisk. For more information on the form fields, see Overview - Fields for Import Tasks.
6. Click Next.
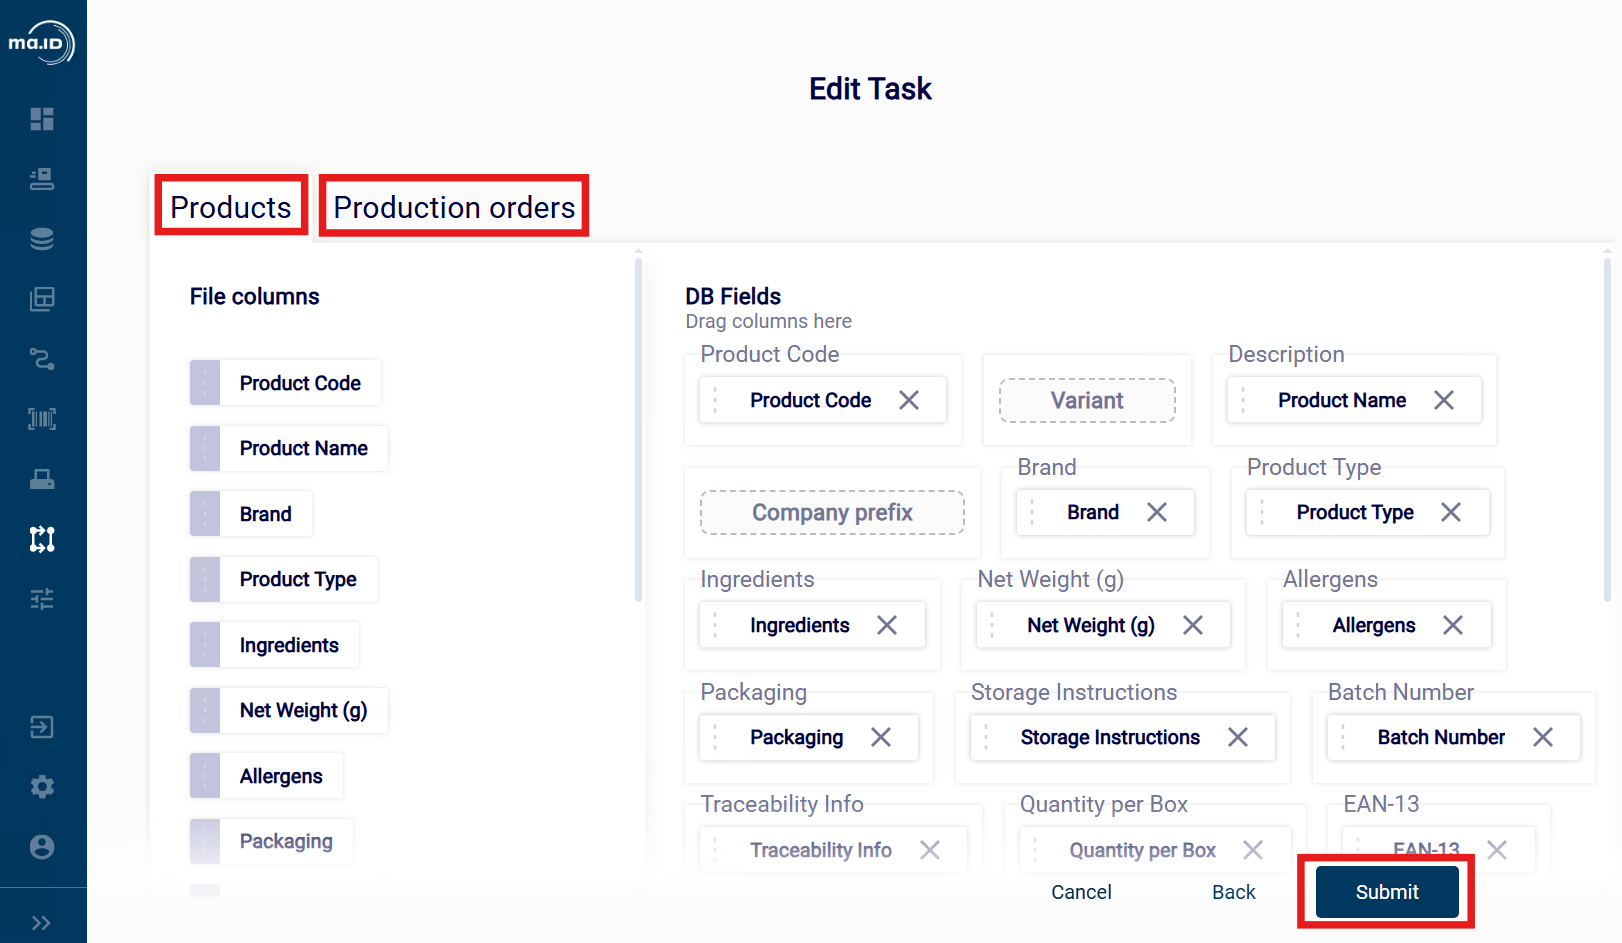
 7. The master data tables available for mapping depend on your configuration and license, and are shown as tabs (for example Product, Production Order, Various Data, Logistic Unit, or Print Job). Switch between tabs to map fields for each table you want to fill from this source. For details on the fields, matching behavior, and limitations of each table, see Master Data > Data Types.
8. Drag and drop information sources to the input fields below DB Fields; fields marked with an asterisk are mandatory. Use Custom DB Fields to create a custom field for a source column that doesn’t match a predefined field, or click Assign to Custom to automatically assign all remaining, unmapped source columns to new custom fields.
9. Click Submit to save the task.
7. The master data tables available for mapping depend on your configuration and license, and are shown as tabs (for example Product, Production Order, Various Data, Logistic Unit, or Print Job). Switch between tabs to map fields for each table you want to fill from this source. For details on the fields, matching behavior, and limitations of each table, see Master Data > Data Types.
8. Drag and drop information sources to the input fields below DB Fields; fields marked with an asterisk are mandatory. Use Custom DB Fields to create a custom field for a source column that doesn’t match a predefined field, or click Assign to Custom to automatically assign all remaining, unmapped source columns to new custom fields.
9. Click Submit to save the task.
Results
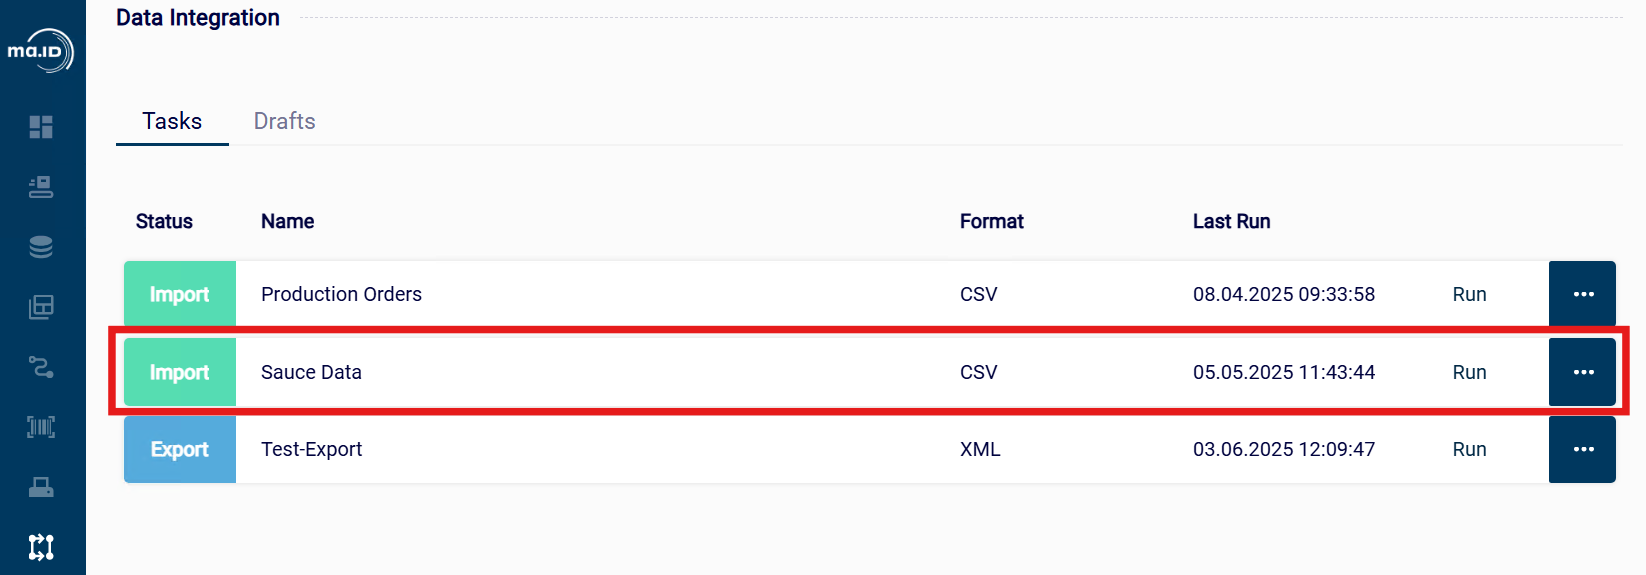
You have created an import task for a file. Your new import task is shown in the overview in Data Integration > Import & Export.
What to do next
- Manage master data.
- Define tags.
- Learn about the individual master data types you can import.
2 - Exporting Data
Exporting logistic units or printer logs from manage.ID to a file, a database, or a REST API.
Before you begin
- You are assigned to a user group that at least has the permission Configure data integration.
About this task
In order to send data out of manage.ID to an external file, database, or system, you define an export task. Of the master data types, only Logistic Units can be exported this way, and only when the Logistic Units feature is enabled — see Master Data > Data Types for what it contains. The same export task type can also target Printer Logs, which aren’t master data and aren’t documented in detail in these pages.
Procedure
In the side bar, select Data Integration and click Import & Export.
The view Data Integration opens.
To add a new task, click the add icon +.
The view New Task opens.
Enter a name for your task and select Export.
Click Next.
Select the table to export: Printer Logs, or Logistic Units if enabled.
Choose whether to export to an API instead of a file. If you export to an API, enter the target URL and, if required, the authentication and retry settings. If you export to a file, choose the format (CSV or XML) and the destination folder, then define a template for each of the following:
- File name: The file name followed by the preferred extension.
- File header: The XML header and the opening tag of your root element (XML) or the header row of the CSV table (CSV).
- Records: Data from your data sets, each wrapped by an XML element (XML) or separated by a delimiter (CSV).
- File footer (XML only): The closing tag of your root element.
To assign content from your data set to a template, click the clipboard icon next to the data set to copy it as a variable, then paste it into the template. Alternatively, define a variable by typing the name of your data set into the template and wrapping it in curly brackets. You can also use the variable {datetime} to automatically add the date and time of the export to the file name.
Optionally filter which records are exported. For Printer Logs, you can filter by printer and export only records from a given date onward; for other fields, use the generic filter rules available for the selected table.
Set the export task to run manually or periodically.
Click Submit to save the task.
Results
You have created an export task. Your new export task is shown in the overview in Data Integration > Import & Export. Each record is exported at most once by a given task — records already exported in a previous run are skipped unless they failed and are configured to be retried.
What to do next
- Learn about Logistic Units, the master data type you can export.
3 - Overview - Fields for Import Tasks
Overview of form fields for import tasks.
Source File Definition
The form section Import settings defines the general properties of the source.
Format
- The format of the source: CSV, XML, or DB (a connection to an external database). The format determines which of the fields below are shown.
Source Folder
- Location of the source file on the server. Not shown for the DB format.
Encoding
- Encoding format of the source file. UTF-8 encoding is commonly used, but some older systems still require ISO_8859_1 encoding. Only for CSV and XML files.
Exclude header
- Only for CSV files: Defines whether the header of the source file should be ignored.
Trim data
- Only for CSV files: Defines whether leading and trailing whitespace is removed from each value before it is imported.
Filters
- Filter for source files that enables to define individual import tasks for different files within the same location.
- Filter type * indicates that all files in the location are imported.
- If only a specific file or a set of files with the same prefix must be imported, enter the prefix followed by an asterisk. Example: interpack*.
- Not shown for the DB format.
Separator
- Only for CSV files: Separator used within the CSV file. Example: ;.
Root element path
- Only for XML files: The XPath expression that identifies the repeating element representing one record in the source file.
Database connection
- Only for the DB format: The database type, host, port, database name, username, and password used to connect to the external database, and either a table to read from or a free-text SQL query.
On Error Rules
- Defines how to handle errors during import. Example: Unclear mapping of CSV entry due to wrong separator.
- Option Ignore and Continue defines that the line with the error is ignored and the import continues.
- Option Stop and Rollback defines that the import job stops. manage.ID returns an error message and the data imported during this import job is removed. The data sets that were updated are rolled back to their version before the execution of the task.
Statuses
Only shown if the Statuses feature is enabled. The form section Statuses defines which status new or updated records receive.
New record status
- The status assigned to a record that is newly created by this import task.
Updated record status
- The status assigned to a record that already existed and is updated by this import task.
Keep record status
- If enabled, an updated record keeps its previous status instead of being set to Updated record status.
File Handling After Import
The form section After importing defines how to handle files after a successful or unsuccessful import job.
Delete old data after (days)
- Retention period for data that no longer exists in the new version of the imported file. The old data is kept in the database for the set amount of days and afterwards deleted.
Move to
- Source file is moved to a separate location.
Change file extension
- Source file is marked by a new file extension.
Delete
- Source file is directly deleted.
Add timestamp
- A timestamp is added to the source file.
Document and Resource Import Fields
Document and Resource imports aren’t master data, but they use the same import task type. They use a simpler set of fields instead of the field mapping above, since these import types match files by name rather than by column:
Tags
- The tag assigned to the imported layout or resource files. The tag also determines which printers the files are synchronized to.
Delete not used files
- Only for Resource imports: If enabled, previously imported resource files with the current tag that are no longer present in the source folder are deleted. There is no equivalent option for Document imports.
Schedule
The form section Schedule defines the repetitions of an import task. manage.ID supports import tasks with regular intervals and import tasks that run on manually defined dates and times.