Overview - Steps of a Coding Scenario
Overview of all available steps and their parameters for a coding scenario.
A coding scenario is built from a sequence of steps. Each step performs one specific action or waits for a specific event before the next step begins.
Steps are divided into two categories:
- Trigger steps wait for a specific event or condition before passing control to the next step. Examples: waiting for a scan, an I/O signal, or a data import.
- Action steps execute an operation immediately and then pass control to the next step. Examples: sending a print job, syncing files, or setting an I/O signal.
Steps are executed sequentially from top to bottom. If a trigger step has not yet received its expected event, the scenario pauses at that step until the event arrives.
Steps with mandatory parameters that have not been configured are highlighted in red in the pipe. The scenario cannot be activated until all mandatory parameters are set.
1 - Barcode Scanner
Steps that wait for or process input from a barcode scanner.
This tab provides steps that wait for or process input from a barcode scanner.
On scan
This trigger step pauses the scenario until a scan is received from a specific scanner assigned to the production line. The scanned value is passed to subsequent steps.
| Parameter | Type | Description |
|---|
| Scanner | Mandatory | The scanner that this step listens to. |
| no-read data | Mandatory | The value the scanner reports when it cannot read a barcode (no-read). |
| stop on no-read | Optional | If enabled, the scenario stops when a no-read is received instead of continuing. Enabled by default. |
Examples
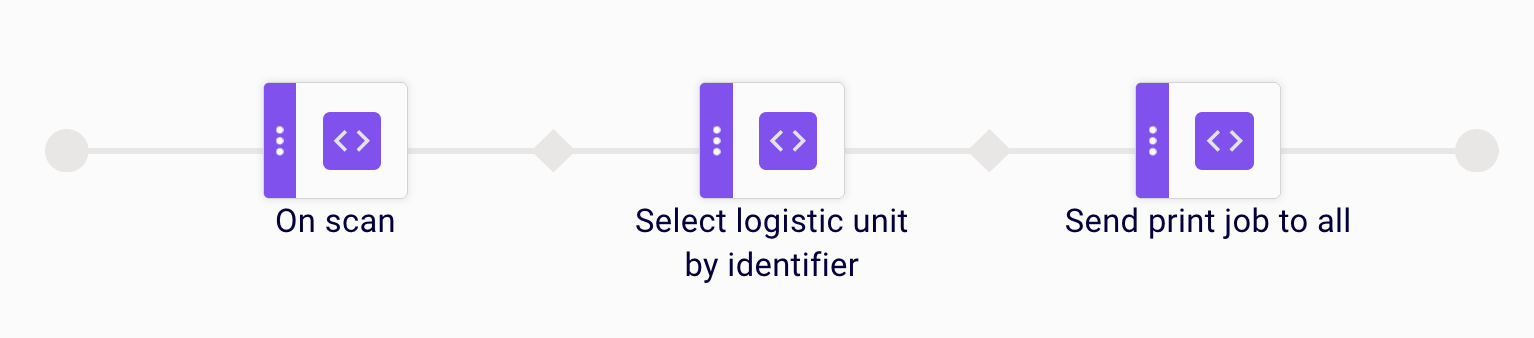
Example 1: Scan a barcode to identify a logistic unit and print a label
A scanner on the production line reads a barcode from an incoming item. The On scan step receives the scanned value and passes it to a Select logistic unit by identifier step, which looks up the matching logistic unit in the master data. Once the logistic unit is identified, a Send print job to all step sends the corresponding label to all printers assigned to the line.
Example 2: placeholder
Placeholder prose for example 2.

Limitations
- Placeholder limitation 1.
- Placeholder limitation 2.
On any scan
This trigger step pauses the scenario until a scan is received from any scanner assigned to the production line. Use this step when the source scanner does not matter.
| Parameter | Type | Description |
|---|
| no-read data | Mandatory | The value a scanner reports when it cannot read a barcode (no-read). |
| stop on no-read | Mandatory | If enabled, the scenario stops when a no-read is received instead of continuing. |
Examples
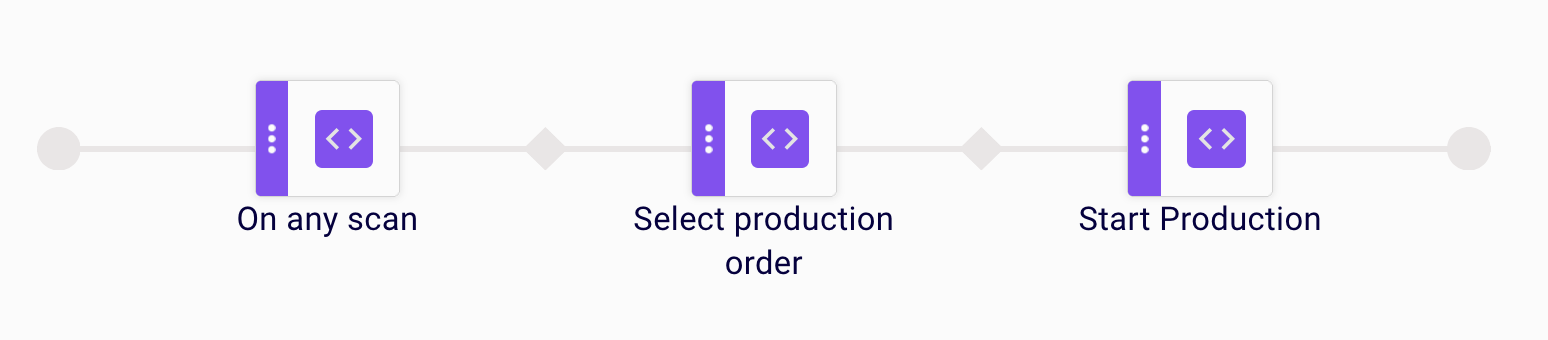
Example 1: Scan from any scanner to identify a production order and start production
Any scanner assigned to the production line can trigger this step — the source does not matter. Once a scan is received, a Select production order step identifies the matching order from the master data. A Start Production step then transitions the production line into the running state.
Example 2: placeholder
Placeholder prose for example 2.

Limitations
- Placeholder limitation 1.
- Placeholder limitation 2.
On socket read
This trigger step pauses the scenario until data is received from a socket reader connection. The step triggers the moment a message is received on the configured socket. The received data (binary) is stored as scenario input without modification, the same way as for the On scan step, so it is available to subsequent steps.
| Parameter | Type | Description |
|---|
| Socket | Mandatory | The socket reader connection that this step listens to. |
Examples
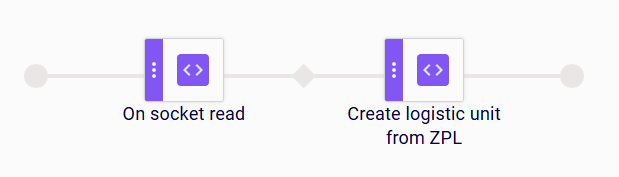
Example 1: Creating a Logistic Unit from Data Received over a Socket
When ZPL data is received over a socket connection, the On socket read step receives the input. The Create logistic unit from ZPL step then applies a configured regular expression to the received data, extracts the unique identifier, and creates a new logistic unit with it.
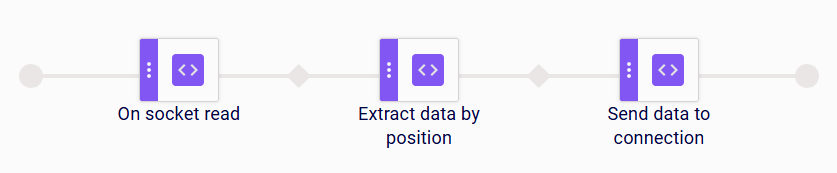
Example 2: Forwarding Data Received over a Socket to a Network Connection
When data is received over a socket connection, the On socket read step receives the input. The Extract data by position step extracts the relevant fragment from the received data, and the Send data to connection step then sends it to the configured network connection.
Check barcode type
This action step checks the most recently scanned barcode against an expected symbology and, optionally, an expected length. Use it to validate that the correct kind of barcode was scanned before continuing.
| Parameter | Type | Description |
|---|
| Barcode type | Mandatory | The barcode symbology the scanned value is expected to match. |
| Invert logic | Optional | If enabled, the condition is inverted (the check passes when the barcode does not match). |
| Expected length | Optional | The expected number of characters in the scanned value. |
Examples
Example 1: Validating a Scanned Barcode before Sending a Command
A scanner on the production line reads a barcode from an incoming item. The On scan step receives the scanned value. The Check barcode type step then verifies that the scanned value matches the expected barcode type and, if configured, the expected length. Only if the check passes does the Send command to device step send a command to the connected device.

Example 2: Validating Data Received over a Socket before Starting Production
When data is received over a socket connection, the On socket read step receives the input. The Check barcode type step then verifies that the received value matches the expected barcode type and, if configured, the expected length. Only if the check passes does the Start Production step start production on the line.

Limitations
- If Expected length is left empty, only the barcode type is checked; no length validation is performed.
- The length check is only evaluated after the barcode type matches. Invert logic only affects the barcode type comparison; it does not invert the length check.
- If the scanned value’s length does not match Expected length, the scenario stops at this step.
- Expected length must be a positive whole number; invalid values are rejected when configuring the step.
Send data
This action step sends a data payload to a scanner, for example to configure it or trigger an action on the device.
This step is deprecated. Use the more universal Send command to device step instead.
| Parameter | Type | Description |
|---|
| Scanner | Mandatory | The scanner that the data is sent to. |
| Data template | Mandatory | The template describing the data payload to send. |
| Stop on error | Mandatory | If enabled, the scenario stops when the data cannot be sent. |
Examples
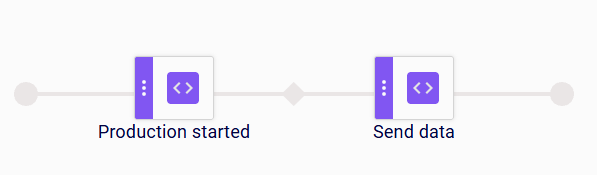
Example 1: Configuring a Scanner when Production Starts
When a production is started on the line, the On production started step triggers the scenario. The Send data step then sends the configured data template to the scanner, for example to apply scanner settings for the new production run.
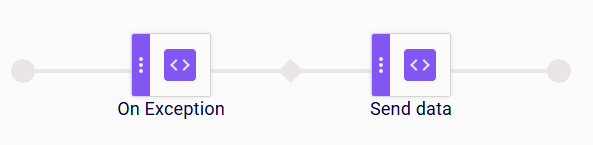
Example 2: Sending Data to a Scanner after an Exception
When an exception occurs during scenario execution, the On exception step triggers the scenario. The Send data step then sends the configured data template to the scanner, for example to reset it after the error.
Limitations
- This step is deprecated; use Send command to device for new scenarios.
- If Stop on error is enabled, the scenario stops when the data cannot be sent to the scanner.
Send data to connection
This action step sends a data payload to a network connection identified by an IP address and port.
If Data source table and Data source column are configured, the value from that column is sent to the connection. Otherwise, the fixed Command is sent.
| Parameter | Type | Description |
|---|
| Data source table | Optional | The table that provides the payload data. |
| Data source column | Optional | The column that provides the payload data. |
| Destination IP | Mandatory | The IP address of the target connection. |
| Destination port | Mandatory | The port of the target connection. |
| Command | Optional | A fixed command to send instead of the data source value. |
Examples
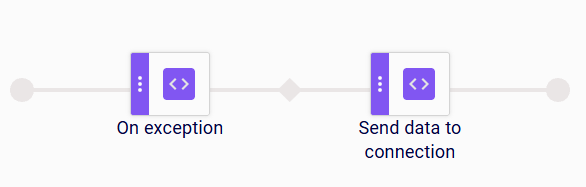
Example 1: Notifying an External System after an Exception
When an exception occurs during scenario execution, the On exception step triggers the scenario. The Send data to connection step then sends the configured data to the target IP address and port, for example to notify an external system about the error.
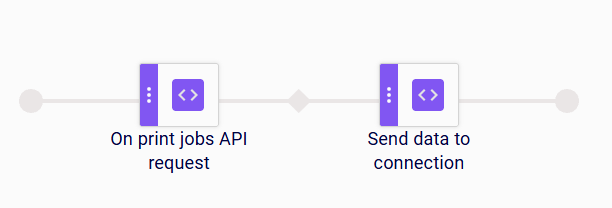
Example 2: Forwarding Data when a Print Job Is Requested via API
When a print job request is received via the API, the On print jobs API request step triggers the scenario. The Send data to connection step then sends the configured data to the target IP address and port, for example to forward information about the print job to an external system.
Limitations
- Only one payload is sent per execution: the data source value if a data source is configured, otherwise the command.
2 - I/O
Steps that wait for an I/O signal as input or control an I/O device as output.
This tab provides steps that either wait for an I/O signal as input or control an I/O device as output.
On I/O
This trigger step pauses the scenario until a specific signal is received from a specific I/O device.
| Parameter | Type | Description |
|---|
| IO device | Mandatory | The I/O device that this step listens to. |
| Aliases | Mandatory | The name of the signal on the I/O device that triggers this step. |
Set I/O
This action step sets a specific signal on an I/O device to the active (ON) state, optionally for a defined duration.
| Parameter | Type | Description |
|---|
| IO device | Mandatory | The I/O device that this step controls. |
| Aliases | Mandatory | The name of the signal to activate on the I/O device. |
| signal-duration (ms) | Optional | The duration in milliseconds for which the signal stays active. If not set, the signal remains active until explicitly reset. |
Reset I/O
This action step resets a specific signal on an I/O device to the inactive (OFF) state.
| Parameter | Type | Description |
|---|
| IO device | Mandatory | The I/O device that this step controls. |
| Aliases | Mandatory | The name of the signal to deactivate on the I/O device. |
| signal-duration (ms) | Optional | The duration in milliseconds for which the reset signal is held. |
Check I/O
This trigger step waits for and checks the current state of a signal on an I/O device, and continues only when the expected state is present.
| Parameter | Type | Description |
|---|
| I/O device | Mandatory | The I/O device whose signal is checked. |
| Aliases | Mandatory | The name of the signal to check on the I/O device. |
Write binary value to WebIO
This action step writes a binary value, assembled from a data source, to the individual bits of a WebIO device.
| Parameter | Type | Description |
|---|
| Data source table | Mandatory | The table that provides the value to write. |
| Data source field | Mandatory | The field that provides the value to write. |
| IO device | Mandatory | The WebIO device to write to. |
| Bit 0 alias | Mandatory | The signal alias mapped to bit 0. |
| Bit 1 alias … Bit N alias | Optional | Additional signal aliases mapped to higher bits. |
Set I/O after no read scan
This action step activates an I/O signal when the preceding scan step returned a no-read result. Use this step to trigger a visual or physical indicator when a barcode could not be read.
| Parameter | Type | Description |
|---|
| IO device | Mandatory | The I/O device that this step controls. |
| Aliases | Mandatory | The name of the signal to raise on a no-read event. |
| signal-duration (ms) | Optional | The duration in milliseconds for which the signal stays active. |
3 - Production Data
Steps that identify and filter master data for use in the coding scenario.
This tab provides steps that identify and filter master data for use in the coding scenario.
Select product
This action step identifies the product from the master data that matches the input received by the production line. If multiple products match, the user can resolve the collision manually or the system throws an error.
| Parameter | Type | Description |
|---|
| Resolve collision manually if multiple products found | Mandatory | If enabled, the user is prompted to select the correct product when multiple products match. If disabled, the system selects automatically. |
| Lookup column | Mandatory | The column in the master data used to identify the product. |
Select production order
This action step identifies the production order from the master data that matches the input received by the production line.
This step has no parameters.
Collect list of products
This action step retrieves a filtered list of products from the master data.
| Parameter | Type | Description |
|---|
| Field to filter | Optional | The field in the master data used to filter the product list. |
| Filter | Optional | The value or pattern applied to the filter field. Only products whose field value matches are included. |
| Stop by no data | Mandatory | If enabled, the scenario stops when the filter returns no products. |
Collect list of orders
This action step retrieves a filtered list of production orders from the master data.
| Parameter | Type | Description |
|---|
| Field to filter | Optional | The field in the master data used to filter the order list. |
| Filter | Optional | The value or pattern applied to the filter field. Only orders whose field value matches are included. |
| Stop by no data | Mandatory | If enabled, the scenario stops when the filter returns no orders. |
Collect list of print jobs
This action step retrieves a filtered list of print jobs from the master data.
| Parameter | Type | Description |
|---|
| Field to filter | Optional | The field used to filter the print job list. |
| Filter | Optional | The value or pattern applied to the filter field. |
| Stop by no data | Mandatory | If enabled, the scenario stops when the filter returns no print jobs. |
Filtered record counter
This action step counts the records in a table that match a filter and makes the count available to subsequent steps.
| Parameter | Type | Description |
|---|
| Table to filter | Mandatory | The table whose records are counted. |
| Field to filter | Mandatory | The field the filter is applied to. |
| Filter value(s) | Optional | The value(s) records must match to be counted. |
| Stop by no data | Mandatory | If enabled, the scenario stops when no records match. |
Select logistic unit
This step identifies and selects a logistic unit () from the master data that matches the current coding scenario context.
Available only when the Logistic Units feature is enabled.
| Parameter | Type | Description |
|---|
| Logistic unit field | Mandatory | The field used to identify the logistic unit. |
| Throw exception if not found | Mandatory | If enabled, the scenario raises an error when no matching logistic unit is found. |
Examples
Example 1: Identifying a logistic unit to update its status
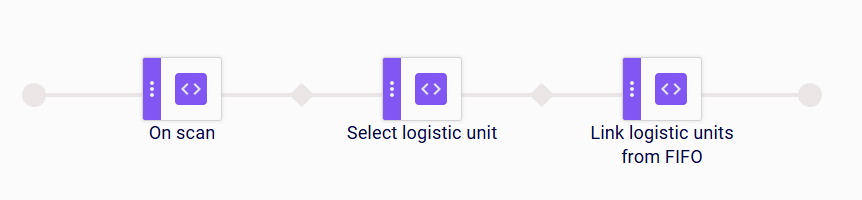
When a scan event occurs, the On scan step receives the scan input. The Select logistic unit step uses that input to find and select the matching logistic unit from the master data. The Set status to logistic units step then updates the status of the selected logistic unit.
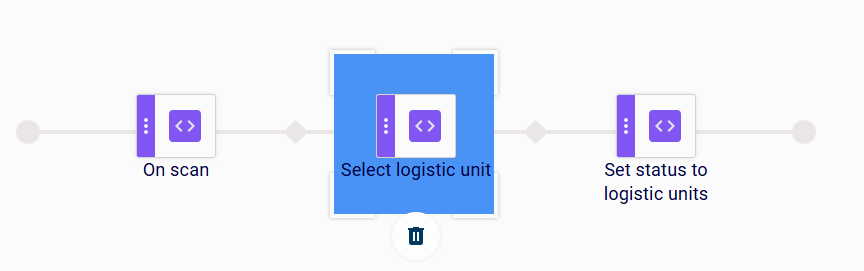
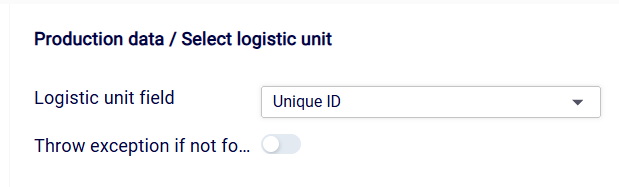
In this example, Logistic unit field is set to Unique ID to match the logistic unit by its unique identifier. Throw exception if not found is disabled, so the scenario continues even if no matching logistic unit is found.
Example 2: Selecting a logistic unit to send a print job
When data is received over a socket connection, the On socket read step receives the input. The Select logistic unit step uses that input to find and select the matching logistic unit from the master data. The Send print job to printer step then sends the corresponding label to the printer using the data of the identified logistic unit.
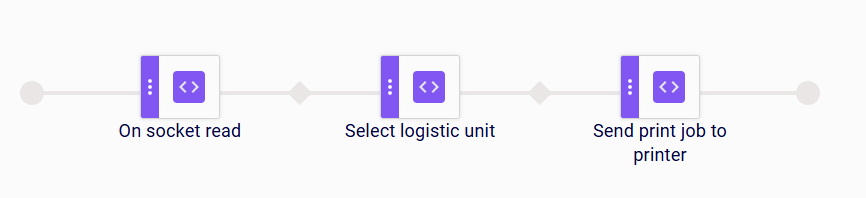
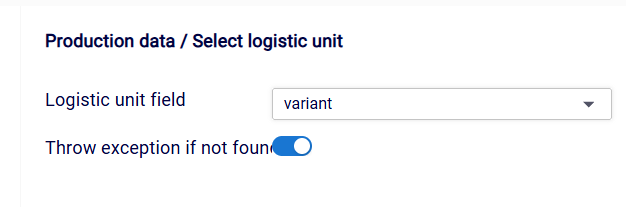
In this example, Logistic unit field is set to custom field variant to match the logistic unit by its variant. Throw exception if not found is enabled, so the scenario raises an error if no matching logistic unit is found.
Limitations
- If multiple logistic units match the input, the first matching record is returned.
Select logistic unit by identifier
This action step identifies and selects a logistic unit from the master data that matches the current coding scenario context. It works like the Select logistic unit step, except that the field used to identify the logistic unit cannot be configured: the logistic unit is always matched by its Unique ID field.
Available only when the Logistic Units feature is enabled.
| Parameter | Type | Description |
|---|
| Throw exception if not found | Mandatory | If enabled, the scenario raises an error when no matching logistic unit is found. |
Examples
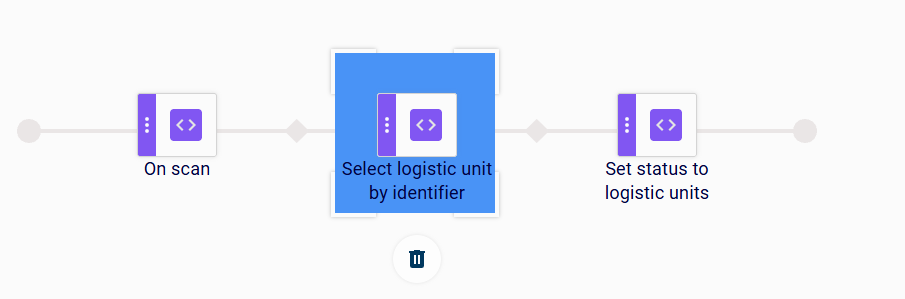
Example 1: Identifying a logistic unit to update its status
When a scan event occurs, the On scan step receives the scan input. The Select logistic unit by identifier step uses that input to find and select the logistic unit whose Unique ID matches. The Set status to logistic units step then updates the status of the selected logistic unit.
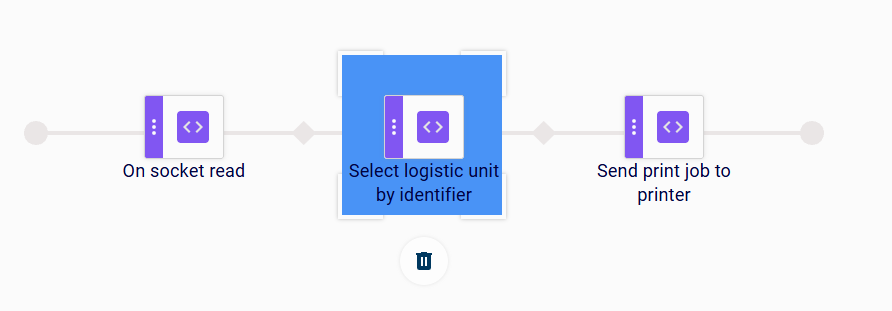
Example 2: Selecting a logistic unit to send a print job
When data is received over a socket connection, the On socket read step receives the input. The Select logistic unit by identifier step uses that input to find and select the logistic unit whose Unique ID matches. The Send print job to printer step then sends the corresponding label to the printer using the data of the identified logistic unit.
Limitations
- If multiple logistic units match the input, the first matching record is returned.
Select logistic unit by status
This action step searches the master data for logistic units that have a selected status and selects exactly one of them. Which unit is selected is determined by a configurable order column and direction: the step returns the logistic unit with either the lowest or the highest value in that column, for example the unit with the lowest NVE/SSCC number. The fields of the selected logistic unit are made available to subsequent steps. Use this step to process logistic units that share the same status in a defined order.
Available only when the Logistic Units feature is enabled.
| Parameter | Type | Description |
|---|
| Status | Mandatory | The status to filter by. |
| Order by column | Mandatory | The column used to order the matching logistic units. |
| Order direction | Mandatory | Whether the step selects the logistic unit with the Lowest value or the Highest value in the order column. |
| Throw exception if not found | Mandatory | If enabled, the scenario raises an error when no logistic unit with the selected status is found. If disabled (default), the scenario stops silently. |
Examples
Example 1: Selecting a logistic unit to send a print job
When a product or production order is assigned to the production line, the Product or order assigned step starts the sequence. The Select logistic unit by status step searches for logistic units with the selected status and selects one of them according to the configured order column and direction. The Send print job to printer step then sends the corresponding label to the printer using the data of the selected logistic unit.

Create logistic unit from ZPL
This action step creates a new logistic unit record from ZPL print data received earlier in the sequence, for example over a socket connection. The unique identifier of the new logistic unit, typically the SSCC, is extracted from the ZPL string using a configurable regular expression. The created logistic unit is persisted and available to subsequent steps, for example to append further data to it.
Available only when the Logistic Units feature is enabled.
| Parameter | Type | Description |
|---|
| Unique field regex | Mandatory | A regular expression that extracts the unique identifier of the logistic unit from the ZPL. The default value is (?<=\(00\))\d{18}, which extracts the 18-digit SSCC that follows the GS1 application identifier (00). The regular expression can be adjusted per scenario step to match the format of the ZPL data. |
Examples
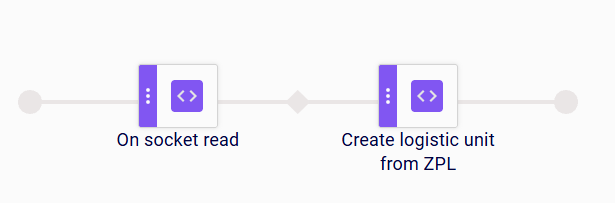
Example 1: Creating a logistic unit from ZPL received over a socket connection
When ZPL data is received over a socket connection, the On socket read step receives the input. The Create logistic unit from ZPL step applies the configured regular expression to the ZPL string, extracts the unique identifier, and creates a new logistic unit with it.
Create logistic unit from printer log
This action step creates a new logistic unit record from a printer log entry. The printer log entry is provided by a preceding print step or by the On printer log trigger step. The unique identifier of the new logistic unit is taken from the configured unique id field, either a layout mapping field or a printer log field. The logistic unit is also initialized with the printed variables, the data of the linked product and production order, the production line it was created on, and the creation timestamp. It is persisted and available to subsequent steps, for example to append further data to it.
| Parameter | Type | Description |
|---|
| Unique id field | Optional | The layout mapping field that provides the unique identifier of the new logistic unit. |
| Unique id field (PrinterLog) | Optional | The printer log field that provides the unique identifier of the new logistic unit. |
| Link product and order | Optional | If enabled, the new logistic unit is linked to the current product and production order. |
| Get production info from printer log | Optional | If enabled, the product and production order to link are identified from printer log fields instead of the current line context. |
| Production order id field (PrinterLog) | Optional | The printer log field that identifies the production order to link. |
| Product id field (PrinterLog) | Optional | The printer log field that identifies the product to link. |
Examples
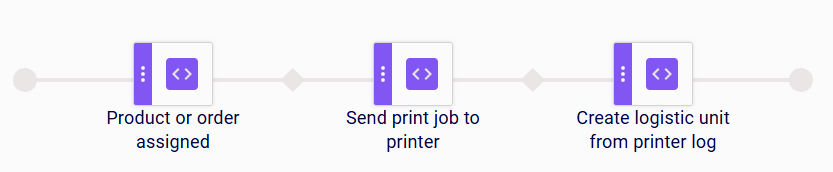
Example 1: Creating a Logistic Unit for Each Printed Label
When a product or production order is assigned to the production line, the Product or order assigned step starts the sequence. The Send print job to printer step sends the label to the printer. The Create logistic unit from printer log step then creates a new logistic unit from the resulting printer log entry, initialized with the printed variables and linked to the current product and production order.
Example 2: Creating Logistic Units for Print Jobs Requested via API
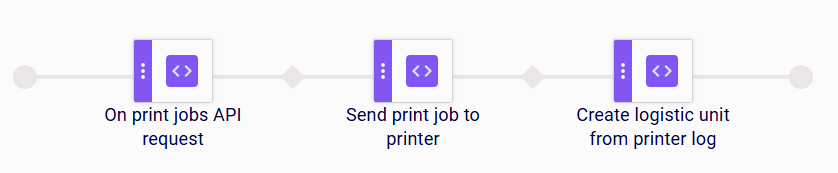
When a print job request is received via the API, the On print jobs API request step triggers the scenario. The Send print job to printer step sends the label to the printer. The Create logistic unit from printer log step then creates a new logistic unit from the printer log entry of the printed label, so every printed label results in a traceable logistic unit.
Limitations
- The step requires a printer log entry in the scenario; place it after a print step or use it with the On printer log trigger step.
Create logistic unit from scan
This action step creates a new logistic unit record from a scanned string. The scanned string is used as the unique identifier of the new logistic unit. If the coding scenario data contains production information, the current product and production order are linked to the created logistic unit. The created logistic unit is persisted and available to subsequent steps for further processing.
Available only when the Logistic Units feature is enabled.
This step has no parameters.
Examples
Example 1: Creating a logistic unit from a scan and updating its status
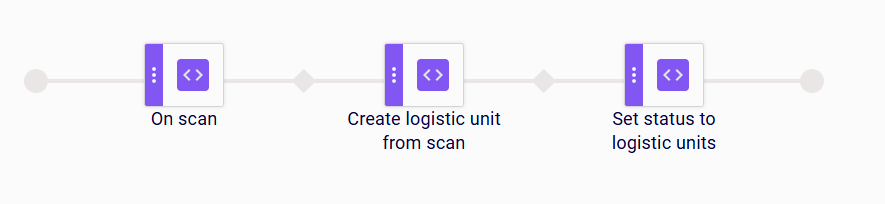
When a scan event occurs, the On scan step receives the scan input. The Create logistic unit from scan step creates a new logistic unit that uses the scanned string as its unique identifier and links it to the current product and production order. The Set status to logistic units step then updates the status of the newly created logistic unit.
Limitations
- The scanned string must be unique, because it is used as the identifier of the logistic unit.
SQL Executor
This action step runs an SQL query against an external database and makes the result available to subsequent steps.
| Parameter | Type | Description |
|---|
| Url | Mandatory | The JDBC URL of the target database. |
| Username | Mandatory | The database user name. |
| Password | Mandatory | The database password. |
| SQL query | Mandatory | The SQL query to execute. |
| First record only | Mandatory | If enabled, only the first record of the result is used. |
Append data to Logistic Unit
This action step takes the value of a layout field that was printed earlier in the sequence and appends it to a field of the last logistic unit created on the production line.
Available only when the Logistic Units feature is enabled.
| Parameter | Type | Description |
|---|
| Layout field | Mandatory | The printed layout field whose value is appended. |
| Logistic unit field | Mandatory | The logistic unit field the value is appended to. |
Examples
Example 1: Appending printed data after a print job import
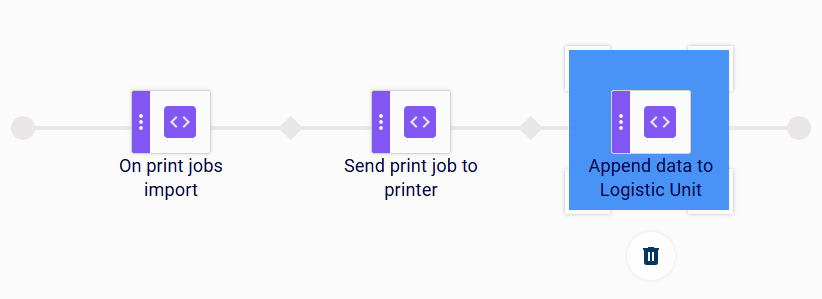
When print jobs are imported, the On print jobs import step receives the print job data. The Send print job to printer step prints the label and makes the printed layout field values available. The Append data to Logistic Unit step then appends the value of the selected layout field to the selected field of the last logistic unit created on the line.
Example 2: Appending printed data to a newly created logistic unit
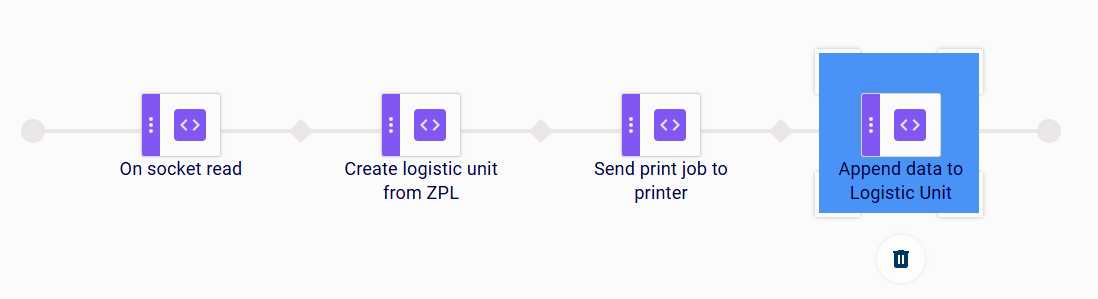
When data is received over a socket connection, the On socket read step receives the input. The Create logistic unit from ZPL step creates a new logistic unit from the ZPL print data. The Send print job to printer step prints the label and makes the printed layout field values available. The Append data to Logistic Unit step then appends the value of the selected layout field to the selected field of the newly created logistic unit, which is the last logistic unit created on the line.
Limitations
- This step uses the printed layout fields as its data source, so it can only be used in a sequence that contains a printing step. If no printing step has run before it, there is no data to append.
- If the selected layout field is not part of the printed data, the step completes without changing the logistic unit.
Assign aggregation to logistic unit
This action step assigns an aggregation layer to the current logistic unit. The logistic unit is created or selected by a preceding step, and the layer defines its position in the configured logistic unit hierarchy, for example Pallet as the upper layer and Box as the layer below it. Assigning the layer is what makes a logistic unit part of that hierarchy: units of a lower layer can then be aggregated under a unit of the layer above, for example by the Link logistic units from FIFO step. Use this step both in the scenario that creates the units to be aggregated and in the scenario that creates the unit they are aggregated under.
| Parameter | Type | Description |
|---|
| Aggregation layer | Mandatory | The layer of the logistic unit hierarchy assigned to the current logistic unit, for example Pallet or Box. The available layers come from the logistic unit layer configuration. |
Examples
Example 1: Assigning the Upper Layer to a Pallet before Aggregating Boxes
When a scan event occurs, the On scan step receives the scan input. The Create logistic unit from scan step creates the logistic unit of the pallet from the scanned value, and the Assign aggregation to logistic unit step assigns the pallet layer to it. The Link logistic units from FIFO step then aggregates the configured number of logistic units under that pallet, and the Flush FIFO step removes the units left in the queue.

Example 2: Assigning the Lower Layer to a Box before Queuing It
When ZPL data is received over a socket connection, the On socket read step receives the input. The Create logistic unit from ZPL step creates the logistic unit of the box from the ZPL print data, and the Assign aggregation to logistic unit step assigns the box layer to it. The FIFO push item step then adds the box to the queue, so that a pallet coding scenario can aggregate it later.

Limitations
- The step requires a logistic unit created or selected by a preceding step; place it after the step that creates or selects the logistic unit.
- The layers available for selection must be defined in the logistic unit layer configuration beforehand.
4 - Layout
Steps that determine which label layout is used for printing and that prepare layout resources.
This tab provides steps that determine which label layout is used for printing and that prepare layout resources.
Identify layout
This action step reads the name of the label layout from a specific column in the master data and assigns it to the print job. The print job is then executed with the layout named in that column, so that each item can be printed with its own layout.
Use this step when the scenario requires a layout that depends on the data being printed, and the single default layout assigned at the printer driver level cannot be used. The step only determines the layout; place it before the step that prints or previews the print data.
| Parameter | Type | Description |
|---|
| Layout name table | Mandatory | The table in the master data that contains the layout name column. |
| Layout name column | Mandatory | The column that contains the name of the label layout. |
Examples
Example 1: Printing an Assigned Product with the Layout of Its Variant
When a product or production order is assigned to the production line, the Product or order assigned step starts the sequence, and the Start Production step transitions the production line into the running state. The Identify layout step then reads the layout name from the configured column in the master data, for example the layout name stored with the assigned product variant, and assigns that layout to the print job. The Send print job to printer step sends the print job to the printer, which prints the label with the layout of that variant.

Example 2: Using the Layout Delivered with a Print Job Received via the API
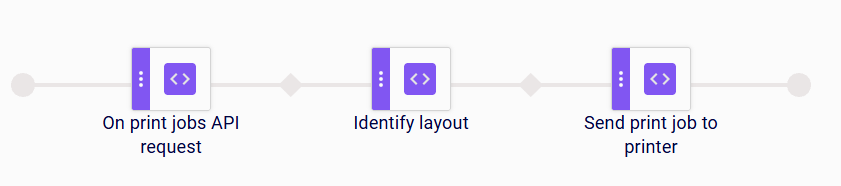
When a print job request is received via the API, the On print jobs API request step triggers the scenario. A print job can also carry the information about the layout it should be printed with, so the Identify layout step reads the layout name from the configured table and column that carry the layout name delivered with the print job, and assigns that layout to it. The Send print job to printer step then sends the print job to the printer, which prints it with the layout delivered in the request.
Limitations
- The step only assigns the layout to the print job; it does not print. To print the label, add a print step such as Send print job to printer or Send print job to all after this step.
- The step must run before the print or preview step that uses the layout.
- The layout name in the configured column must match the name of an existing label layout.
Detect and sync logos
This action step detects which logo files are required for the current print job and synchronizes them to the printer before printing begins.
| Parameter | Type | Description |
|---|
| Logos directory path | Mandatory | The directory that contains the logo files to synchronize. |
5 - Send Print Job(s)
Steps that control the printing process.
This tab provides steps that control the printing process.
Most steps on this tab additionally expose two optional common parameters: Quantity (overrides the number of labels to print) and Print_ACK (request a print acknowledgement). Only the step-specific parameters are listed below.
Send print job to printer
This action step sends a print job to a specific printer assigned to the production line.
| Parameter | Type | Description |
|---|
| Printer | Mandatory | The printer that should execute the print job. |
| Add load logo | Optional | If enabled, a command to load logos is included in the print job. |
Send print job to all
This action step sends a print job simultaneously to all printers assigned to the production line.
| Parameter | Type | Description |
|---|
| Add load logo | Optional | If enabled, a command to load logos is included in the print job sent to all printers. |
Generate printer data set(s)
This action step creates printer data sets in LDF format. Use this step when the printing process requires a pre-generated data file instead of a direct print command.
| Parameter | Type | Description |
|---|
| LDF table | Mandatory | The table that provides the LDF data. |
| LDF column | Mandatory | The column in the LDF table that is used. |
| LDF Collection | Optional | The LDF collection to generate. |
| ANSI->Roman8 | Optional | If enabled, converts ANSI characters to the Roman8 character set. |
| ANSI->PC8 | Optional | If enabled, converts ANSI characters to the PC8 character set. |
| LMF file name | Optional | The name of the LMF file that is created. |
Generate preview
This action step generates a preview of the print data that would be sent to the printer, without executing an actual print job. The step processes the print data exactly as a print step would, so the preview shows the label with its resolved variables and can be used to validate the label content before the print job is actually sent.
Use this step before the actual printing execution to check the data on the label, and during the development and testing of coding scenarios to verify the print data without producing labels.
Because no print job is executed, this step does not increase counters in the master data.
| Parameter | Type | Description |
|---|
| timeOut Exception | Optional | If enabled, the scenario raises an error when the preview is not confirmed within the timeout. |
| TimeOut Time | Optional | The time to wait for the preview before the timeout applies. |
Examples
Example 1: Previewing the Print Data before Printing
When a production is started on the line, the On production started step triggers the scenario. The Identify layout step reads the name of the label layout from the master data, and the Generate preview step generates a preview of the print data so the label content can be checked. The Send print job to printer step then sends the print job to the printer.

Example 2: Testing the Print Data without Printing
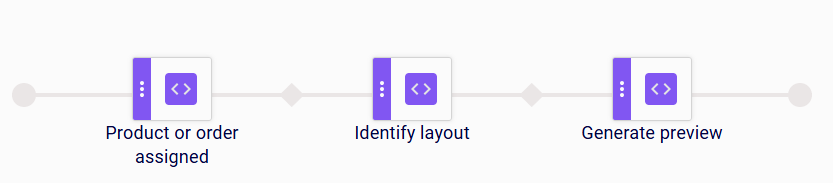
When a product or production order is assigned to the production line, the Product or order assigned step triggers the scenario. The Identify layout step reads the name of the label layout from the master data, and the Generate preview step generates a preview of the print data.
Since the scenario contains no print step, no print job is sent and no counter in the master data is increased. This makes the scenario suitable for testing the print data of a layout during the development of a coding scenario.
Limitations
- The printer driver must support preview jobs. If the driver does not support them, no preview can be generated.
- The step only generates a preview; it does not send a print job. To print the data, add a print step such as Send print job to printer or Send print job to all.
Modify print copies quantity
This step pauses the scenario and prompts the user to confirm or change the number of label copies to print before the print job is sent. It applies to the printers targeted by the scenario (a specific selection, or all printers on the line). Each printer has its own print quantity, and a separate device property controls whether that quantity can be modified by the user; only printers with this property enabled are included in the prompt. The quantity confirmed or changed by the user is then used when the print job is sent. All copies share the same set of variables, for example the same counter value. To generate unique print jobs with their own calculated variables instead, use Modify print job quantity.
| Parameter | Type | Description |
|---|
| timeOut Exception | Optional | If enabled, the scenario raises an error when the user does not respond within the timeout. |
| TimeOut Time | Optional | The time to wait for the user response before the timeout applies. |
Examples
Example 1: Confirming the Print Quantity when Production Starts
When a production is started on the line, the On production started step triggers the scenario. The Generate preview step generates a preview of the print data, and the Modify print copies quantity step then prompts the user to confirm or change the number of copies before the Send print job to printer step sends the print job to the printer.

Example 2: Confirming the Print Quantity when a Product or Order Is Assigned
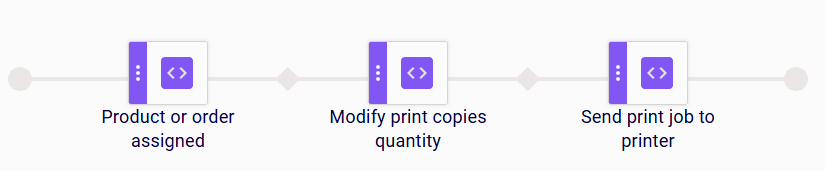
When a product or production order is assigned to the production line, the Product or order assigned step triggers the scenario. The Modify print copies quantity step then prompts the user to confirm or change the number of copies before the Send print job to printer step sends the print job to the printer.
Limitations
- Only printers with the print quantity modification property enabled are included in the prompt; other targeted printers keep their existing quantity unchanged. If none of the targeted printers have this property enabled, no prompt is shown and the step has no effect.
- If the user cancels the prompt, the step is cancelled and the scenario does not continue.
Modify print job quantity
This action step changes the quantity of an existing print job, using the value set through the common Quantity parameter. Unlike Modify print copies quantity, which prints multiple identical copies sharing the same set of variables, this step generates the configured quantity as separate print jobs, each with its own set of calculated variables, for example a different counter value per print job.
This step has no step-specific parameters.
Examples
Example 1: Generating Unique Print Jobs when Production Starts
When a production is started on the line, the On production started step triggers the scenario. The Generate preview step generates a preview of the print data, and the Modify print job quantity step then generates the configured quantity as separate print jobs, each with its own calculated variables. The Send print job to printer step then sends them to the printer.

Example 2: Generating Unique Print Jobs when a Product or Order Is Assigned
When a product or production order is assigned to the production line, the Product or order assigned step triggers the scenario. The Modify print job quantity step then generates the configured quantity as separate print jobs, each with its own calculated variables, and the Send print job to printer step then sends them to the printer.

Limitations
- To print multiple identical copies of the same print job instead, use Modify print copies quantity.
Resume production
This action step resumes a paused or interrupted production by re-sending the print job to the printer. The printer is reloaded with exactly the same print job data as before the interruption, so production continues without loss or change of print data.
When the step is executed, a popup prompts the user to select the printer that should be reloaded with the print data. Optionally, the user can check the modifiable variables before the print job is re-sent.
| Parameter | Type | Description |
|---|
| Quantity | Optional | Overrides the number of labels to print for the re-sent print job. |
| Print_ACK | Optional | If enabled, a print acknowledgement is requested from the printer. |
Examples
Example 1: Resuming Production after a Product Reload
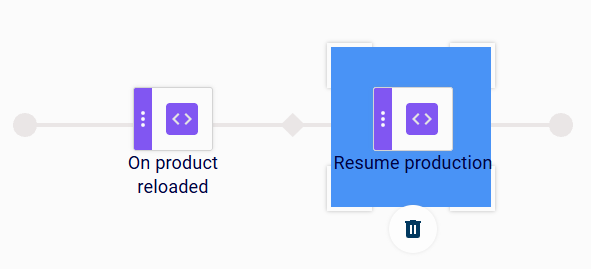
When the active product on the production line is reloaded, the On product reloaded step triggers the scenario. The Resume production step then prompts the user to select the printer that should be reloaded and re-sends the print job to it.
The printer continues production with exactly the same print data as before the reload.
Example 2: Resuming Production on an I/O Signal
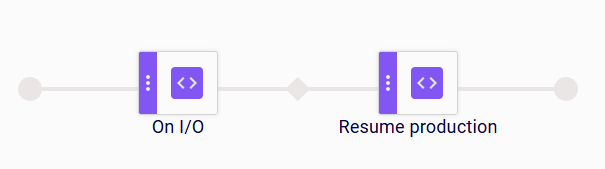
When an I/O device emits a signal, the On I/O step receives and validates the signal. The Resume production step then prompts the user to select the printer that should be reloaded and re-sends the print job to it.
The printer continues production with exactly the same print data as before the interruption.
Limitations
- The step can only re-send a print job that was previously sent; it does not generate new print data.
Send command to device
This action step sends a command to a device when a configured condition is met.
| Parameter | Type | Description |
|---|
| Device | Mandatory | The device the command is sent to. |
| Condition table | Mandatory | The table that provides the value evaluated by the condition. |
| Condition field | Mandatory | The field evaluated by the condition. |
| Condition regexp | Optional | A regular expression the field value must match for the command to be sent. |
| Command template | Mandatory | The template of the command to send. |
| Stop on error | Mandatory | If enabled, the scenario stops when the command cannot be sent. |
Send simple template to device worker
This action step sends a simple command template to a device.
| Parameter | Type | Description |
|---|
| Device | Mandatory | The device the command is sent to. |
| Command template | Mandatory | The template of the command to send. |
| Stop on error | Mandatory | If enabled, the scenario stops when the command cannot be sent. |
Reprint printer log
This action step reprints a previously printed label from the printer log, optionally prompting the user to choose the printer and layout.
| Parameter | Type | Description |
|---|
| Printer popup | Optional | If enabled, the user is prompted to choose the printer for the reprint. |
| Printer | Optional | The printer used for the reprint when no popup is shown. |
| Layout popup | Optional | If enabled, the user is prompted to choose the layout for the reprint. |
| Layout | Optional | The layout used for the reprint when no popup is shown. |
6 - Event
Trigger steps that react to changes in master data, production state changes, or the completion of system tasks.
This tab provides trigger steps that react to changes in master data, to production state changes, or to the completion of system tasks.
On product change
This trigger step pauses the scenario until a change in the product master data is detected.
This step has no parameters.
On order change
This trigger step pauses the scenario until a change in the production order master data is detected.
This step has no parameters.
On product or order change
This trigger step pauses the scenario until a change in either the product master data or the production order master data is detected.
This step has no parameters.
On data import
This trigger step pauses the scenario until a specific import task has been executed. Optionally, the trigger can be restricted to successful imports only.
| Parameter | Type | Description |
|---|
| Import interface | Mandatory | The import task that this step listens to. |
| Start by success | Optional | If enabled, the step only triggers when the import task completed successfully. If disabled, the step triggers regardless of the import result. |
On print jobs import
This trigger step pauses the scenario until a print job import task has been executed. It triggers both when a new print job is imported into the database and when an existing print job’s status is reset to pending.
This step has no parameters.
Examples
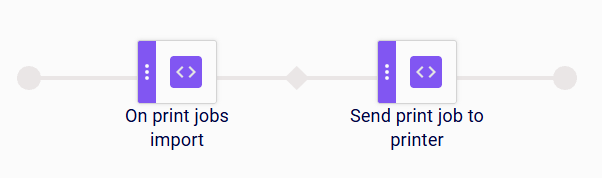
Example 1: Printing an Imported Print Job
When a print job import task has been executed, the On print jobs import step triggers the scenario. The Send print job to printer step then sends the imported print job to the printer.
Example 2: Printing an Imported Print Job to All Printers
When a print job import task has been executed, the On print jobs import step triggers the scenario. The Identify layout step reads the name of the label layout from the master data, the Generate preview step generates a preview of the print data, and the Send print job to all step then sends the print job to all printers assigned to the line.

On print jobs API request
This trigger step is activated when a print job is received through an external API request. The minimum required information to submit a print job request is the productionLineName field, which identifies the target production line. The printing workflow that follows is configured with coding scenario steps, the same way as a standard print workflow. The API response is returned at the moment the scenario finishes.
This step has no parameters.
Examples
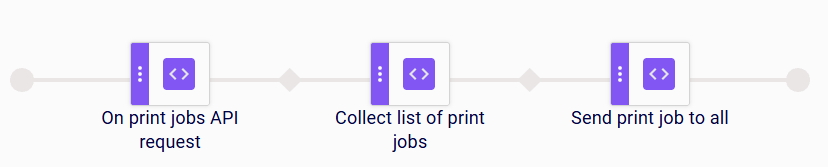
Example 1: Printing All Pending Print Jobs when One Is Requested via API
When a print job request is received via the API, the On print jobs API request step triggers the scenario. The Collect list of print jobs step then collects and triggers all pending print jobs, and the Send print job to all step sends them to all printers assigned to the line. The API response still includes only the print job created by the current request.
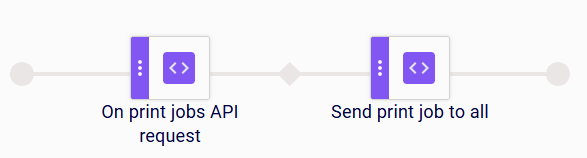
Example 2: Printing Only the Requested Print Job via API
When a print job request is received via the API, the On print jobs API request step triggers the scenario. Without a Collect list of print jobs step in the sequence, the Send print job to all step sends only the print job from the current request, and no other pending print jobs are processed.
Limitations
- If the request is not completed within the configured timeout and a timeout exception is returned, any print jobs and printing results already created up to that point are still persisted in the database; this method is not transactional, so partial results are retained regardless of whether the request completed successfully.
On exception
This trigger step is activated when a preceding step in the coding scenario raises an error. Use it to define the recovery actions that run when a scenario fails, so the error can be handled in a controlled way instead of interrupting production unexpectedly.
| Parameter | Type | Description |
|---|
| Coding scenarios | Optional | The coding scenarios this exception handler listens to. If left empty, the handler applies to any coding scenario. |
| Silent error handling | Mandatory | If enabled, the error is handled silently: no alarm is raised and the user does not receive a toast notification. If disabled, the error is reported as a toast notification is shown to the user. |
| Exception type | Optional | Restricts the handler to a specific exception type. If left empty, the handler reacts to any exception. |
Examples
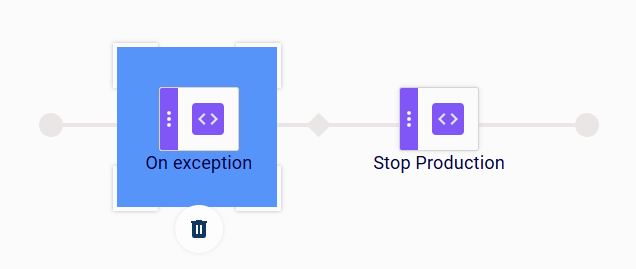
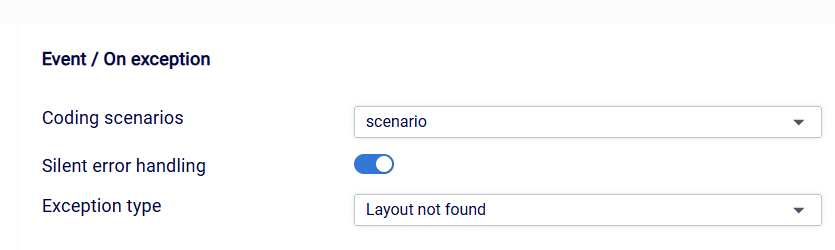
Example 1: Stopping production on exception
The On exception step is configured to react to the scenario coding scenario, with Silent error handling enabled and the Exception type restricted to Layout not found. When that scenario raises a Layout not found error, the exception is handled silently and the Stop Production step stops the production line.
Example 2: Sending a command on exception
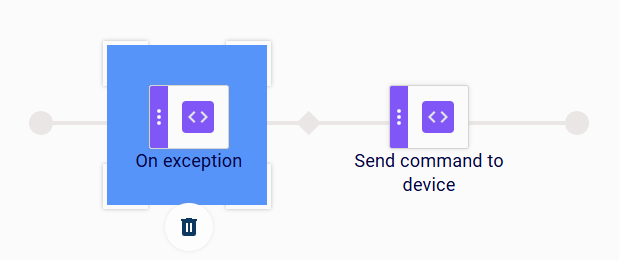
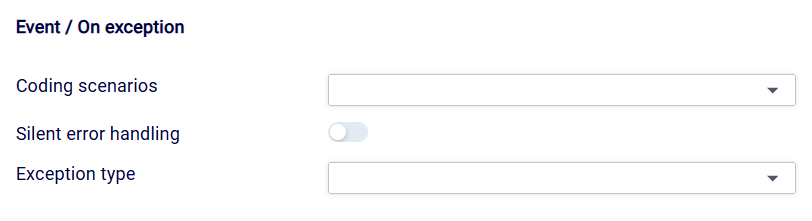
The On exception step is configured with no restrictions: Coding scenarios and Exception type are left empty, and Silent error handling is disabled. As a result, the handler reacts to any exception raised by any coding scenario and reports it as a notification. When an exception occurs, the Send command to device step sends a command to the connected device.
Product or order assigned
This trigger step pauses the scenario until a product or production order is assigned to the production line.
This step has no parameters.
On production started
This trigger step pauses the scenario until the production line transitions to the started state. It also makes all information linked to the production available to subsequent steps in the scenario — the product, the production order, and any other data associated with the production run.
This step has no parameters.
Examples
Example 1: Printing a Label when Production Starts
When a production is started on the line, the On production started step triggers the scenario and makes the production data available. The Identify layout step reads the name of the label layout from the master data, the Generate preview step generates a preview of the print data, and the Send print job to printer step then sends the print job to the printer.

Example 2: Printing Collected Print Jobs when Production Starts
When a production is started on the line, the On production started step triggers the scenario. The Collect list of print jobs step retrieves a filtered list of print jobs from the master data, and the Send print job to printer step then sends them to the printer.

On production stopped
This trigger step reacts to the stop production event: the scenario is triggered when a production is stopped on the production line.
This step has no parameters.
Examples
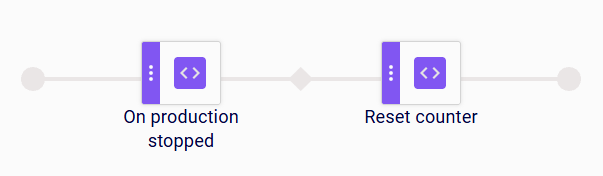
Example 1: Resetting a Counter when Production Stops
When a production is stopped on the line, the On production stopped step triggers the scenario. The Reset counter step then sets the selected counter back to its start value, so counting starts fresh for the next production run.
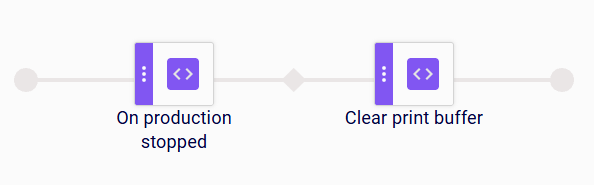
Example 2: Clearing the Print Buffer when Production Stops
When a production is stopped on the line, the On production stopped step triggers the scenario. The Clear print buffer step then clears the pending print data on the selected printer, so leftover print jobs are not printed when the next production starts.
On production paused
This trigger step reacts to the pause production event: the scenario is triggered when a production is paused on the production line.
This step has no parameters.
Examples
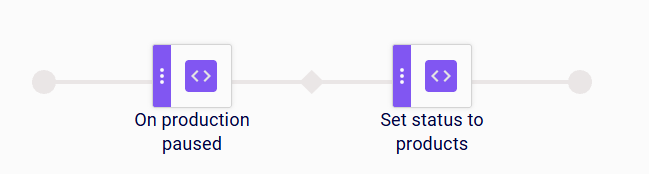
Example 1: Setting a Product Status when Production Is Paused
When a production is paused on the line, the On production paused step triggers the scenario. The Set status to products step then sets the configured status on the current products, for example to mark them as on hold while the production is paused.
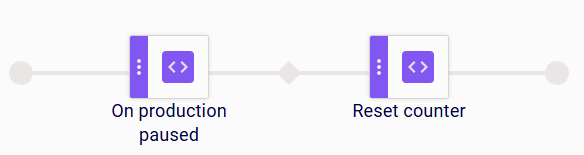
Example 2: Resetting a Counter when Production Is Paused
When a production is paused on the line, the On production paused step triggers the scenario. The Reset counter step then sets the selected counter back to its start value.
On product reloaded
This trigger step reacts to the reload event on the production line: the scenario is triggered when the active product is reloaded without a production order. It also makes the reloaded production information available to subsequent steps in the scenario. Use On production order reloaded instead for reloads where a production order is assigned.
This step has no parameters.
Examples
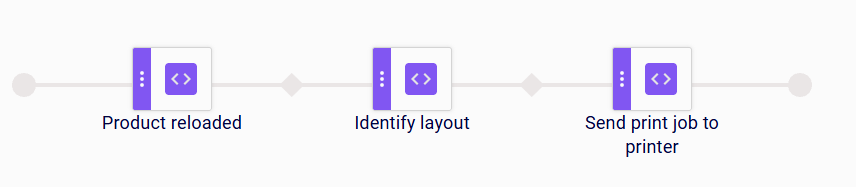
Example 1: Printing a Label when the Product Is Reloaded
When the active product on the production line is reloaded, the On product reloaded step triggers the scenario and makes the production data available. The Identify layout step reads the name of the label layout from the master data, and the Send print job to printer step then sends the print job to the printer.
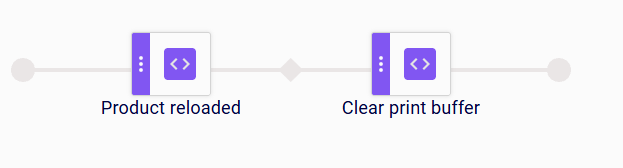
Example 2: Clearing the Print Buffer when the Product Is Reloaded
When the active product on the production line is reloaded, the On product reloaded step triggers the scenario. The Clear print buffer step then clears the pending print data on the selected printer, so leftover print jobs are not printed for the reloaded product.
Limitations
- The step only triggers when the reload happens without a production order assigned. If a production order is assigned, use On production order reloaded instead.
On production order reloaded
This trigger step reacts to the reload event on the production line, restricted to reloads where a production order is assigned: the scenario is triggered when the active production order is reloaded. It also makes the reloaded production information available to subsequent steps in the scenario. Use On product reloaded instead for reloads where no production order is assigned.
This step has no parameters.
Examples
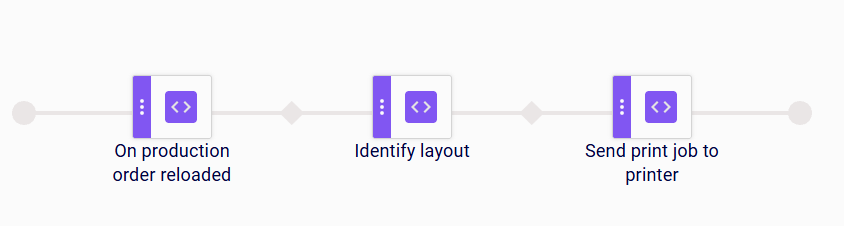
Example 1: Printing a Label when the Production Order Is Reloaded
When the active production order on the production line is reloaded, the On production order reloaded step triggers the scenario and makes the production data available. The Identify layout step reads the name of the label layout from the master data, and the Send print job to printer step then sends the print job to the printer.
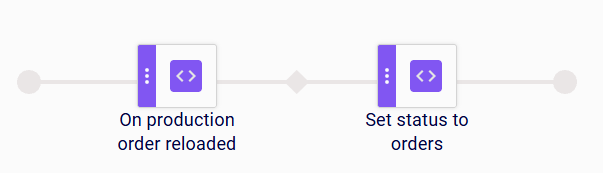
Example 2: Updating the Status when a Production Order Is Reloaded
When a production order is reloaded on the line, the On production order reloaded step triggers the scenario. The Set status to orders step then sets the selected status on the current production order.
On printer log
This trigger step reacts to the arrival of a new printer log entry: the scenario is triggered when a new entry is created in the printer log. It also makes the printer log entry from the event available to subsequent steps in the scenario.
This step has no parameters.
Examples
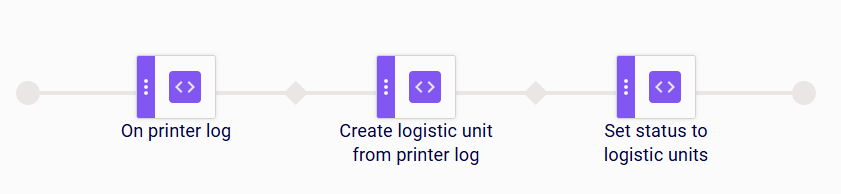
Example 1: Creating a Logistic Unit from a Printer Log Entry
When a new printer log entry arrives, the On printer log step triggers the scenario. The Create logistic unit from printer log step then creates a logistic unit from the entry, and the Set status to logistic units step sets the selected status on the newly created logistic unit.
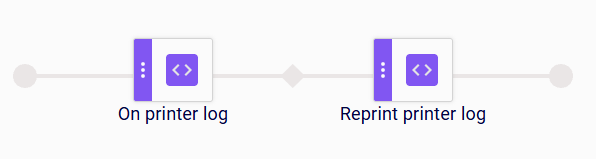
Example 2: Reprinting a Label from the Printer Log in a Global Scenario
In a Global scenario, when a new printer log entry arrives, the On printer log step triggers the scenario. The Reprint printer log step then reprints the label from that printer log entry.
Limitations
On reprint printer log
This trigger step pauses the scenario until a reprint is requested from the printer log.
This step has no parameters.
On resource file import
This trigger step pauses the scenario until a resource file import task has finished.
This step has no parameters.
7 - Production
Steps that control or check the production state of the production line.
This tab provides steps that control or check the production state of the production line.
Start Production
This action step starts the production process on the production line.
This step has no parameters.
Stop Production
This action step stops the production process on the production line.
This step has no parameters.
Check If Production Running
This action step verifies that the production line is currently running.
If the production line is not running, the workflow execution is canceled and no further actions are performed.
This step has no parameters.
Examples
Example 1: Verifying Production State before Sending a Print Job
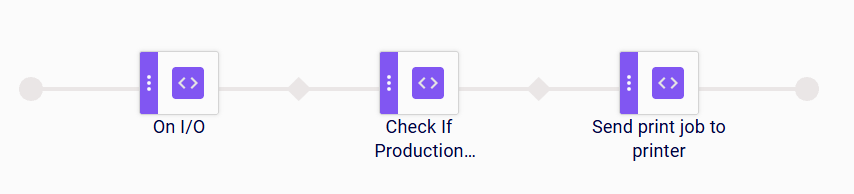
When an I/O device emits a signal, the On I/O step receives and validates the signal. The Check If Production Running step then verifies whether there is an active production associated with the line linked to this coding scenario.
If a production is running, the Send Print Job to Printer step sends the corresponding label to the printer assigned to the line.
If no production is running, the scenario terminates at this point, and the Send Print Job to Printer step is skipped.
Example 2: Verifying Production State before Updating Logistic Unit Status
When a scan event occurs, the On scan step receives the scan input. The Select logistic unit step identifies and selects the corresponding logistic unit. The Check If Production Running step then verifies whether there is an active production associated with the line linked to this coding scenario.
If a production is running, the Set status to logistic units step updates the status of the selected logistic unit.
If no production is running, the scenario terminates at this point, and the Set status to logistic units step is skipped.

Limitations
- Only checks the production associated with the line on which the coding scenario is being performed.
8 - Output
Steps that write data back to the system or expose it to external systems.
This tab provides steps that write data back to the system or expose it to external systems.
Expose product
This action step exposes product information to an external system or output target.
This step has no parameters.
Expose Logistic Unit
This action step exposes logistic unit information to an external system or output target.
This step has no parameters.
9 - FIFO Queue
Steps that manage a first-in, first-out data queue.
This tab provides steps that manage a first-in, first-out data queue. Use these steps when you need to buffer and process data in the order it was received.
FIFO push item
This action step adds the current Item (production order, product, logistic unit) to the end of a FIFO queue. The item is the one available at the point where the step runs, for example a logistic unit created by a preceding step. Because the queue is shared, the record stays available beyond the coding scenario that added it: another scenario can retrieve the queued item later with the FIFO get item step, in the same order they were added. Use this step to hand data over to a scenario that processes it at a later point in the production process.
| Parameter | Type | Description |
|---|
| FIFO Queue | Mandatory | The queue the record is added to. |
Examples
Example 1: Queuing a Logistic Unit for Later Processing
When ZPL data is received over a socket connection, the On socket read step receives the input. The Create logistic unit from ZPL step creates a logistic unit from the ZPL print data, and the Assign aggregation to logistic unit step assigns the aggregation layer to it. The FIFO push item step then adds the logistic unit to the end of the queue, so that another coding scenario can process it later.

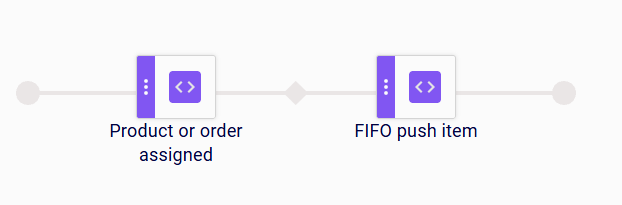
Example 2: Buffering the Current Data Item When a Product or Order Is Assigned
When a product or production order is assigned to the production line, the Product or order assigned step starts the sequence. The FIFO push item step then adds the current item to the end of the queue, so that it can be retrieved and processed in the order it was received.
Limitations
- The step adds the item that is available where it runs; place it after the step that creates or selects the item to be queued.
- Records remain in the queue until another step retrieves or removes them.
FIFO get item
This action step retrieves the next data record from the front of a FIFO queue and makes it available to subsequent steps. The record is not removed from the queue; it stays at the front until a FIFO delete item step removes it. The retrieved data is available to the following steps like any other data record in the scenario, so it can also be used for printing: a Send print job to printer step placed after this step sends the queued record to the printer as a print job. Use this step to process buffered records in the order they were added.
| Parameter | Type | Description |
|---|
| FIFO Queue | Mandatory | The queue the record is read from. |
Examples
Example 1: Printing the Next Queued Record When a Product Is Reloaded
When the active product on the production line is reloaded, the On product reloaded step triggers the scenario. The FIFO get item step retrieves the next record from the front of the queue and makes its data available, and the Send print job to printer step then sends that data to the printer as a print job. The FIFO delete item step finally removes the processed record from the queue.

Example 2: Updating the Next Queued Record When a Production Is Stopped
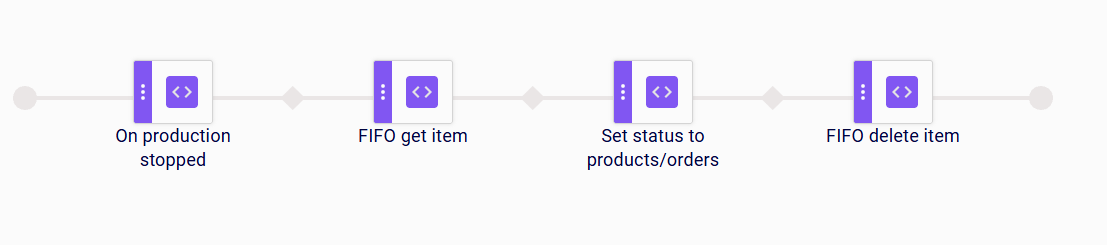
When a production is stopped on the line, the On production stopped step triggers the scenario. The FIFO get item step retrieves the next record from the front of the queue and makes its data available, and the Set status to products/orders step then sets the configured statuses on the products and production orders of that record. The FIFO delete item step finally removes the processed record from the queue.

Limitations
- The step always retrieves the record at the front of the queue; it cannot select a specific record.
- The step does not remove the record it retrieves. Place a FIFO delete item step after the steps that process it, otherwise the same record is retrieved again the next time the scenario runs.
FIFO delete item
This action step removes a record from a FIFO queue.
| Parameter | Type | Description |
|---|
| FIFO Queue | Mandatory | The queue the record is removed from. |
Examples
Example 1: Removing a Processed Record when Production Stops
When a production is stopped on the line, the On production stopped step triggers the scenario. The FIFO get item step retrieves the next record from the front of the queue, and the Set status to products/orders step sets the configured statuses on the products and production orders of that record. The FIFO delete item step then removes the record from the queue, so it is not processed again.
Example 2: Removing a Record after Its Label Has Been Printed
When a production is started on the line, the On production started step triggers the scenario. The FIFO get item step retrieves the next record from the front of the queue, and the Send print job to printer step sends the corresponding label to the printer. The FIFO delete item step then removes the record from the queue, so it is not printed again.

Limitations
- The step removes one record per execution.
- Retrieving a record with FIFO get item does not remove it from the queue. Without FIFO delete item, the record stays in the queue and is retrieved again on the next run.
- The step only removes the record from the queue. It does not delete the underlying master data.
Link logistic units from FIFO
This action step aggregates logistic units that are buffered in a FIFO queue under a pallet, for
example the boxes that belong to that pallet. It is used in pallet coding scenarios: the logistic
unit of the pallet is created or selected by a preceding step, and this step then pulls the
configured number of logistic units off the queue in FIFO order and assigns the pallet’s logistic
unit as their parent. Because the units are pulled off the queue, each buffered unit is aggregated
under exactly one pallet.
| Parameter | Type | Description |
|---|
| FIFO Queue | Mandatory | The queue the logistic units are pulled from. |
| Number of logistic units | Optional | The number of logistic units pulled off the queue per pallet. If empty - pulled whole queue |
| Throw exception if not enough units | Mandatory | If enabled, the scenario raises an error when the queue holds fewer logistic units than configured. If disabled, the step proceeds with the units actually available, for example for the last, partial pallet of a production run. |
Examples
Example 1: Aggregating Logistic Units under a Newly Created Pallet
When a scan event occurs, the On scan step receives the scan input. The Create logistic unit from scan step creates the logistic unit of the pallet from the scanned value, and the Assign aggregation to logistic unit step assigns the aggregation to it. The Link logistic units from FIFO step then pulls the configured number of logistic units off the queue in FIFO order and assigns the newly created logistic unit as their parent.

Example 2: Aggregating Logistic Units under an Existing Pallet
When a scan event occurs, the On scan step receives the scan input. The Select logistic unit step uses that input to find and select the logistic unit of the pallet from the master data. The Link logistic units from FIFO step then pulls the configured number of logistic units off the queue in FIFO order and assigns the selected logistic unit as their parent.
Limitations
- The step is available in pallet coding scenarios only.
- The step requires the logistic unit of the pallet to be created or selected by a preceding step; place it after the step that creates or selects it.
- The logistic units to aggregate must be added to the queue beforehand, for example by a FIFO push item step in the coding scenario that creates them.
Flush FIFO
This action step clears a FIFO queue: it removes all records currently queued, regardless of their type. When the queue buffers logistic units for aggregation, the queued units are discarded without being assigned to any pallet. Use this step for error recovery or for end-of-run cleanup, so that the next production run starts with an empty queue.
| Parameter | Type | Description |
|---|
| FIFO Queue | Mandatory | The queue that is cleared. |
Examples
Example 1: Clearing the Queue after Aggregating a Newly Created Pallet
When a scan event occurs, the On scan step receives the scan input. The Create logistic unit from scan step creates the logistic unit of the pallet from the scanned value, and the Assign aggregation to logistic unit step assigns the aggregation to it. The Link logistic units from FIFO step aggregates the configured number of logistic units under that pallet. The Flush FIFO step then removes the units left in the queue, so they are not aggregated under the next pallet.

Example 2: Clearing the Queue after Aggregating an Existing Pallet
When a scan event occurs, the On scan step receives the scan input. The Select logistic unit step uses that input to find and select the logistic unit of the pallet from the master data. The Link logistic units from FIFO step aggregates the configured number of logistic units under that pallet. The Flush FIFO step then removes the units left in the queue, so they are not aggregated under the next pallet.

Limitations
- The step clears the entire queue at once. To remove a single record, use FIFO delete item.
- Records removed by this step are discarded and are not assigned to any pallet.
10 - OPC-UA
Steps that integrate with OPC-UA compatible devices and systems.
This tab provides steps that integrate with OPC-UA compatible devices and systems.
On opcua
This trigger step pauses the scenario until a signal is received from a specific OPC-UA node.
| Parameter | Type | Description |
|---|
| OPCUA device | Mandatory | The OPC-UA device that this step listens to. |
| Node id | Mandatory | The node id of the OPC-UA item that this step listens to. |
On opcua value match
This trigger step pauses the scenario until the value of a specific OPC-UA node matches an expected value.
| Parameter | Type | Description |
|---|
| OPCUA device | Mandatory | The OPC-UA device that this step listens to. |
| Node id | Mandatory | The node id of the OPC-UA item that is monitored. |
| Expected value | Mandatory | The value the node must reach to trigger this step. |
| Ignore case | Mandatory | If enabled, the value comparison ignores letter case. |
Write PLC values
This action step writes a fixed, configured value to an OPC-UA node. Use it when the value to write is always the same, unlike Write database value to OPC UA node, which writes a value read from the database.
| Parameter | Type | Description |
|---|
| PLC device | Mandatory | The PLC device to write to. |
| Node id | Mandatory | The node id of the OPC-UA item to write to. |
| OPC UA node value | Mandatory | The value to write to the node. |
Examples
Example 1: Writing a Fixed Value when Production Starts via OPC-UA
When a signal is received from the configured OPC-UA node, the On opcua step triggers the scenario. The Start Production step starts production on the line, and the Send print job to printer step sends the label to the printer. The Write OPC UA values step then writes the configured value to the target node.

Read PLC values
This action step reads the current value of a PLC item on demand and makes it available to subsequent steps in the same scenario run. Unlike the On opcua and On opcua value match trigger steps, which wait for a value to change, this step actively reads the value at the moment it is executed. Use it when the production line exposes a product or order identifier as a PLC value, and a subsequent step, for example Select product or Select production order, needs this value to find the matching record in the master data.
The step works with both OPC-UA and Modbus devices, in the same way as the Write PLC values step.
| Parameter | Type | Description |
|---|
| PLC device | Mandatory | The PLC device to read from. This can be an OPC-UA or a Modbus device. |
| Node id | Mandatory | The item to read: the node id of an OPC-UA device or the register of a Modbus device. |
Examples
Example 1: Selecting a Product based on a PLC Value
When the value of the configured PLC item matches the expected value, the On PLC value match step triggers the scenario. The Read PLC values step reads the current product identifier from the PLC. The Select product step uses this value to identify the matching product from the master data, and the Send print job to printer step sends the label to the printer. The Write database value to OPC UA node step then writes the selected column of the product back to the configured node.

Example 2: Selecting a Production Order based on a PLC Value
When a signal is received from the configured PLC item, the On PLC step triggers the scenario. The Write PLC values step writes a fixed value to the PLC, for example to reset an error flag. The Read PLC values step reads the current order identifier from the PLC. The Select production order step uses this value to identify the matching production order from the master data. The SQL Executor step then runs an SQL query against an external database, for example to store data of the selected production order.

Limitations
- If the read fails (e.g. the device or item is unreachable), the step fails and the error is reported in the scenario logs.
Write database value to OPC UA node
This action step writes a value from a database table to an OPC-UA node. Use it to share production data, for example production order or logistic unit information, with external PLCs and devices during the print process. When the step is executed, the current value of the selected column for the currently selected record is written to the selected node.
| Parameter | Type | Description |
|---|
| DB table | Mandatory | The database table containing the value to write: Product, Production Order, Logistic Unit, ect. |
| DB column | Mandatory | The column of the selected table whose current value is written to the node. |
| OPCUA device | Mandatory | The OPC-UA device to write to. |
| Node id | Mandatory | The node id of the OPC-UA item to write to. The list shows the nodes configured for the selected device. |
Examples
Example 1: Sharing Production Data after Printing
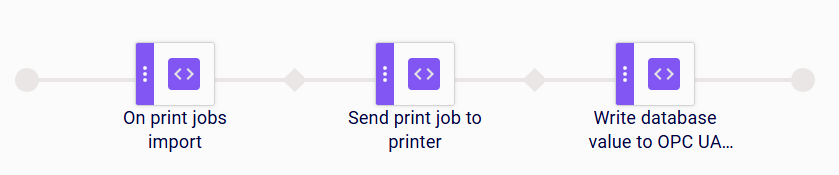
When print jobs are imported, the On print jobs import step triggers the scenario. The Send print job to printer step sends the label to the printer. The Write database value to OPC UA node step then writes the current value of the selected column, for example from the production order, to the configured OPC-UA node.
Example 2: Sharing Logistic Unit Data with a PLC
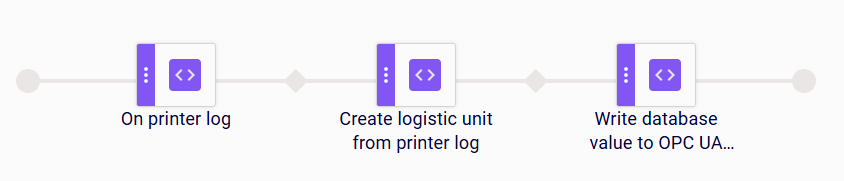
When a new printer log entry arrives, the On printer log step triggers the scenario. The Create logistic unit from printer log step creates a logistic unit from the log entry. The Write database value to OPC UA node step then writes the selected column of the logistic unit, for example its identifier, to the configured OPC-UA node.
Limitations
- If the write fails (e.g. the node is unreachable or the value type does not match the node’s type), the step fails and the error is reported in the scenario logs.
11 - Other
Utility steps for miscellaneous functions in a coding scenario.
This tab provides utility steps for miscellaneous functions in a coding scenario.
Sync files on all printers
This action step synchronizes all resource files (layouts, fonts, logos) to all hardware devices assigned to the production line. Use this step after a resource update to ensure all printers have the latest files before a print job is sent.
This step has no parameters.
Pause
This action step delays the execution of the next step by a number of seconds. Use it to introduce a deliberate wait between actions, for example to give hardware time to complete an operation.
| Parameter | Type | Description |
|---|
| Sleep (sec) | Optional | The number of seconds the scenario waits before executing the next step. Defaults to 2 seconds. |
Fragment data by position
This action step extracts a fragment from the input data, identified by a start position and a length.
| Parameter | Type | Description |
|---|
| Start Position | Mandatory | The zero-based position in the input where the fragment begins. |
| Length | Mandatory | The number of characters to extract. |
Extract data by position
This action step extracts a substring from the input data by position and stores it under a named key for later steps.
| Parameter | Type | Description |
|---|
| Start Position | Mandatory | The position in the input where the extraction begins. |
| Length | Mandatory | The number of characters to extract. |
| Key | Mandatory | The name under which the extracted value is stored. |
Check scenario variable
This action step validates a scenario variable against an expected value. If the value does not match, the scenario stops and an error is reported.
| Parameter | Type | Description |
|---|
| Key | Mandatory | The scenario variable to check. |
| Expected Value | Mandatory | The value the variable must have. |
Checking scanned data against printed data
This action step compares the data scanned after printing against the data that was printed, to verify the label was produced correctly.
| Parameter | Type | Description |
|---|
| Layout fields | Mandatory | The layout fields compared against the scanned data. |
Filter products by line
This action step filters the available products to those valid for the current production line.
| Parameter | Type | Description |
|---|
| Line info source | Mandatory | The source of the line information used to filter products. |
Set status to products/orders
This action step sets a status value on the current products and production orders in a single step.
Available only when the Status feature is enabled.
| Parameter | Type | Description |
|---|
| Status for products | Mandatory | The status to set on the products. |
| Status for production orders | Mandatory | The status to set on the production orders. |
Examples
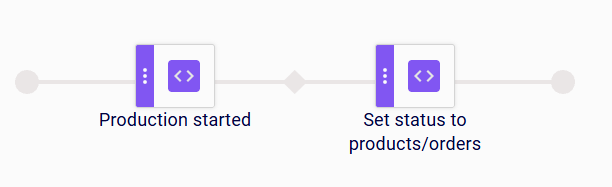
Example 1: Setting a Status when Production Starts
When a production is started on the line, the On production started step triggers the scenario. The Set status to products/orders step then sets the configured statuses on the current products and production orders.
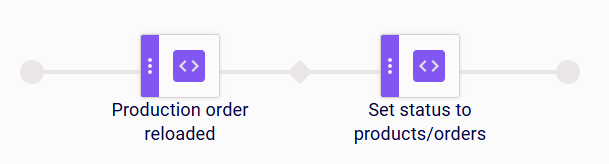
Example 2: Setting a Status when a Production Order Is Reloaded
When a production order is reloaded on the line, the On production order reloaded step triggers the scenario. The Set status to products/orders step then sets the configured statuses on the current products and production orders.
Limitations
- The status for products or production orders is only set if they are available in the coding scenario context (production data); otherwise it is skipped and the step does not fail.
Set status to products
This action step sets a status value on the current products.
Available only when the Status feature is enabled.
| Parameter | Type | Description |
|---|
| Status for product | Mandatory | The status to set on the products. |
Examples
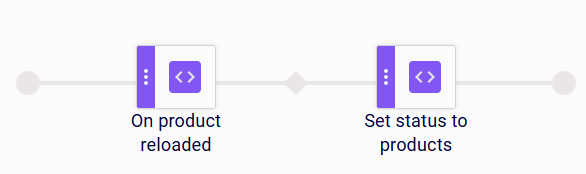
Example 1: Setting a Status when the Product Is Reloaded
When the active product on the production line is reloaded, the On product reloaded step triggers the scenario. The Set status to products step then sets the configured status on the current products.
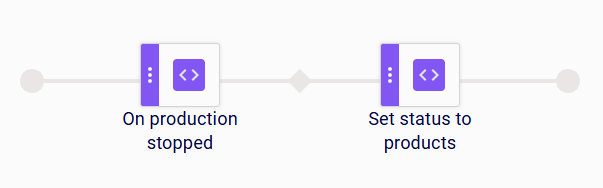
Example 2: Setting a Status when Production Stops
When a production is stopped on the line, the On production stopped step triggers the scenario. The Set status to products step then sets the configured status on the current products.
Limitations
- The status is only set if products are available in the coding scenario context (production data); otherwise it is skipped and the step does not fail.
Set status to orders
This action step sets the selected status on the current production orders. The production orders are identified by the current line context or by a preceding step in the sequence. The new status is persisted, so subsequent steps and other scenarios work with the updated status. Use this step to track the state of production orders along the production process.
Available only when the Status feature is enabled.
| Parameter | Type | Description |
|---|
| Status for production orders | Mandatory | The status to set on the production orders. |
Examples
Example 1: Updating the Status when a Production Order Is Reloaded
When a production order is reloaded on the line, the On production order reloaded step triggers the scenario. The Set status to orders step then sets the selected status on the current production order.
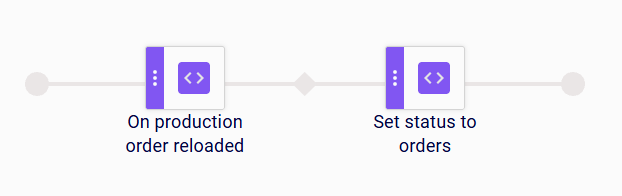
Example 2: Marking a Production Order after an Exception
When an exception occurs during scenario execution, the On exception step triggers the scenario. The Select production order step identifies the affected production order from the master data. The Set status to orders step then sets the selected status on that production order, for example to mark it for review after the error.
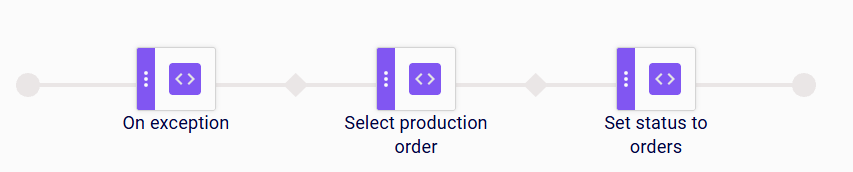
Limitations
- The step requires a production order identified by the current line context or a preceding step.
Set status to logistic units
This action step sets the selected status on the current logistic units. The logistic units are identified or created by a preceding step in the sequence. The new status is persisted, so subsequent steps and other scenarios work with the updated status, for example the Check logistic unit status step. Use this step to track the state of logistic units along the production process.
Available only when the Logistic Units feature is enabled.
| Parameter | Type | Description |
|---|
| Status for logistic units | Mandatory | The status to set on the logistic units. |
Examples
Example 1: Updating the Status of a Scanned Logistic Unit
A scanner on the production line reads a barcode from an incoming item. The On scan step receives the scanned value, and the Select logistic unit step selects the matching logistic unit. The Set status to logistic units step then sets the selected status on that logistic unit.
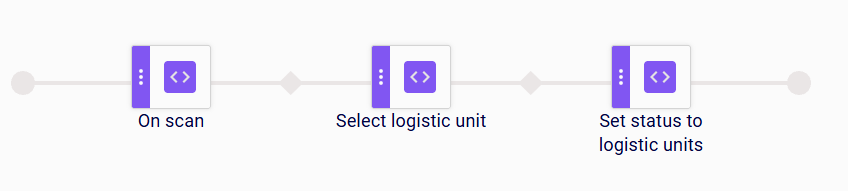
Example 2: Setting an Initial Status on a Newly Created Logistic Unit
When a product or production order is assigned to the production line, the Product or order assigned step starts the sequence. The Send print job to printer step sends the label to the printer, and the Create logistic unit from printer log step creates a new logistic unit from the resulting printer log entry. The Set status to logistic units step then sets the selected status on the newly created logistic unit, so it starts its lifecycle with a defined status.

Limitations
- The step requires logistic units identified or created by a preceding step; place it after the step that selects or creates the logistic units.
Check logistic unit status
This action step checks the status of the current logistic unit against a set of expected statuses. The logistic unit is identified by a preceding step. If the current status matches one of the expected statuses, the scenario continues with the next step. If it does not, the scenario ends at this step. Use it to make sure that only logistic units in an expected state are processed further.
Available only when the Logistic Units feature is enabled.
| Parameter | Type | Description |
|---|
| Expected statuses | Mandatory | The statuses the logistic unit is allowed to have. At least one status must be defined. |
Examples
Example 1: Starting Production Only for an Expected Status
A scanner on the production line reads a barcode from an incoming item. The On scan step receives the scanned value, and the Select logistic unit by identifier step selects the matching logistic unit. The Check logistic unit status step then verifies that the logistic unit has one of the expected statuses. Only if the check succeeds does the Start Production step start the production on the line.

Example 2: Appending Data Only for an Expected Status
When a scan is received from any scanner assigned to the line, the On any scan step receives the scanned value, and the Select logistic unit by identifier step selects the matching logistic unit. The Check logistic unit status step then verifies the logistic unit’s status. Only if the status matches one of the expected statuses does the Append data to Logistic Unit step append data to the logistic unit.

Limitations
- The step requires a logistic unit identified by a preceding step (e.g. a scan); place it after the step that selects the logistic unit.
Clear print buffer
This action step clears the pending print data for a printer. Some printers support a custom clear command, which can be configured in the device properties.
| Parameter | Type | Description |
|---|
| Printer | Mandatory | The printer whose print buffer is cleared. |
Examples
Example 1: Clearing the Print Buffer after an Exception
When an exception occurs during scenario execution, the On exception step triggers the scenario. The Clear print buffer step then clears the pending print data on the selected printer, so no outdated labels are printed after the error.
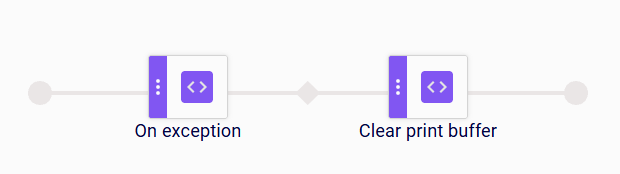
Example 2: Clearing the Print Buffer when Production Stops
When a production is stopped on the line, the On production stopped step triggers the scenario. The Clear print buffer step then clears the pending print data on the selected printer, so leftover print jobs are not printed when the next production starts.
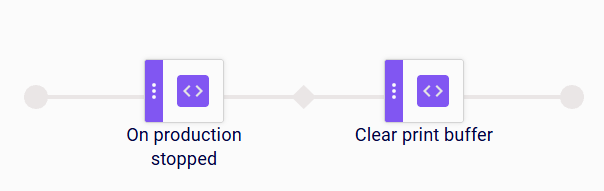
Limitations
- Whether the print buffer is cleared with a custom clear command depends on the printer; the command must be set up in the device properties.
Custom message
This action step sends a custom notification message to configured recipients or system channels.
| Parameter | Type | Description |
|---|
| custom notification | Mandatory | The notification message to send. |
| custom notification type | Mandatory | The type/channel of the notification. |
Clear dashboard
This action step clears the data currently shown on the production dashboard.
This step has no parameters.
Run import/export
This action step triggers an integration (import or export) task.
| Parameter | Type | Description |
|---|
| Integration task | Mandatory | The integration task to run. |
Set group to scenario
This action step assigns a user group to the scenario, restricting who can interact with it.
| Parameter | Type | Description |
|---|
| Group | Mandatory | The user group assigned to the scenario. |
Modify print variable
This action step prompts the user to modify one or more print variables before printing.
| Parameter | Type | Description |
|---|
| Single use | Mandatory | If enabled, the modified value applies only to the next print. |
| Show selected variables only | Optional | If enabled, only the selected variables are shown for editing. |
Identify print quantity
This action step determines the number of labels to print from a data source.
| Parameter | Type | Description |
|---|
| Source table | Mandatory | The table that provides the print quantity. |
| Source column | Mandatory | The column that provides the print quantity. |
Sync resource file(s)
This action step synchronizes resource files to the production line’s devices.
| Parameter | Type | Description |
|---|
| Delete file masks | Optional | File name masks identifying files to delete during the sync. |
| White list | Optional | File name masks identifying files to keep during the sync. |
Filter Production Lines
This action step filters products to those valid for the current production line, based on product columns.
| Parameter | Type | Description |
|---|
| Product columns used to validate production line | Mandatory | The product columns used to validate the production line. |
Deactivate printers
This action step deactivates printers associated with a resource.
| Parameter | Type | Description |
|---|
| Resource | Mandatory | The resource whose printers are deactivated. |
Increase numeric value
This action step increases a numeric column value on the currently selected record by a configured amount. Use it to keep data in the database up to date during scenario execution.
| Parameter | Type | Description |
|---|
| DB table | Mandatory | The database table containing the value to increase: Product, Production Order, Logistic Unit, etc. |
| DB column | Mandatory | The numeric column of the selected table to increase. |
| Amount | Mandatory | The amount the value is increased by. |
Examples
Example 1: Incrementing a Counter when Production Starts
When a production is started on the line, the On production started step triggers the scenario. The Increase numeric value step then increases the configured numeric column on the selected record.
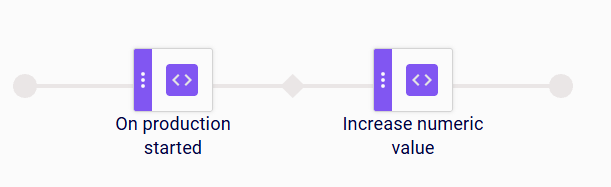
Example 2: Counting Print Jobs Requested via API
When a print job request is received via the API, the On print jobs API request step triggers the scenario. The Increase numeric value step then increases the configured numeric column, by the configured amount for each request.
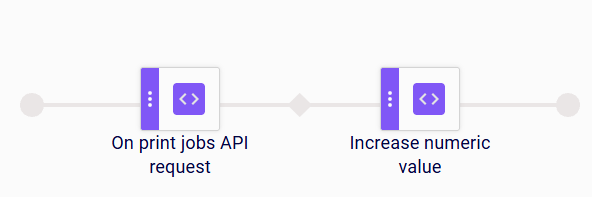
Limitations
- If the update fails (e.g. the record is not found or the column is not numeric), the step fails and the error is reported in the scenario logs.
Decrease numeric value
This action step decreases a numeric column value on the currently selected record by a configured amount. Use it to reduce stored quantities during scenario execution, for example to decrement a remaining quantity.
| Parameter | Type | Description |
|---|
| DB table | Mandatory | The database table containing the value to decrease: Product, Production Order, Logistic Unit, etc. |
| DB column | Mandatory | The numeric column of the selected table to decrease. |
| Amount | Mandatory | The amount the value is decreased by. |
Examples
Example 1: Decreasing a Remaining Quantity when Production Stops
When a production is stopped on the line, the On production stopped step triggers the scenario. The Decrease numeric value step then decreases the configured numeric column on the selected record, for example the remaining quantity on the production order.
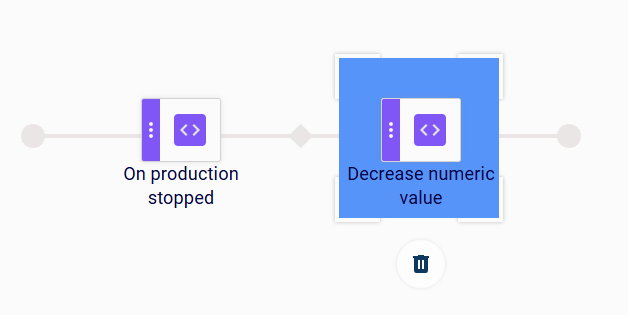
Example 2: Decreasing a Value when Production Is Paused
When a production is paused on the line, the On production paused step triggers the scenario. The Decrease numeric value step then decreases the configured numeric column by the configured amount.
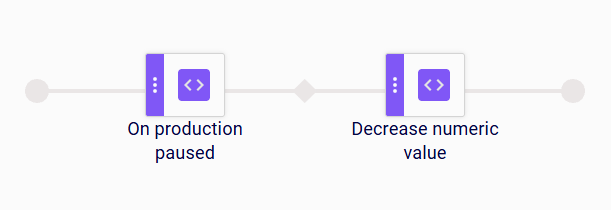
Limitations
- Decreasing a value below 0 is allowed; no lower bound is enforced.
- If the update fails (e.g. the record is not found or the column is not numeric), the step fails and the error is reported in the scenario logs.
Reset numeric value
This action step sets a numeric column value on the currently selected record to a configured reset value. Use it to return counters or quantities to a known starting value during scenario execution.
| Parameter | Type | Description |
|---|
| DB table | Mandatory | The database table containing the value to reset: Product, Production Order, Logistic Unit, etc. |
| DB column | Mandatory | The numeric column of the selected table to reset. |
| Reset value | Mandatory | The value the column is set to. |
Examples
Example 1: Resetting a Counter when a Production Order Is Reloaded
When a production order is reloaded on the line, the On production order reloaded step triggers the scenario. The Reset numeric value step then sets the configured numeric column back to the reset value, for example resetting a produced-units counter on the production order to 0 before the new run starts.
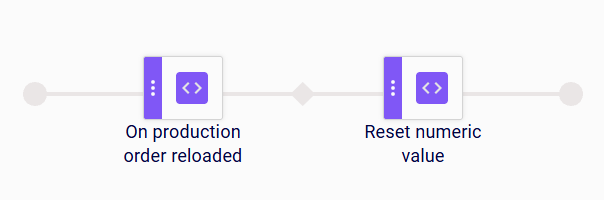
Example 2: Resetting a Value after an Exception
When an exception occurs during scenario execution, the On exception step triggers the scenario. The Reset numeric value step then sets the configured numeric column back to the reset value, so the counter does not keep an inconsistent value after the error.
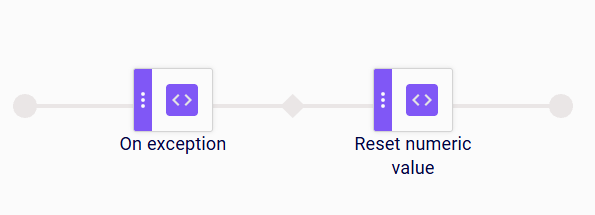
Increment counter
This action step increases the current value of a counter by the configured increment step. Use it to count recurring events, for example print jobs or production starts. The new value is persisted, so subsequent steps and other scenarios using the counter work with the updated value.
| Parameter | Type | Description |
|---|
| Counter | Mandatory | The counter to increment. The list shows all counters defined in the counter table. |
| Increment step | Mandatory | The amount the counter’s current value is increased by. |
Examples
Example 1: Counting Print Jobs Requested via API
When a print job request is received via the API, the On print jobs API request step triggers the scenario. The Increment counter step then increases the selected counter by the configured increment step for each request.
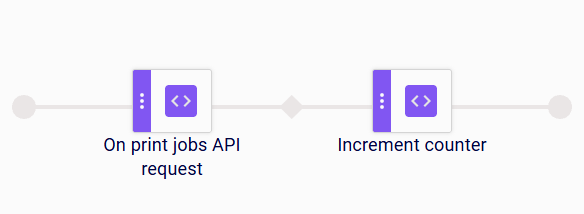
Example 2: Counting Production Starts
When a production is started on the line, the On production started step triggers the scenario. The Increment counter step then increases the selected counter by the configured increment step.
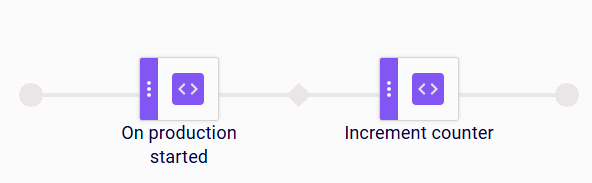
Decrement counter
This action step decreases the current value of a counter by the configured decrement step. Use it to count down a value, for example a remaining quantity or quota. The new value is persisted, so subsequent steps and other scenarios using the counter work with the updated value.
| Parameter | Type | Description |
|---|
| Counter | Mandatory | The counter to decrement. The list shows all counters defined in the counter table. |
| Decrement step | Mandatory | The amount the counter’s current value is decreased by. |
Examples
Example 1: Decrementing a Counter when Production Stops
When a production is stopped on the line, the On production stopped step triggers the scenario. The Decrement counter step then decreases the selected counter by the configured decrement step.
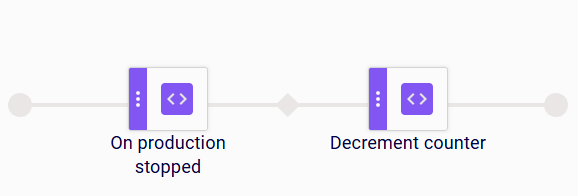
Example 2: Decrementing a Counter when Production Is Paused
When a production is paused on the line, the On production paused step triggers the scenario. The Decrement counter step then decreases the selected counter by the configured decrement step.
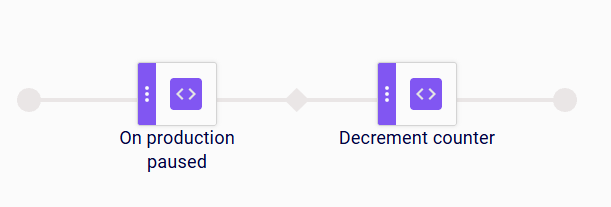
Reset counter
This action step sets the current value of a counter back to the start value defined in the counter table. Use it to return a counter to a known starting point, for example before a new production run. The reset value is persisted.
| Parameter | Type | Description |
|---|
| Counter | Mandatory | The counter to reset. The list shows all counters defined in the counter table. |
Examples
Example 1: Resetting a Counter when a Product Is Reloaded
When the active product on the production line is reloaded, the On product reloaded step triggers the scenario. The Reset counter step then sets the selected counter back to its start value before the new run starts.
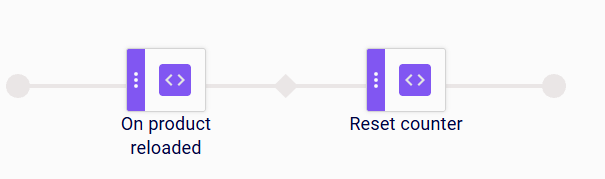
Example 2: Resetting a Counter when a Product or Order Is Assigned
When a product or production order is assigned to the production line, the Product or order assigned step triggers the scenario. The Reset counter step then sets the selected counter back to its start value, so counting starts fresh for the new assignment.
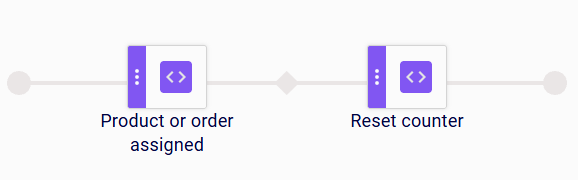
Limitations
- If the counter has no start value defined, the reset clears the counter’s current value.
Evaluate counter
This action step compares the current value of a counter against a configured comparison value. If the condition is true, the scenario continues with the next step. If the condition is false, the scenario stops silently, without reporting an error. Use it to make the following steps conditional on a counter value, for example to enforce a limit.
| Parameter | Type | Description |
|---|
| Counter | Mandatory | The counter whose current value is evaluated. The list shows all counters defined in the counter table. |
| Condition | Mandatory | The comparison operator: Equals, Not equals, More than, or Less than. |
| Comparison value | Mandatory | The value the counter’s current value is compared against. |
Examples
Example 1: Printing Only While a Counter Limit Is Not Reached
When a production is started on the line, the On production started step triggers the scenario. The Evaluate counter step checks the selected counter, for example whether its current value is Less than a configured limit. Only if the condition is true does the Send print job to printer step send the label to the printer; otherwise the scenario stops silently.
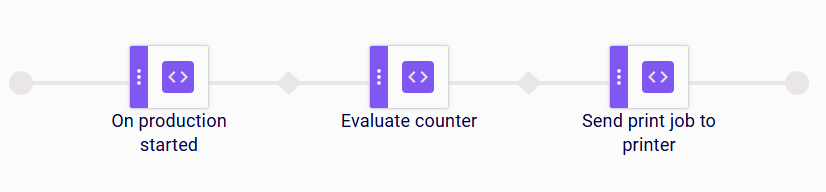
Example 2: Resuming Production Based on a Counter Value
When a production order is reloaded on the line, the On production order reloaded step triggers the scenario. The Evaluate counter step compares the selected counter’s current value against the comparison value. Only if the condition is true does the Resume production step re-send the print job to the printer.
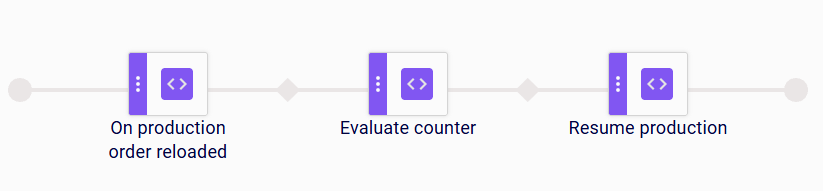
12 - Custom
Customer-specific steps available only in installations where the corresponding module is enabled.
This tab provides customer-specific steps. The steps below are only present in installations where the corresponding customer module is enabled, and may not be available in your installation.
Split Barcode
This action step splits a scanned barcode into separate parts for use by subsequent steps.
This step belongs to a customer-specific module and may not be available in your installation.
This step has no parameters.
Check production and dates
This action step checks the current production against previous productions and validates date information such as best-before dates.
This step belongs to a customer-specific module and may not be available in your installation.
| Parameter | Type | Description |
|---|
| layoutVariablesForCheckingPreviousProductions | Mandatory | The layout variables used to match against previous productions. |
| batch code variable | Mandatory | The variable that holds the batch code. |
| Product table column for best-before date offset | Mandatory | The product table column that provides the best-before date offset. |
Filter Printers
This action step filters the available printers based on a type column.
This step belongs to a customer-specific module and may not be available in your installation.
| Parameter | Type | Description |
|---|
| Column used to select type | Mandatory | The column used to determine the printer type for filtering. |
COPA Log Exporter
This action step exports printer log data to an external COPA database.
This step belongs to a customer-specific module and may not be available in your installation.
| Parameter | Type | Description |
|---|
| COPA JDBC Url | Mandatory | The JDBC URL of the COPA database. |
| COPA Username | Mandatory | The COPA database user name. |
| COPA Password | Mandatory | The COPA database password. |
Dual Scan Validation
This action step validates a product by comparing the results of two barcode scans.
This step belongs to a customer-specific module and may not be available in your installation.
| Parameter | Type | Description |
|---|
| Scanner device | Mandatory | The scanner device used for validation. |
| Scanner command payload | Mandatory | The command payload sent to the scanner. |
| Validation outputs | Mandatory | The outputs used to signal the validation result. |
Scan station
This action step manages a scan station with a primary and secondary scanner, optionally falling back to automatic scanning after a timeout.
This step belongs to a customer-specific module and may not be available in your installation.
| Parameter | Type | Description |
|---|
| Primary scanner | Mandatory | The primary scanner of the station. |
| Secondary scanner | Mandatory | The secondary scanner of the station. |
| Aut.Scanner timeout, sec | Optional | The time in seconds before falling back to automatic scanning. |